使用列表 List
在 List 中使用输入型组件
List 组件支持在循环项内部放置 Input、Select 等输入型组件,用户在每一行中编辑的数据会自动写回表单 store,随表单提交一起保存。
前置条件
- List 必须配置
id。 - List 的
componentProps中需要开启syncToFormData: true。
基础用法
- 在表单设计器中拖入 List 组件,配置好数据源(
dataSource)。 - 在 List 组件属性中开启 syncToFormData。
- 在 List 的循环体内拖入 Input、Select 等输入型组件,给这些子组件配置
id。 - 运行时,List 加载数据后,每行的输入组件会自动绑定到对应行数据上,用户编辑后的值在提交时会包含在表单数据中。
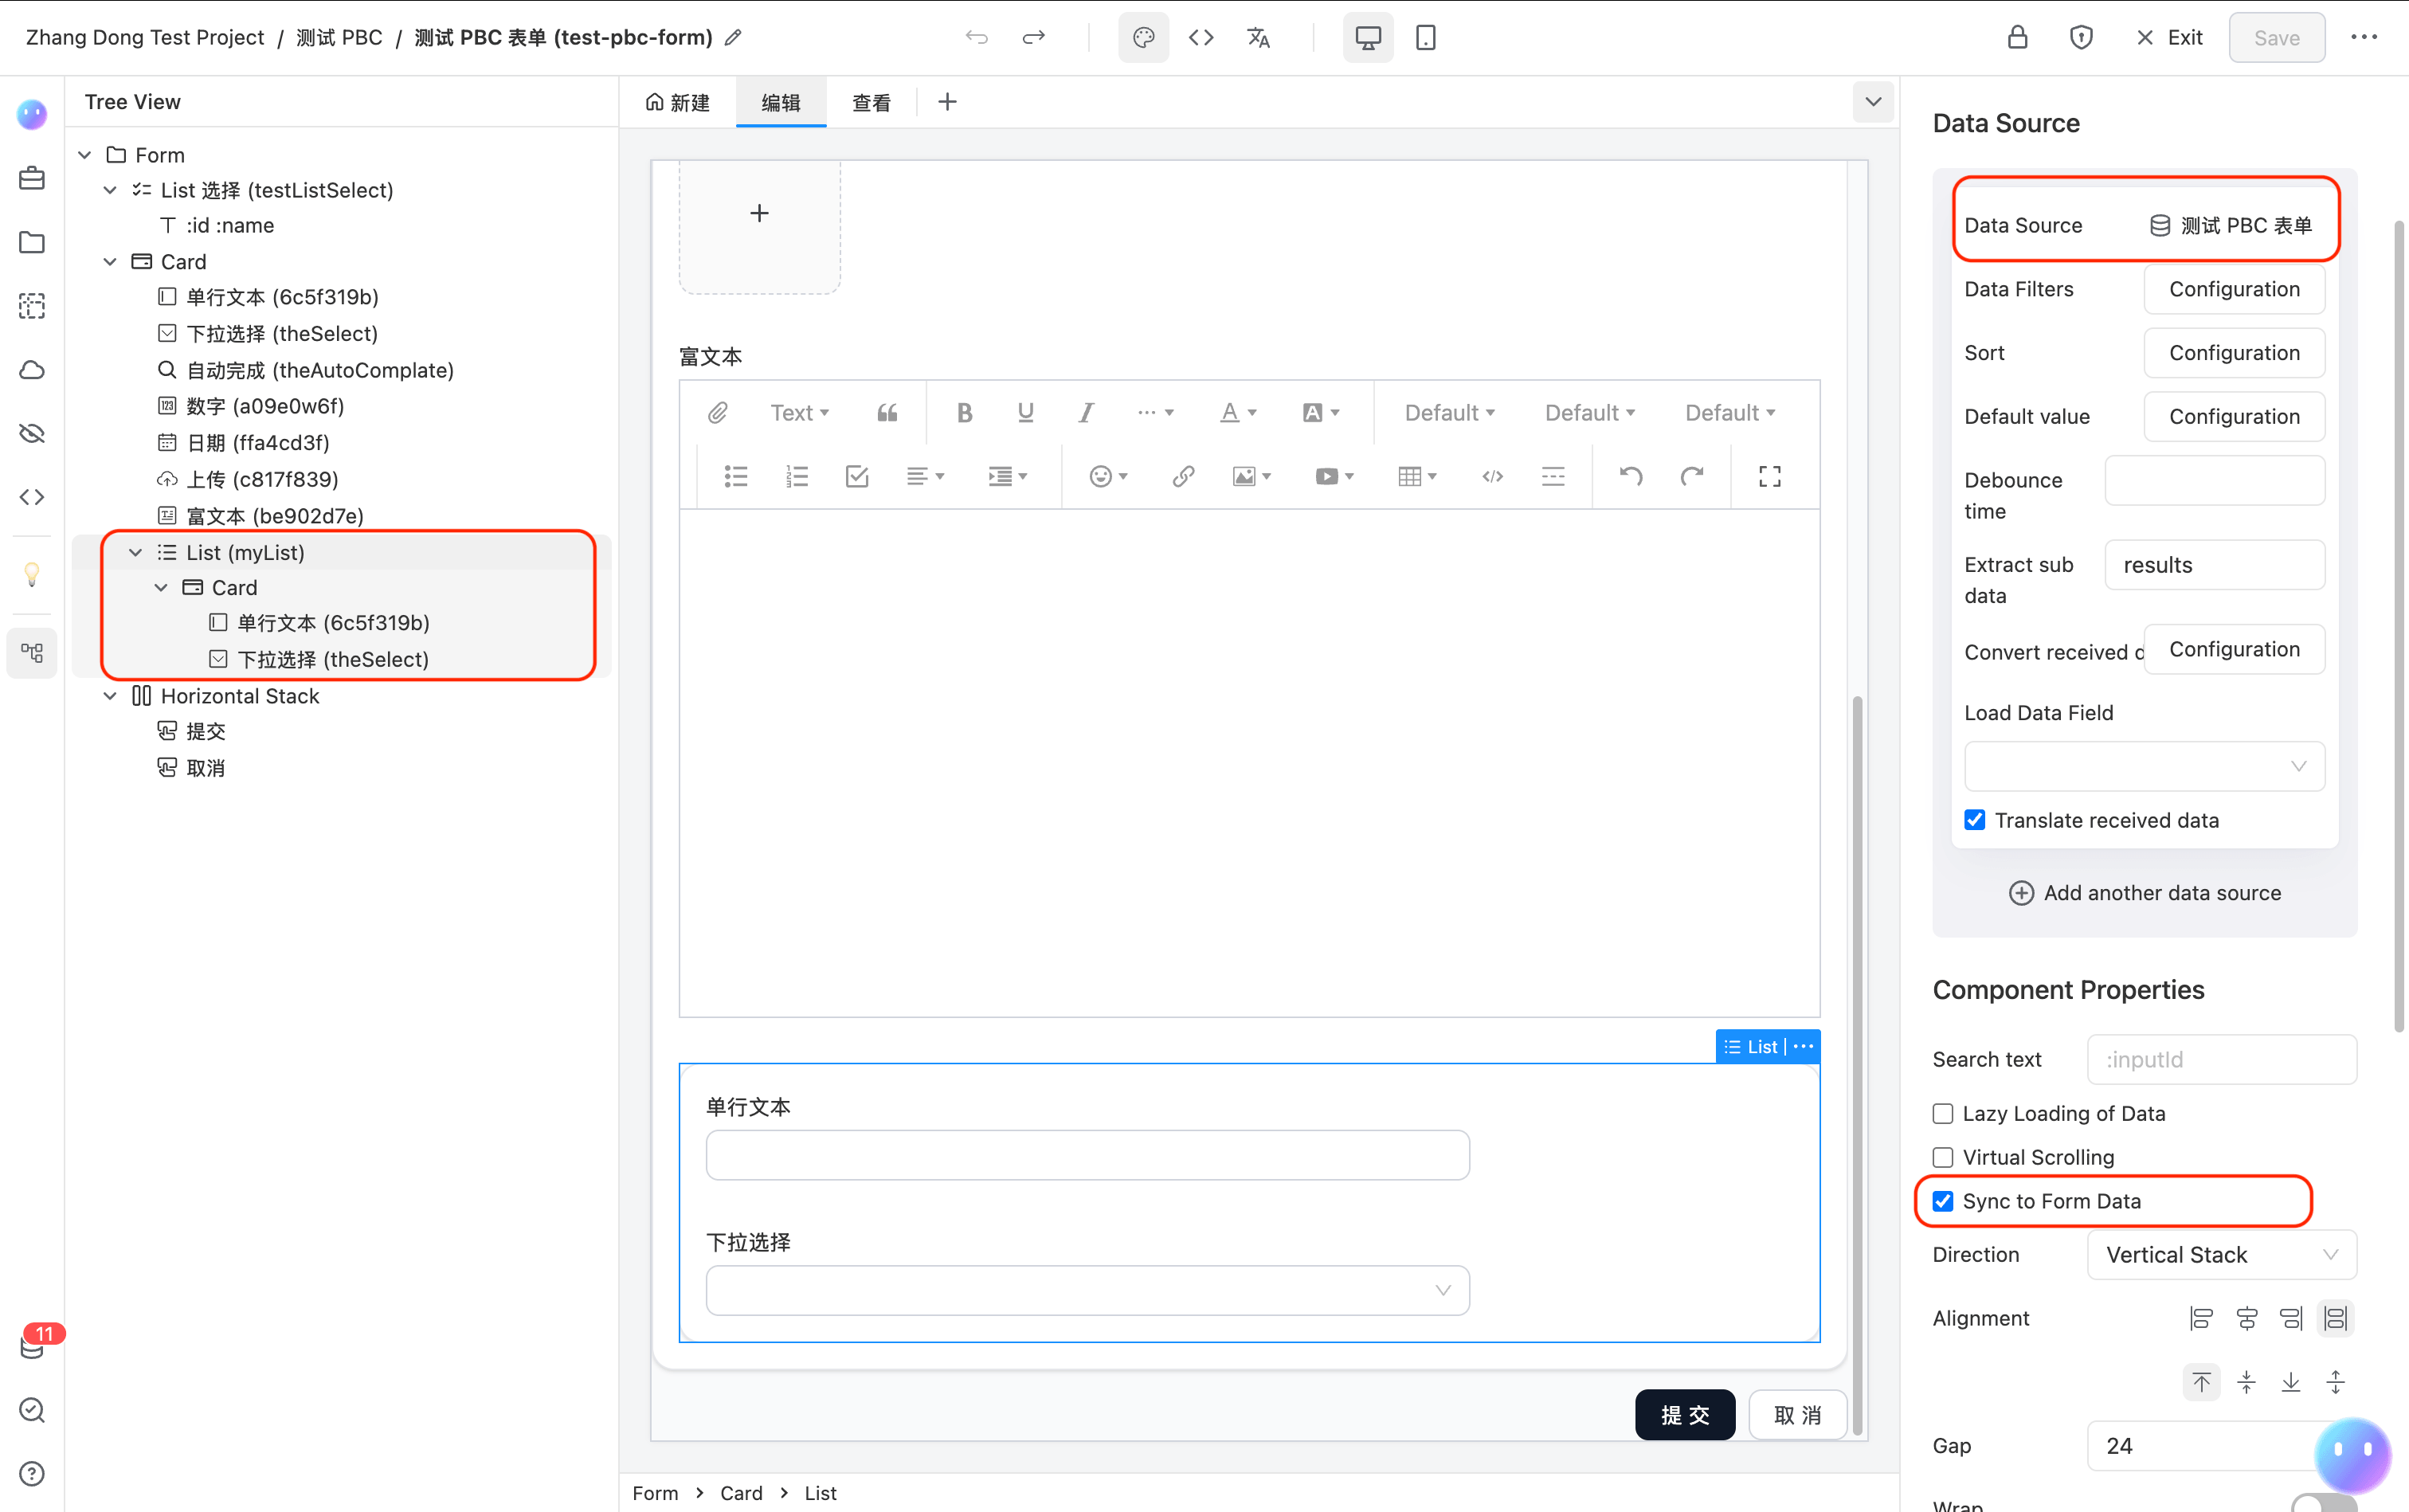
配置示例
{
  "component": "List",
  "id": "myList",
  "componentProps": {
    "dataSource": {
      "token": "test-pbc-form"
    },
    "syncToFormData": true
  },
  "fields": [
    {
      "component": "Card",
      "fields": [
        {
          "component": "Text",
          "componentProps": {
            "content": ":6c5f319b"
          }
        },
        {
          "component": "Input",
          "id": "6c5f319b",
          "title": "单行文本",
          "validation": {
            "maxLength": 200
          }
        },
        {
          "component": "Select",
          "id": "theSelect",
          "title": "下拉选择",
          "componentProps": {
            "stringEqual": true,
            "dataSource": {
              "token": "numeric-test-form",
              "pbcToken": "numeric-test-pbc"
            },
            "mapping": {
              "value": "id",
              "label": "name"
            }
          }
        }
      ]
    }
  ]
}
数据存储结构
开启 syncToFormData 后,List 的数据会以其 id 为 key 存入表单 store。每行数据中,子组件的 id 对应各自的字段值:
{
  "myList": [
    { "6c5f319b": "用户输入的文本", "theSelect": "选中的值", ...其他原始字段 },
    { "6c5f319b": "第二行文本", "theSelect": "另一个值", ... }
  ]
}
提交表单时,myList 字段会包含完整的数组数据。
注意事项
- 子组件的
id就是该字段在每行数据对象中的 key,确保id与数据源字段名一致即可实现回显。 - 支持嵌套 List(List 内部再嵌 List),路径会自动拼接,例如外层
orderList.0,内层orderList.0.items.1。 - 未开启
syncToFormData时,List 仅做展示用途,内部的输入组件不会影响表单数据。
在 Scripts 中获取和监听 List 数据
开启 syncToFormData 后,List 的数据存在表单 store 中,可以通过 formApi 进行读取和监听。
获取 List 数据:
const listData = formApi.getValue('myList');
// => [{ "6c5f319b": "文本值", "theSelect": "选中值", ... }, ...]
也可以获取某一行某个字段的值:
const firstRowSelect = formApi.getValue('myList.0.theSelect');
监听数据变化:
通过 formApi.on('change') 监听整个表单数据变化:
formApi.on('change', (allData) => {
  console.log('List 数据:', allData.myList);
});
通过 formApi.on('fieldValueChange') 监听具体字段变化。注意回调接收到的 id 参数是带路径的格式,如 myList.0.theSelect:
formApi.on('fieldValueChange', (id, newValue) => {
  // id 格式为 "myList.{index}.{fieldId}",例如 "myList.0.theSelect"
  if (id.startsWith('myList.')) {
    console.log(`字段 ${id} 变为`, newValue);
  }
});