Bootstrap
The CETA platform can extend itself using forms, pages, and flows. These extensions can be injected at the project level or the PBC level by adding menu items to utilize the extended functionalities.
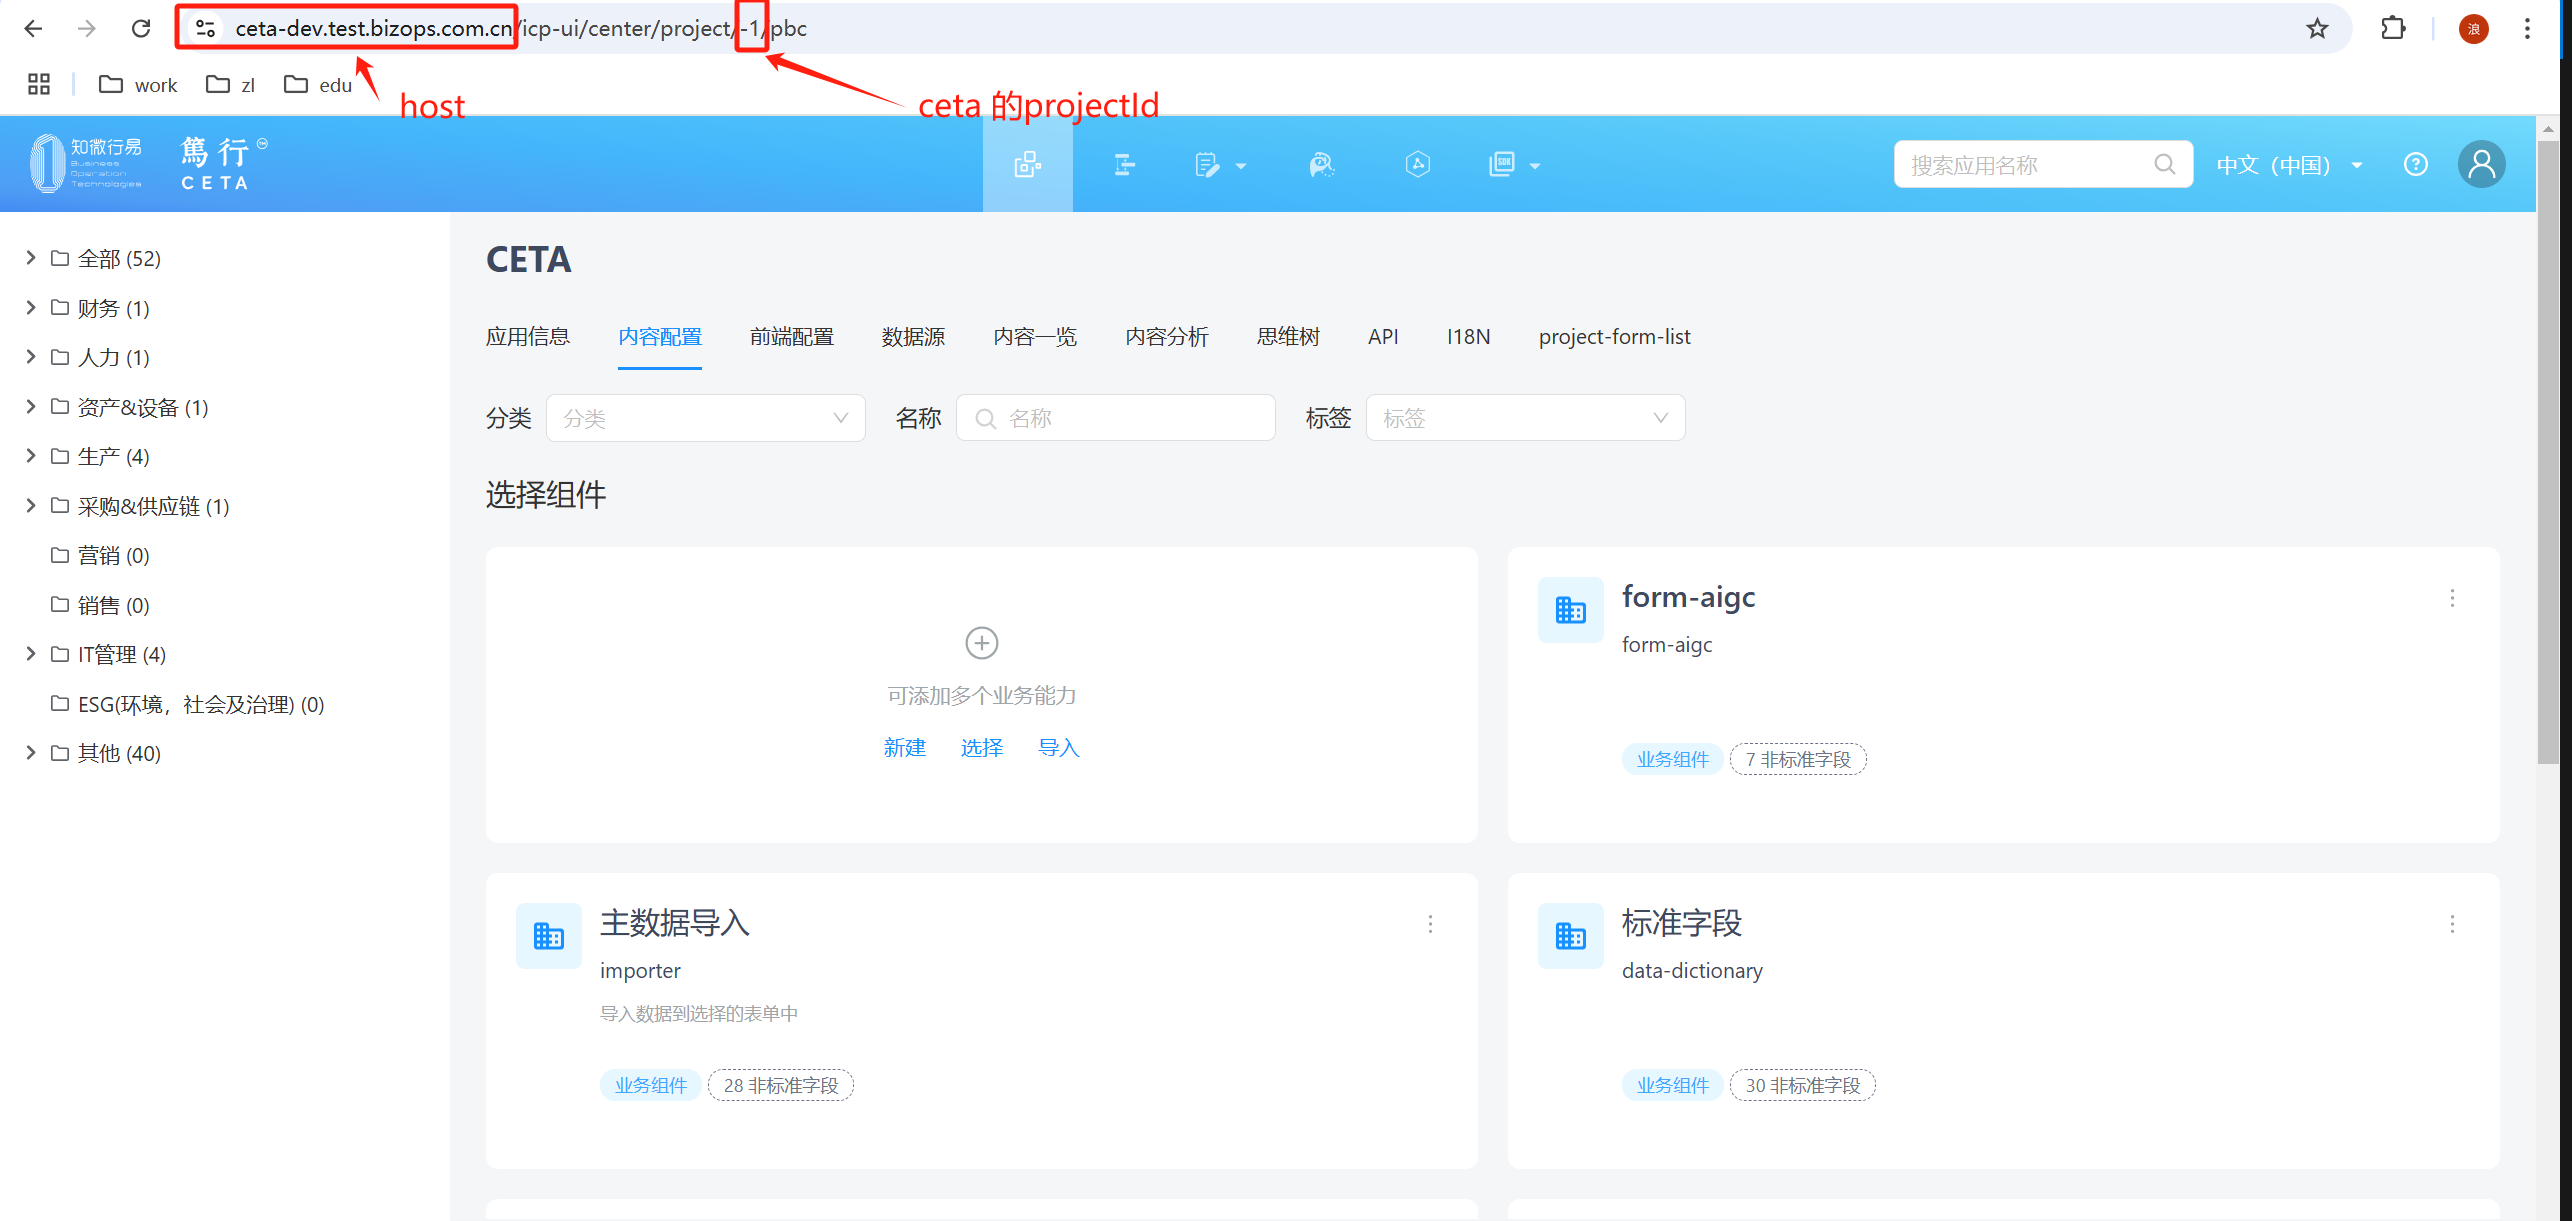
1. Locate the CETA Project
https://ceta-dev.test.bizops.com.cn/icp-ui/center/project/-1/pbc is the access path. Replace https://ceta-dev.test.bizops.com.cn with the corresponding environment's host, and -1 is the projectId for CETA.
2. Forms
- Forms must be checked as master data with the data type set to
CETA Mate Data Security Level - Project. - There must be a
Single Line TexttypeInputFieldwith the IDprojectId, and its default value should be:params.projectId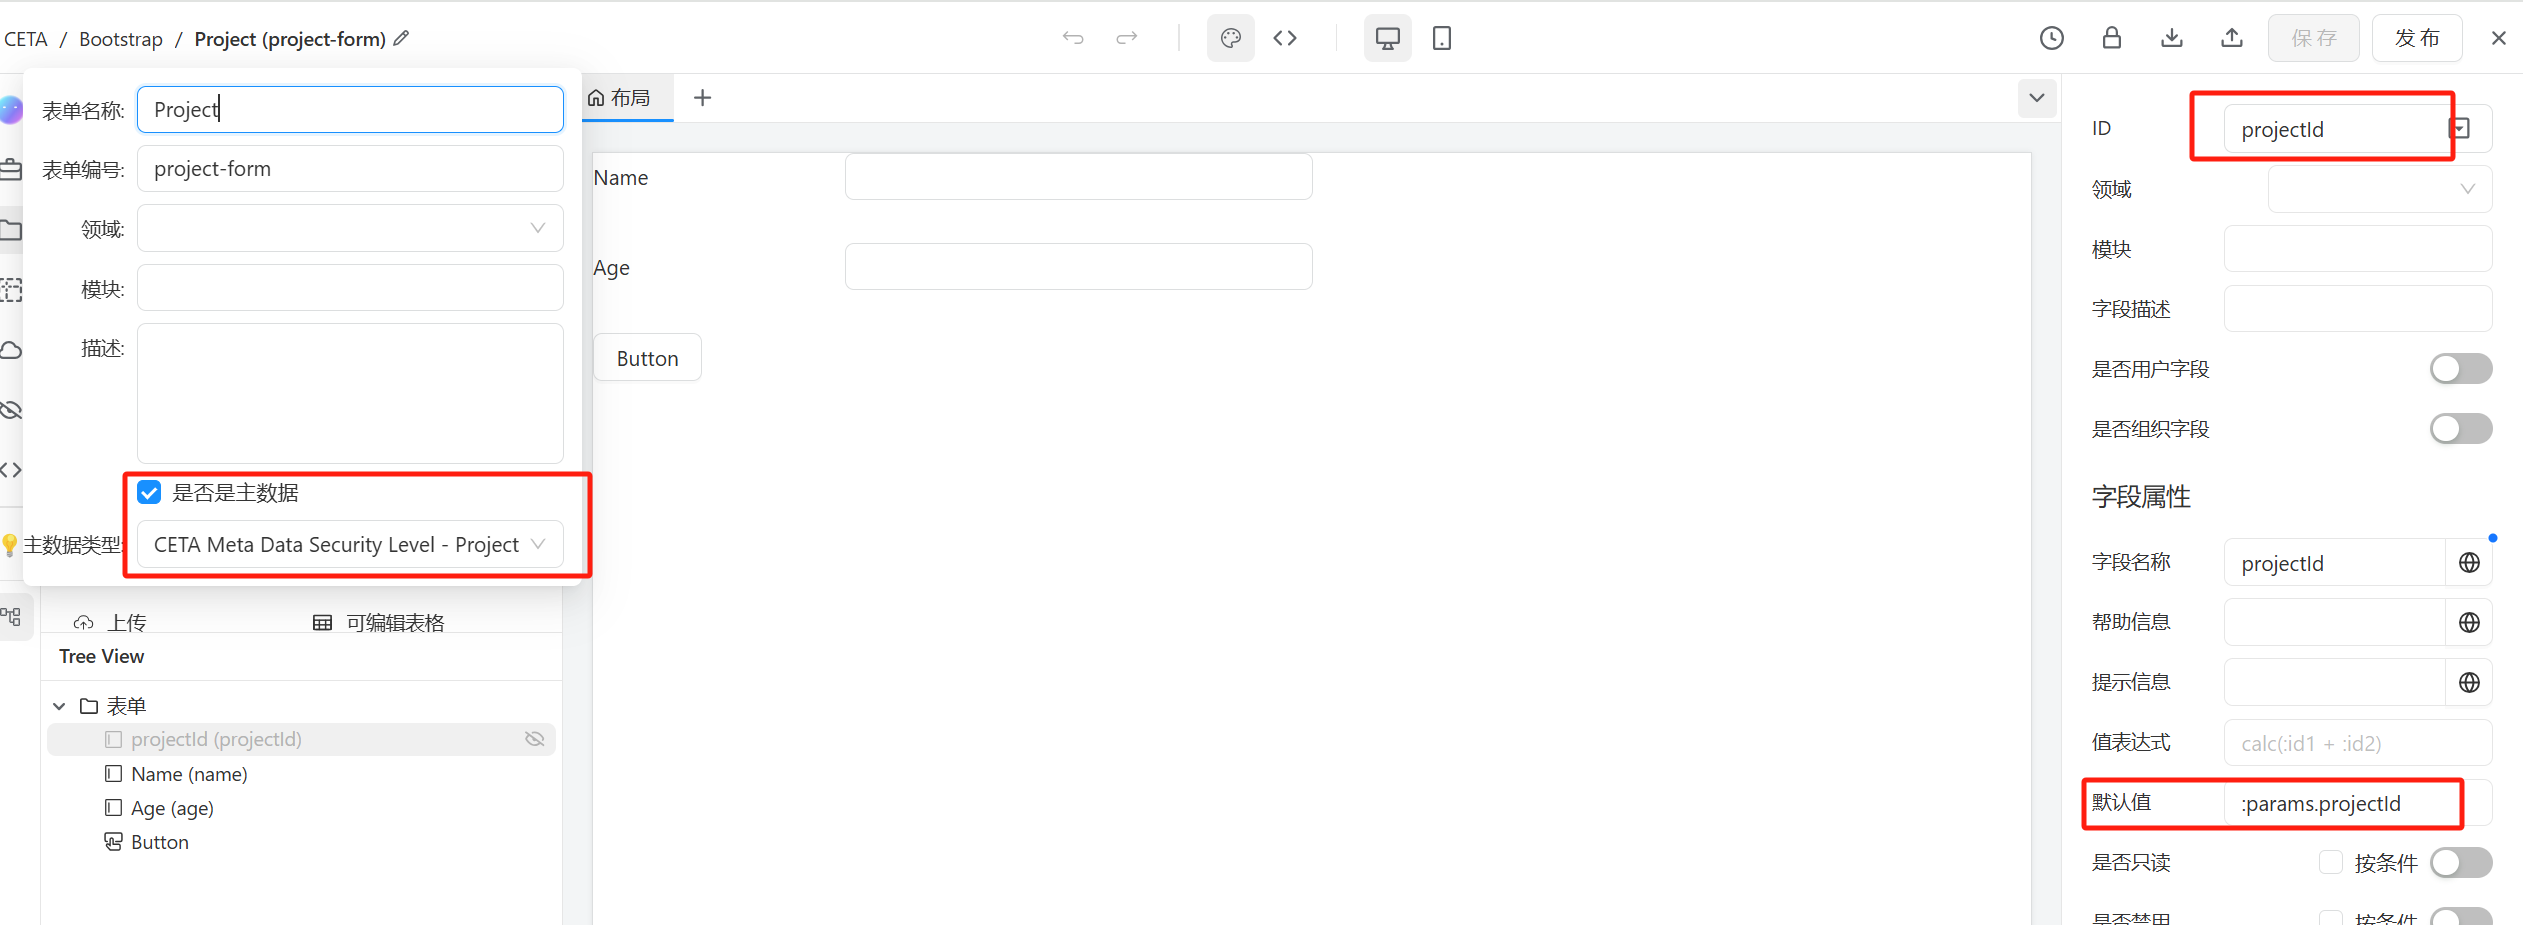
- If extending functionality for a PBC, you can use
:params.pbcIdin the default value to obtain thepbcIdfrom the URL path parameters.
3.Page
- If there is a "New" button, after selecting the form in the "Form" tab, switch to the "Custom" tab and prefix the link address with
./../../, for example,./../../form/project-form/layout/default.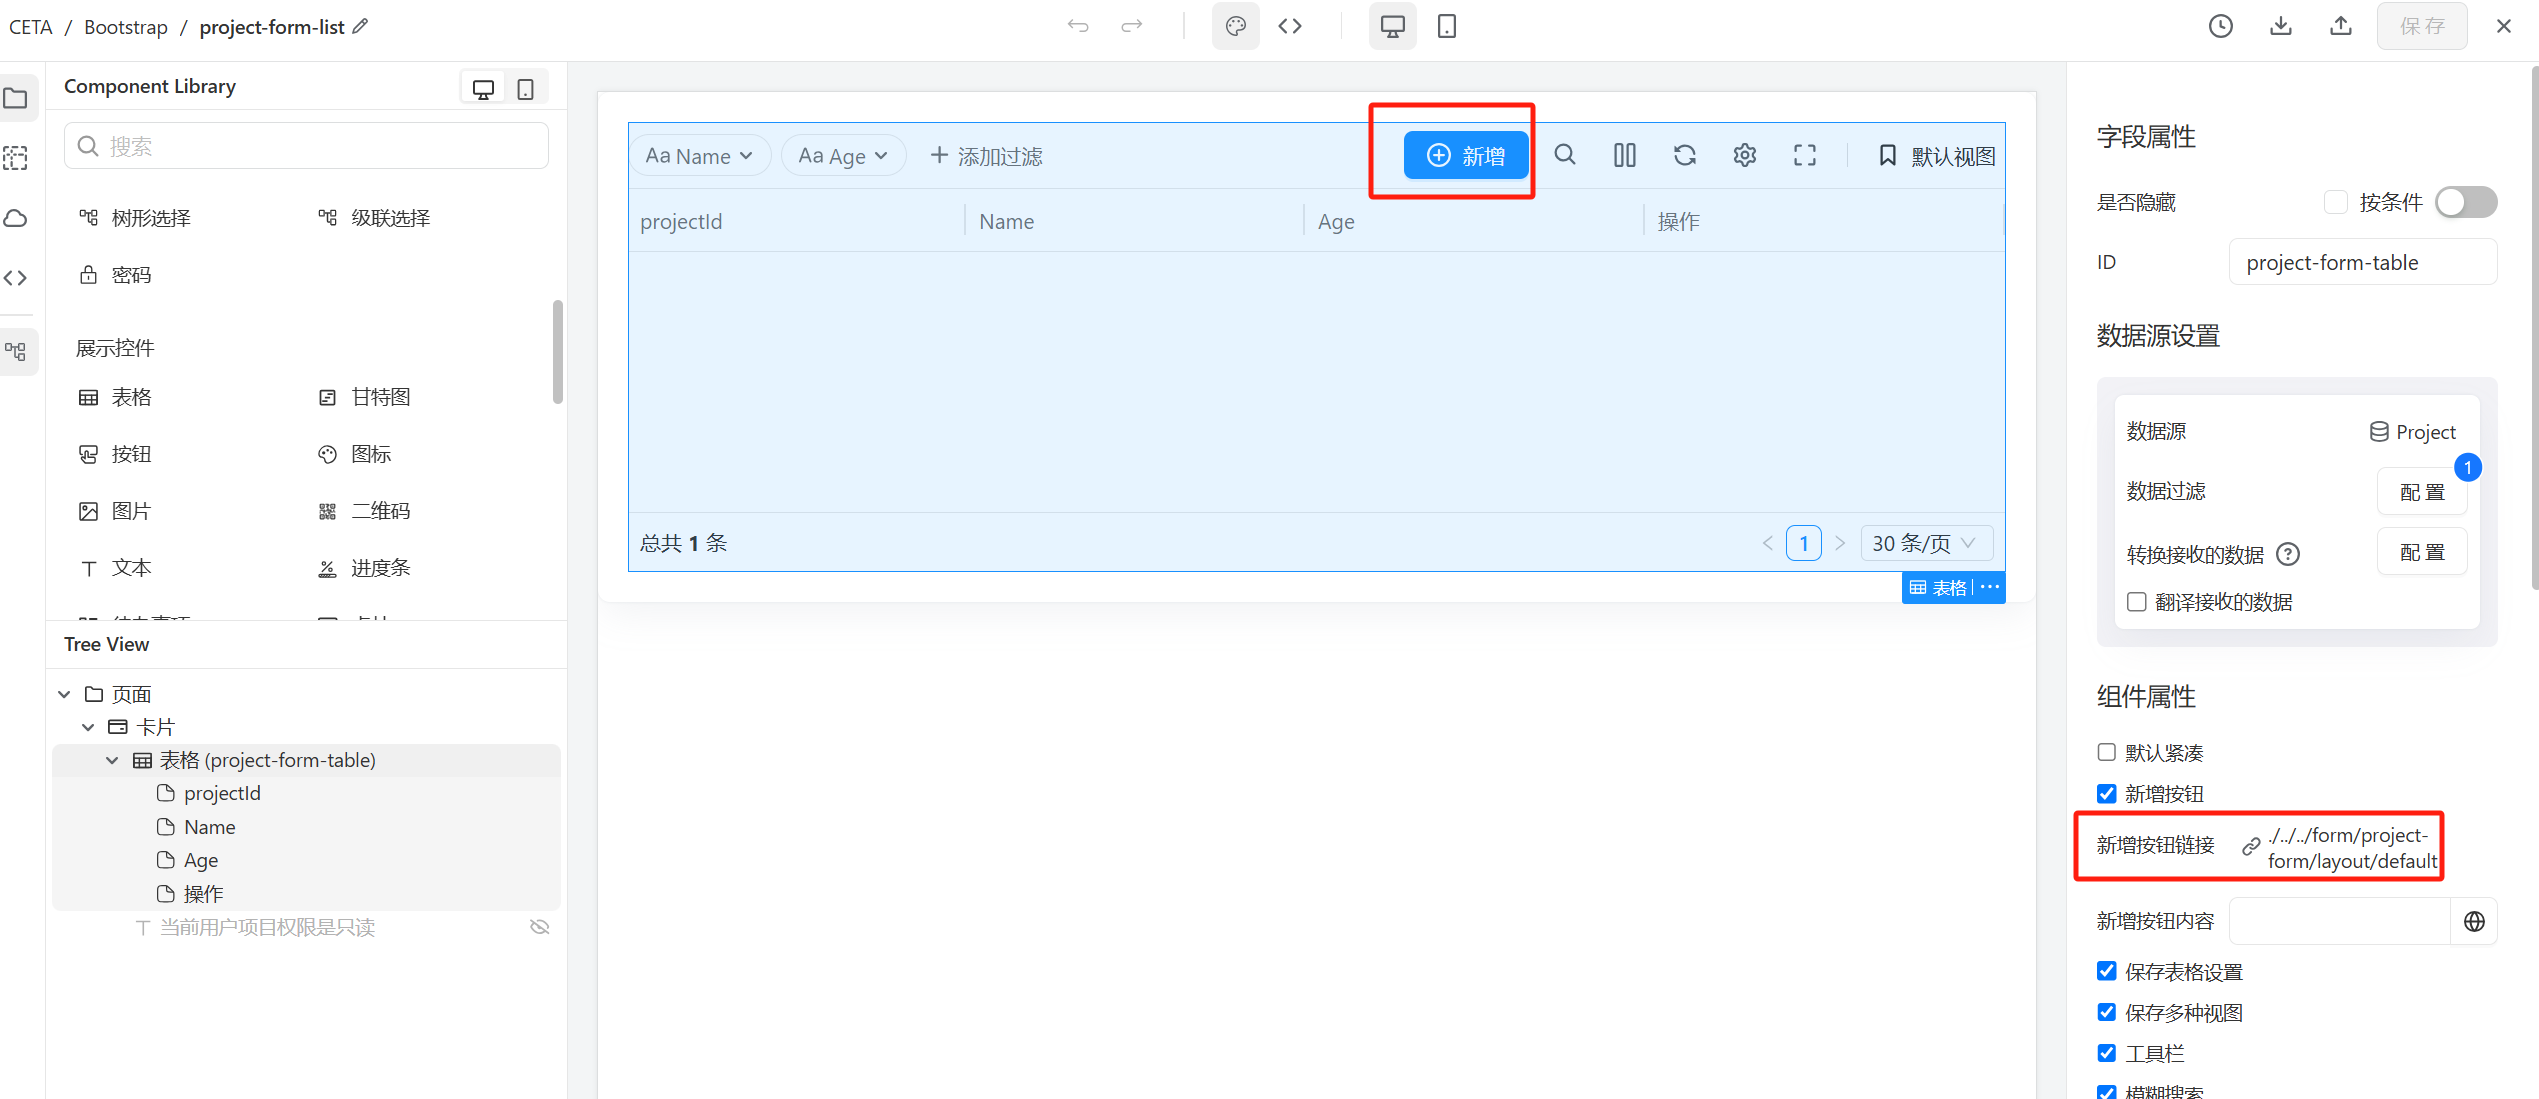
- If the Table has a "View" or "Edit" button, configure the link address similarly by adding the
./../../prefix. - If the Page is for a project-level menu and contains only one
Table, it is recommended to set the Table height tocalc(100vh - var(--app-header-height) - var(--pbcm-main-head-height) - var(--assume-project-level1-tabs-height) - var(--pbcm-button-bar)). - If the Page is for a project sub-menu and contains one
Tab Groupand oneTable, it is recommended to embed these two components into aVertical Stack. Set the style height of theVertical Stacktocalc(100vh - var(--app-header-height) - var(--pbcm-main-head-height) - var(--assume-project-level1-tabs-height) - var(--pbcm-button-bar)), set the style of theTab Grouptoflex: 0(occupying fixed space), and set the style of theTabletoflex: 1(filling the remaining space). - Configure buttons to hide based on project permissions. In the button configuration, use
:context.projectReadonlyto determine if the button should be hidden.
4. Flow
-
If the Flow node type is
Form(form operations: create, edit; approval operations: approve), the permissions are configured the same as in 2. Forms. -
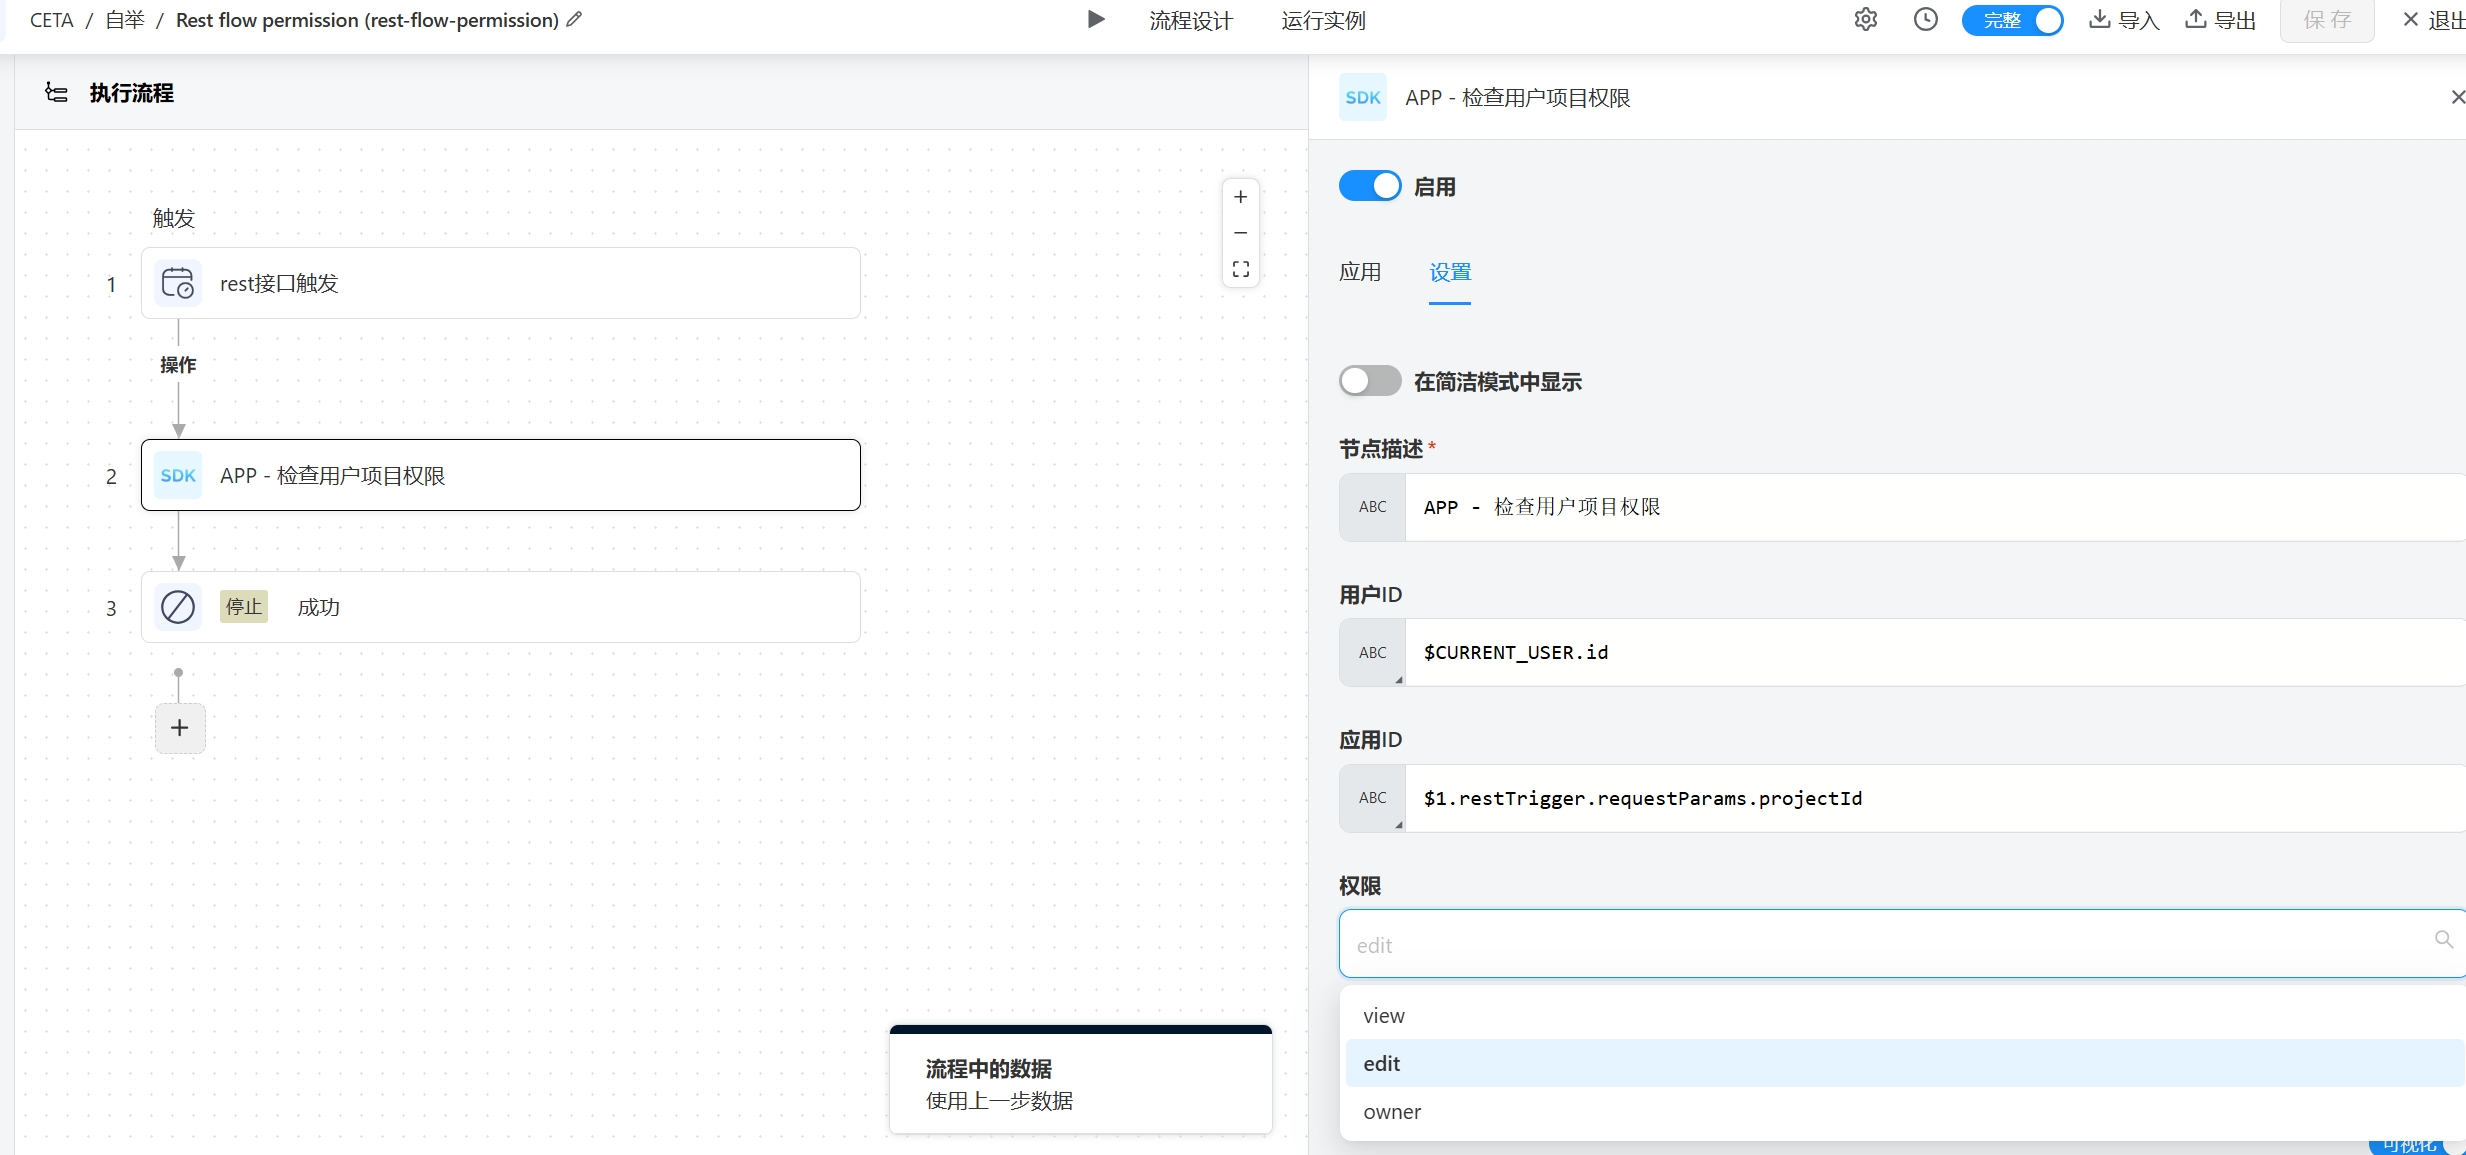
If it is a
Rest Flow, an SDK must be added to check user project permissions. The input and output parameters of the SDK are as follows:Input Parameters:
- User ID: Obtain using
$CURRENT_USER.id. - Application ID: Passed through the REST request parameters, for example:
/flow/api/flow-rest/rest-flow-permission?projectId=:params.projectId. You can obtainprojectIdusing$1.restTrigger.requestParams.projectId. - Permission Type:
view/edit/owner, representing read-only, edit, and full permissions, respectively.
Output Parameters:
- hasPermission:
trueorfalse, wheretrueindicates permission.
- User ID: Obtain using
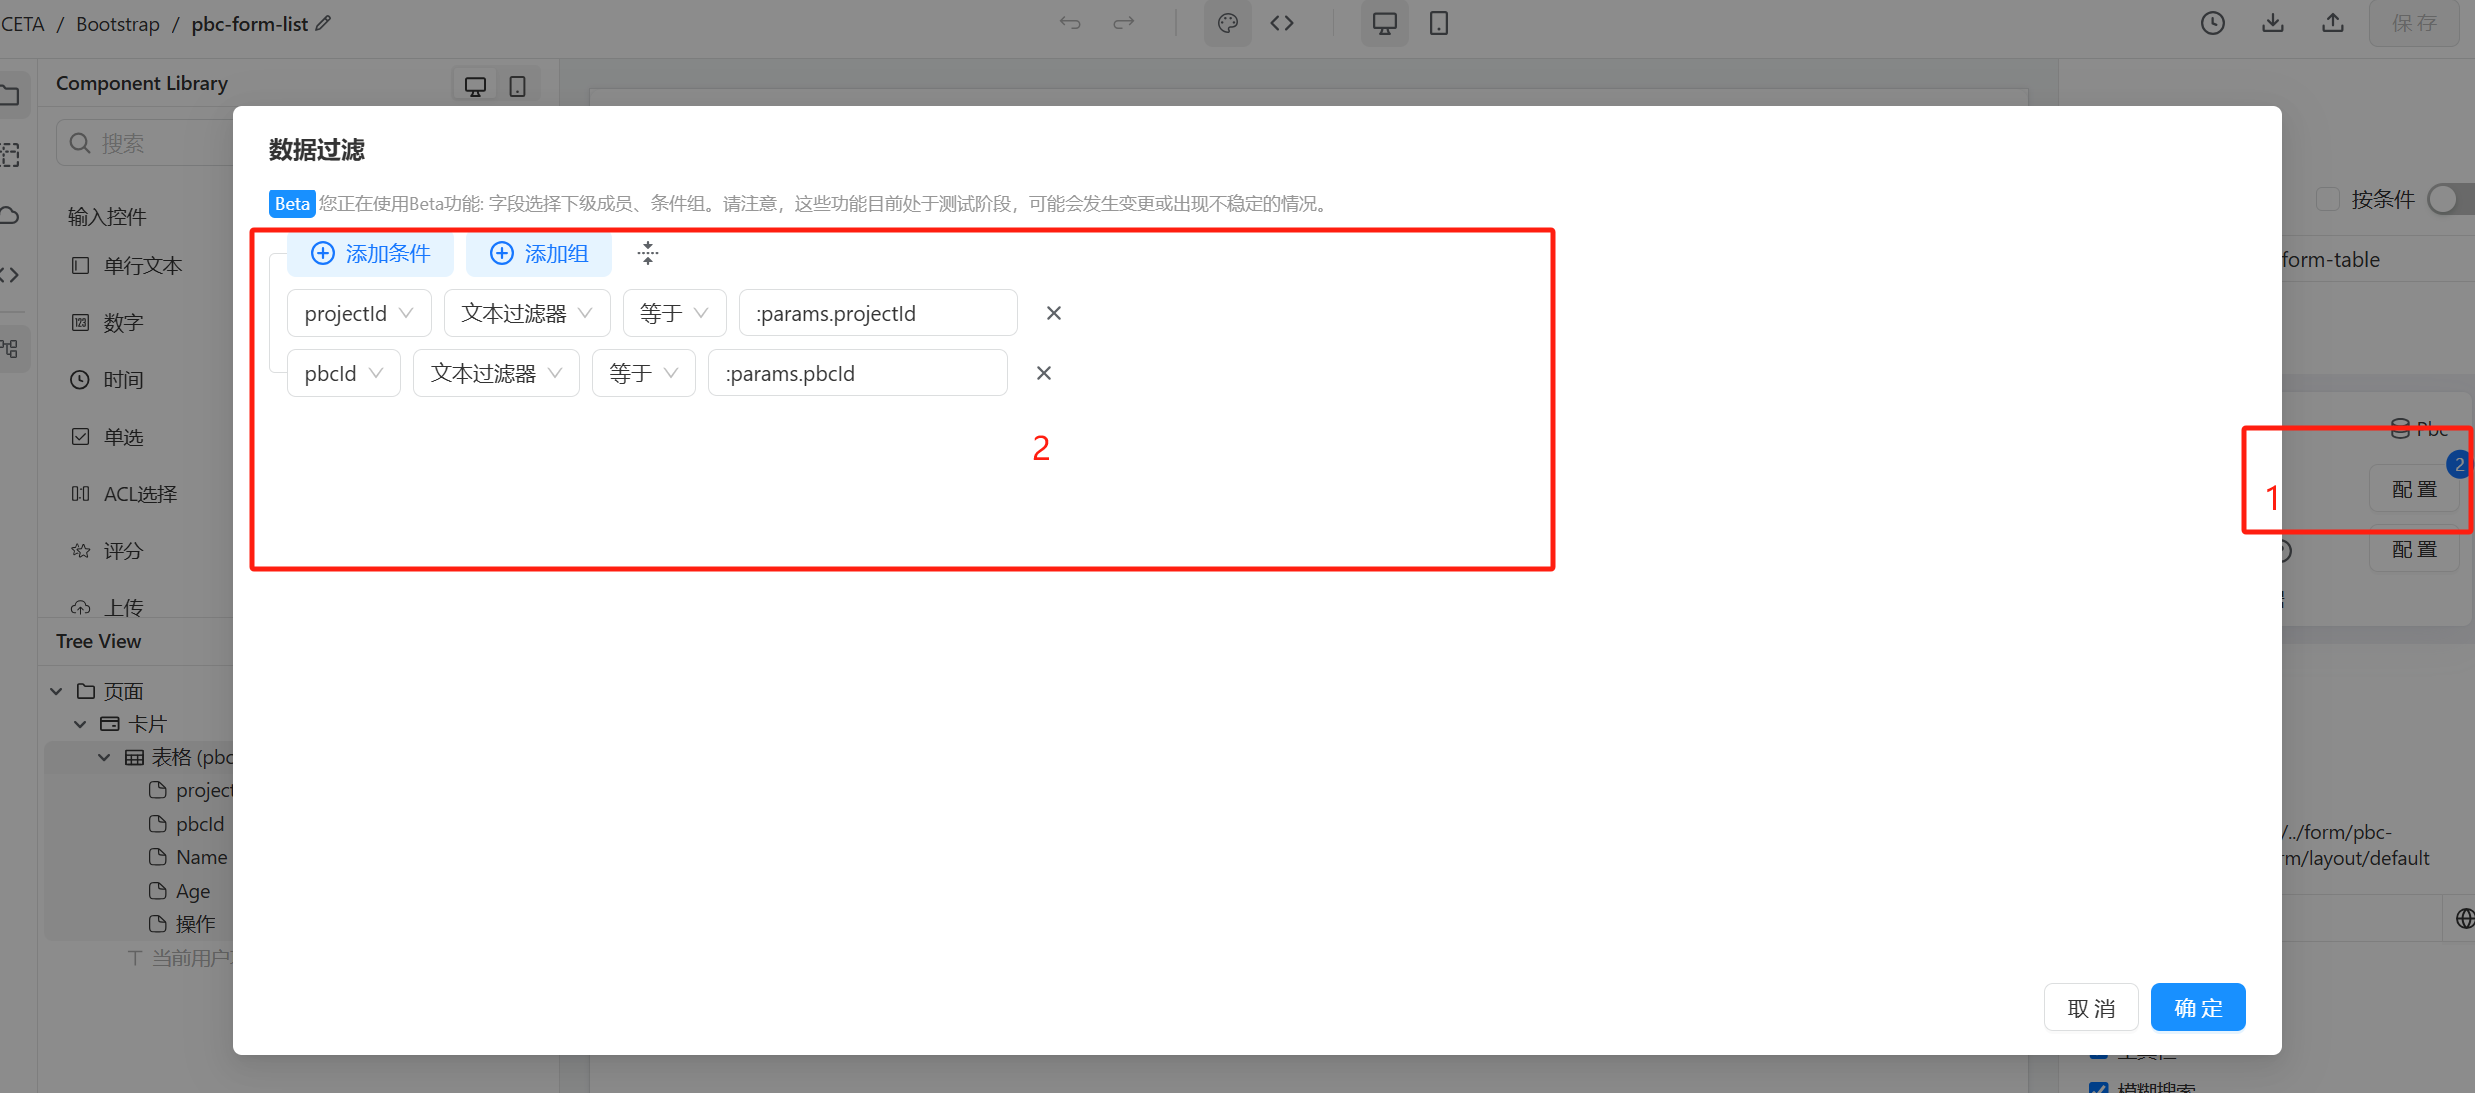
5. Project Data Isolation
- For project-level data isolation, configure
projectId ==:params.projectId, which is mandatory. - For PBC-level data isolation in addition to project-level isolation, add the configuration
pbcId=:params.pbcId.
Example:
6. Menu Configuration
6.1 Configure the Corresponding Menu Level
Applicationis at the project level. You can choose the insertion position; if not selected, it will be appended to the end.Componentis at the PBC level.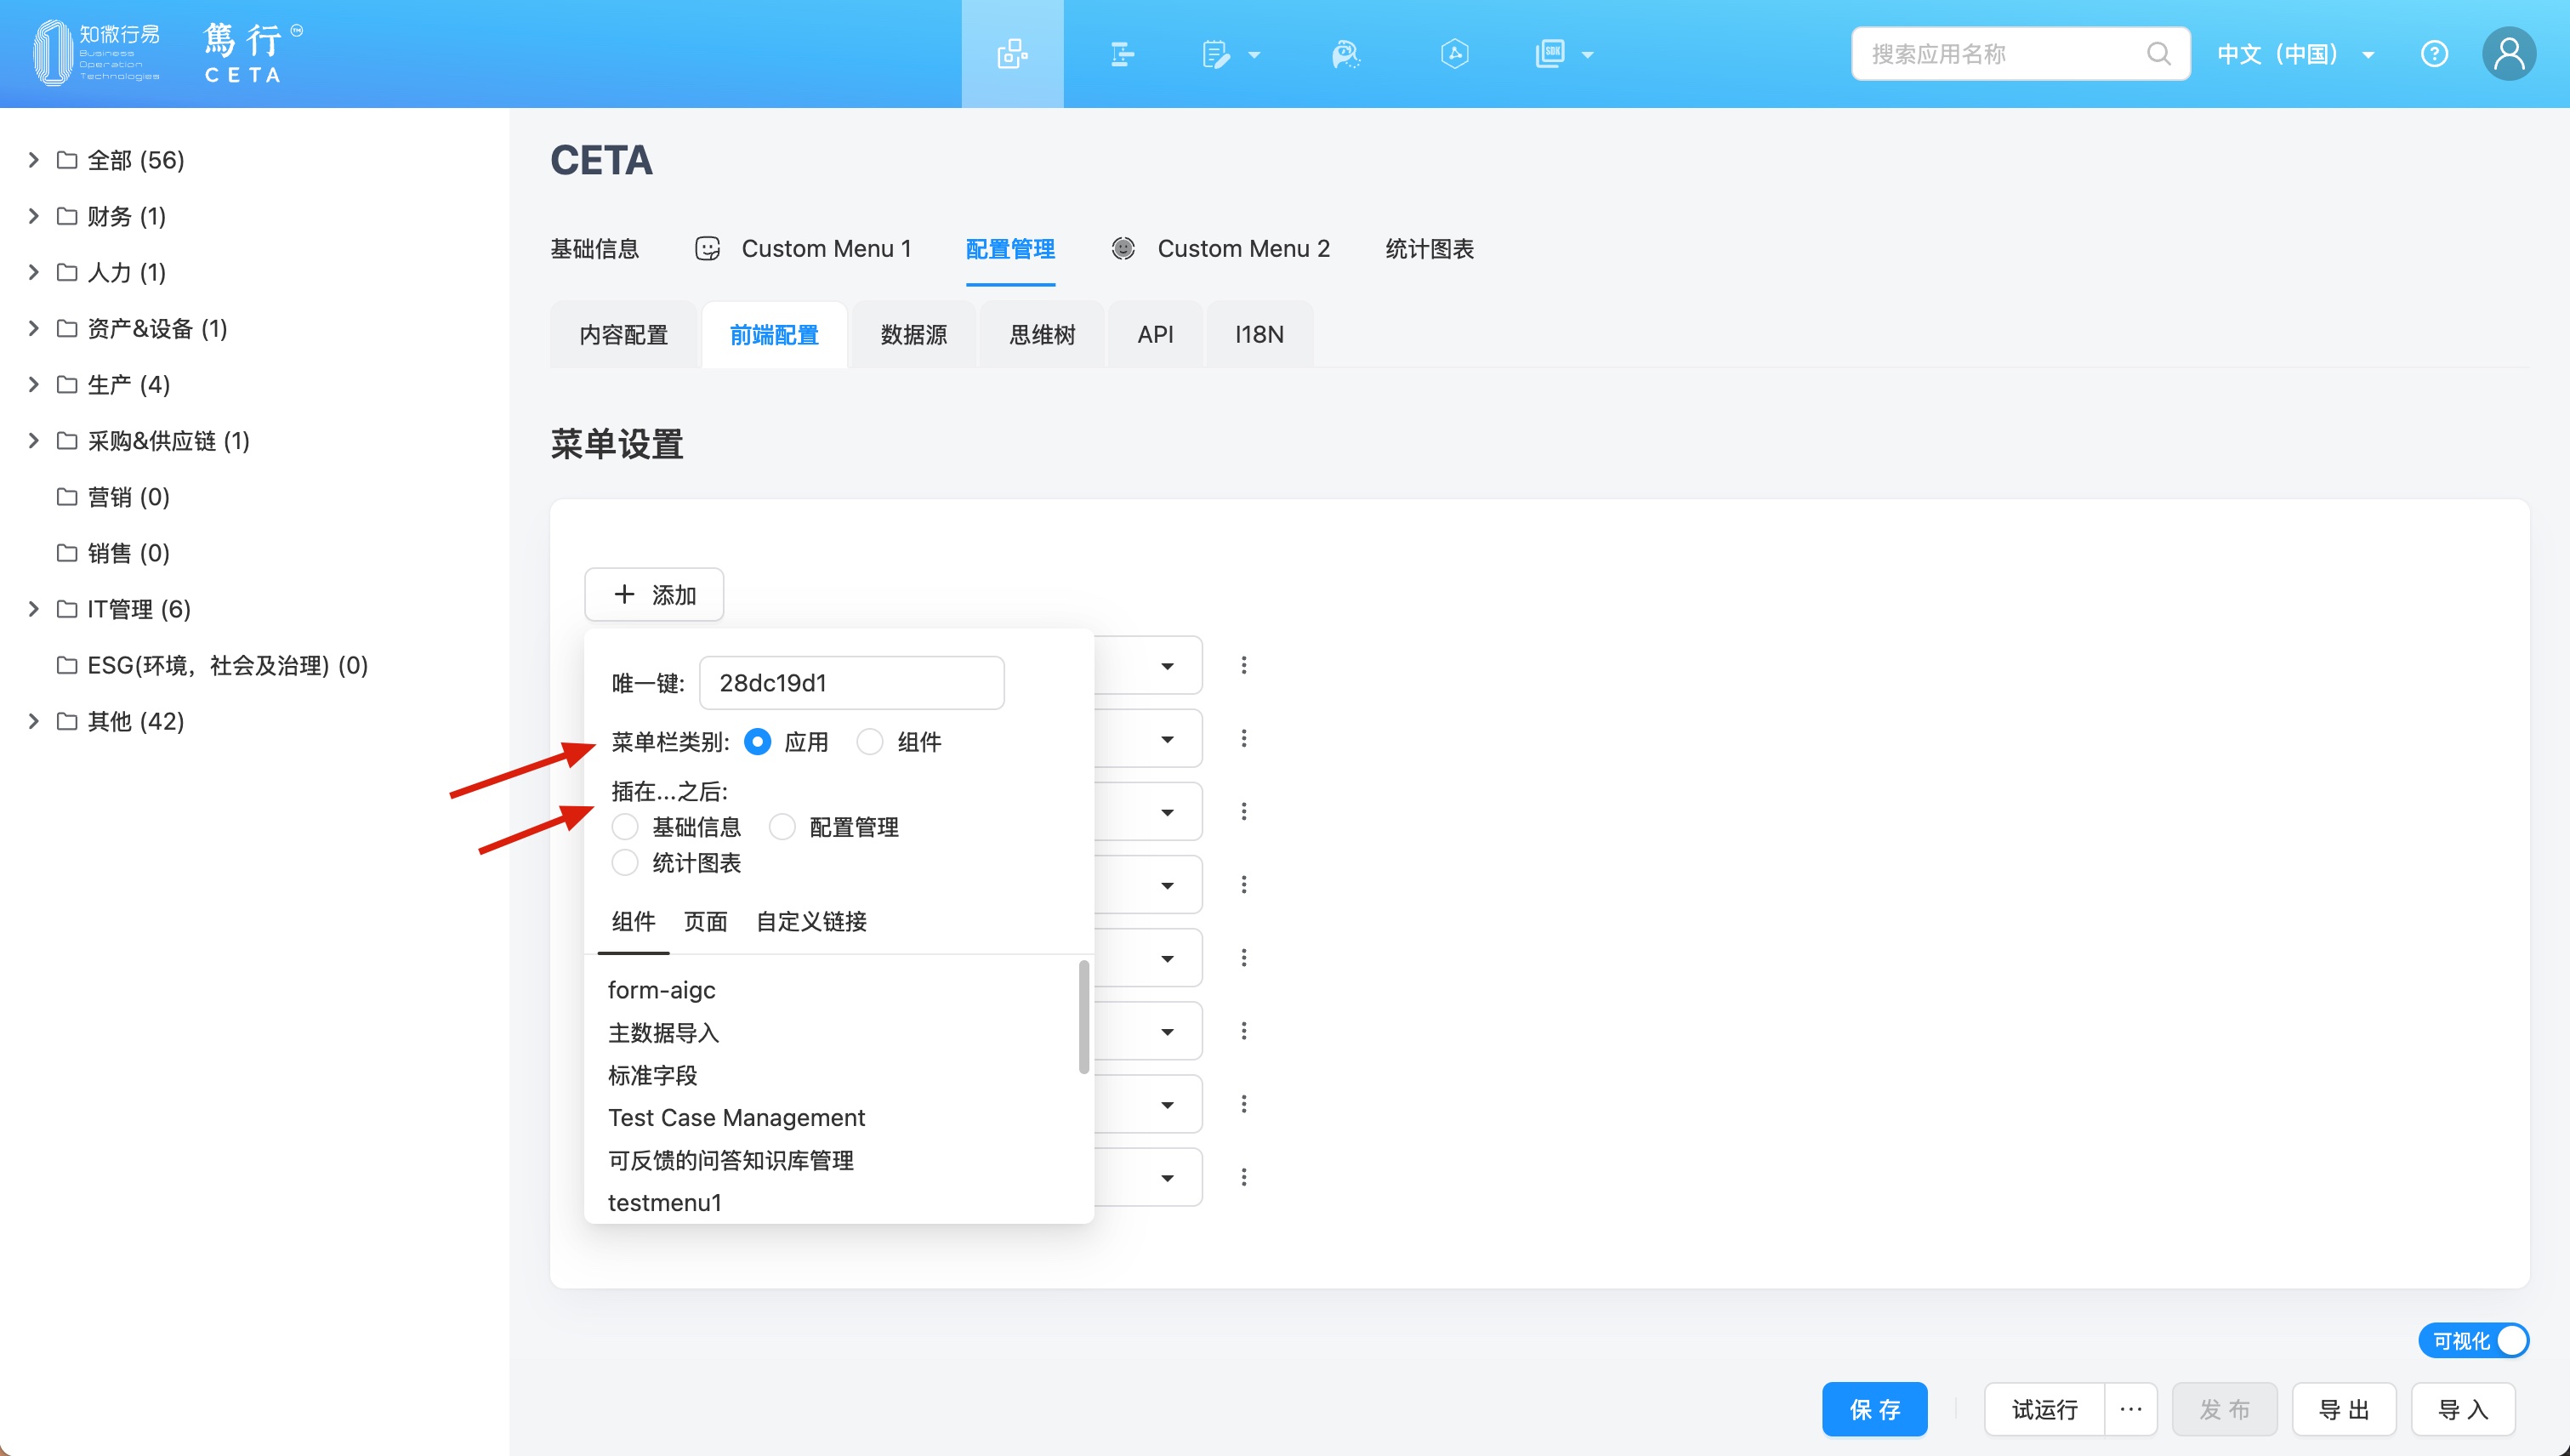
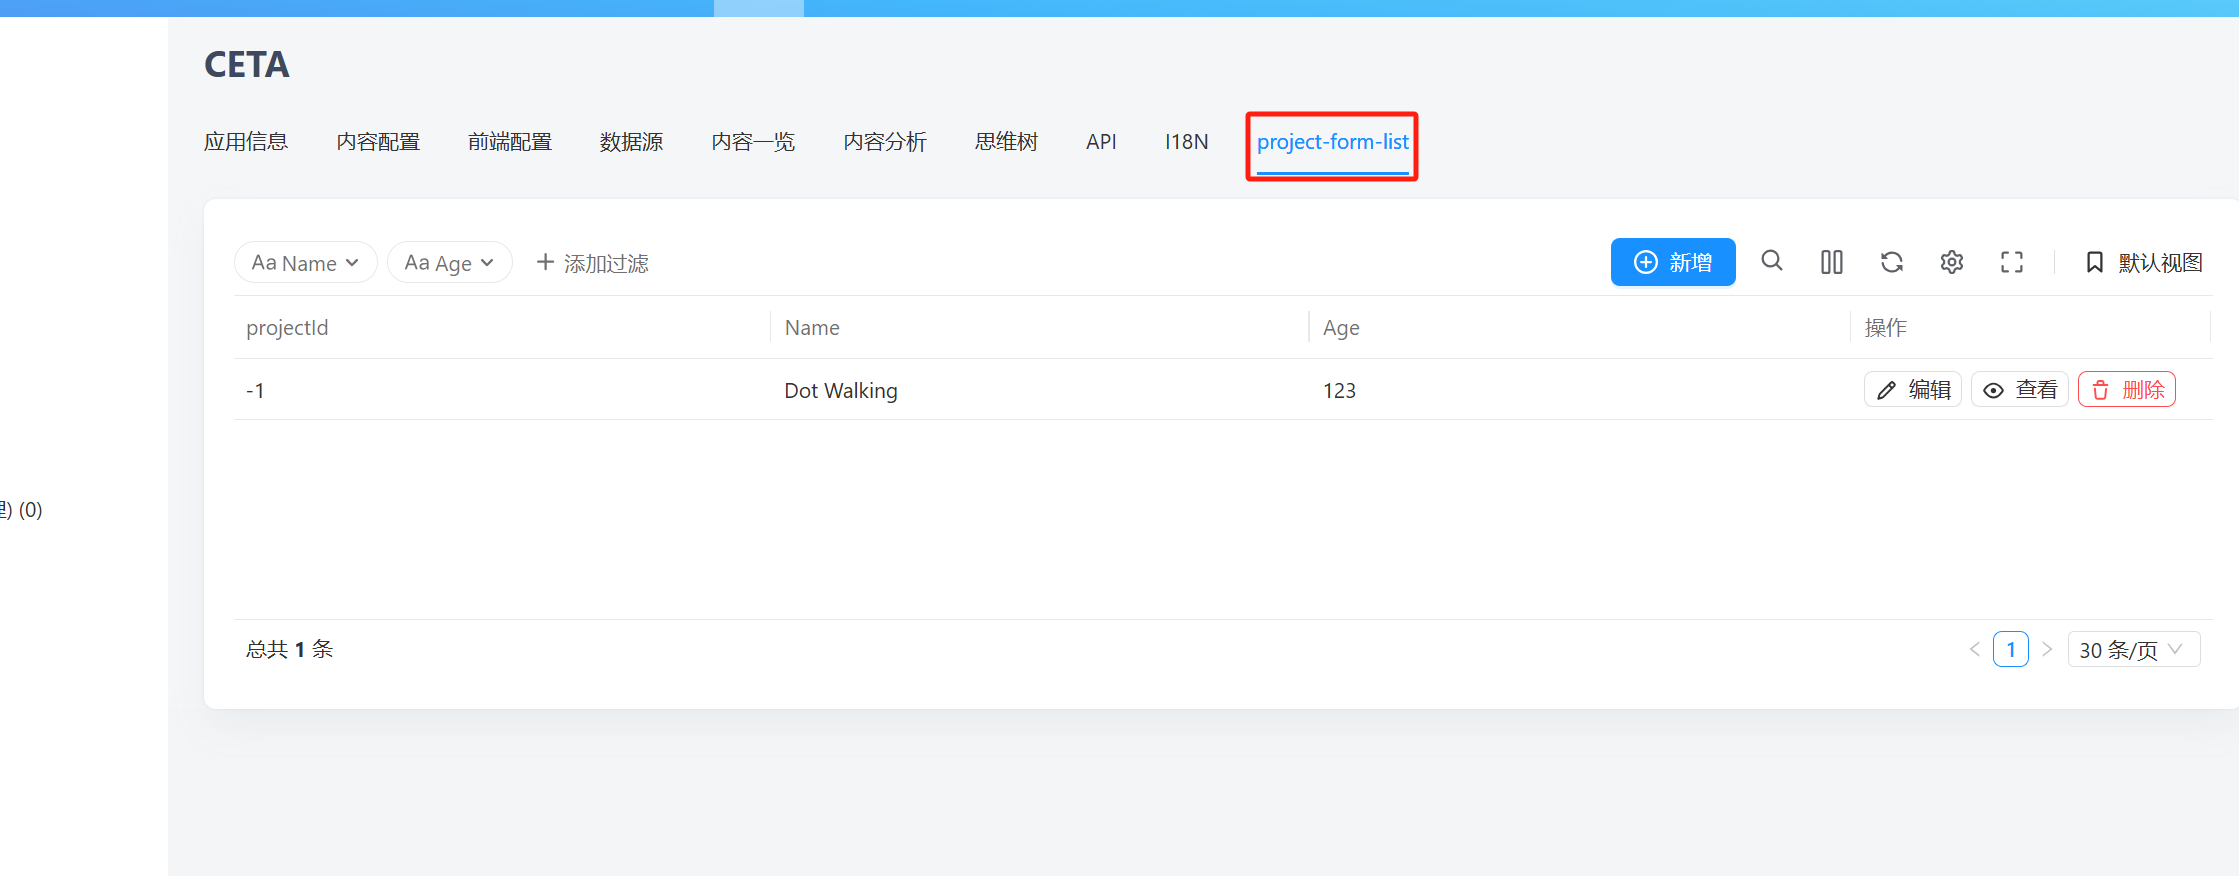
6.2 Effect of Menu Configuration
1.Application:
2.Component:
