Using Editable Table
Configuring Editable Table for Adding and Editing in a Dialog
- Drag a button into the toolbar of the "Editable Table" component.
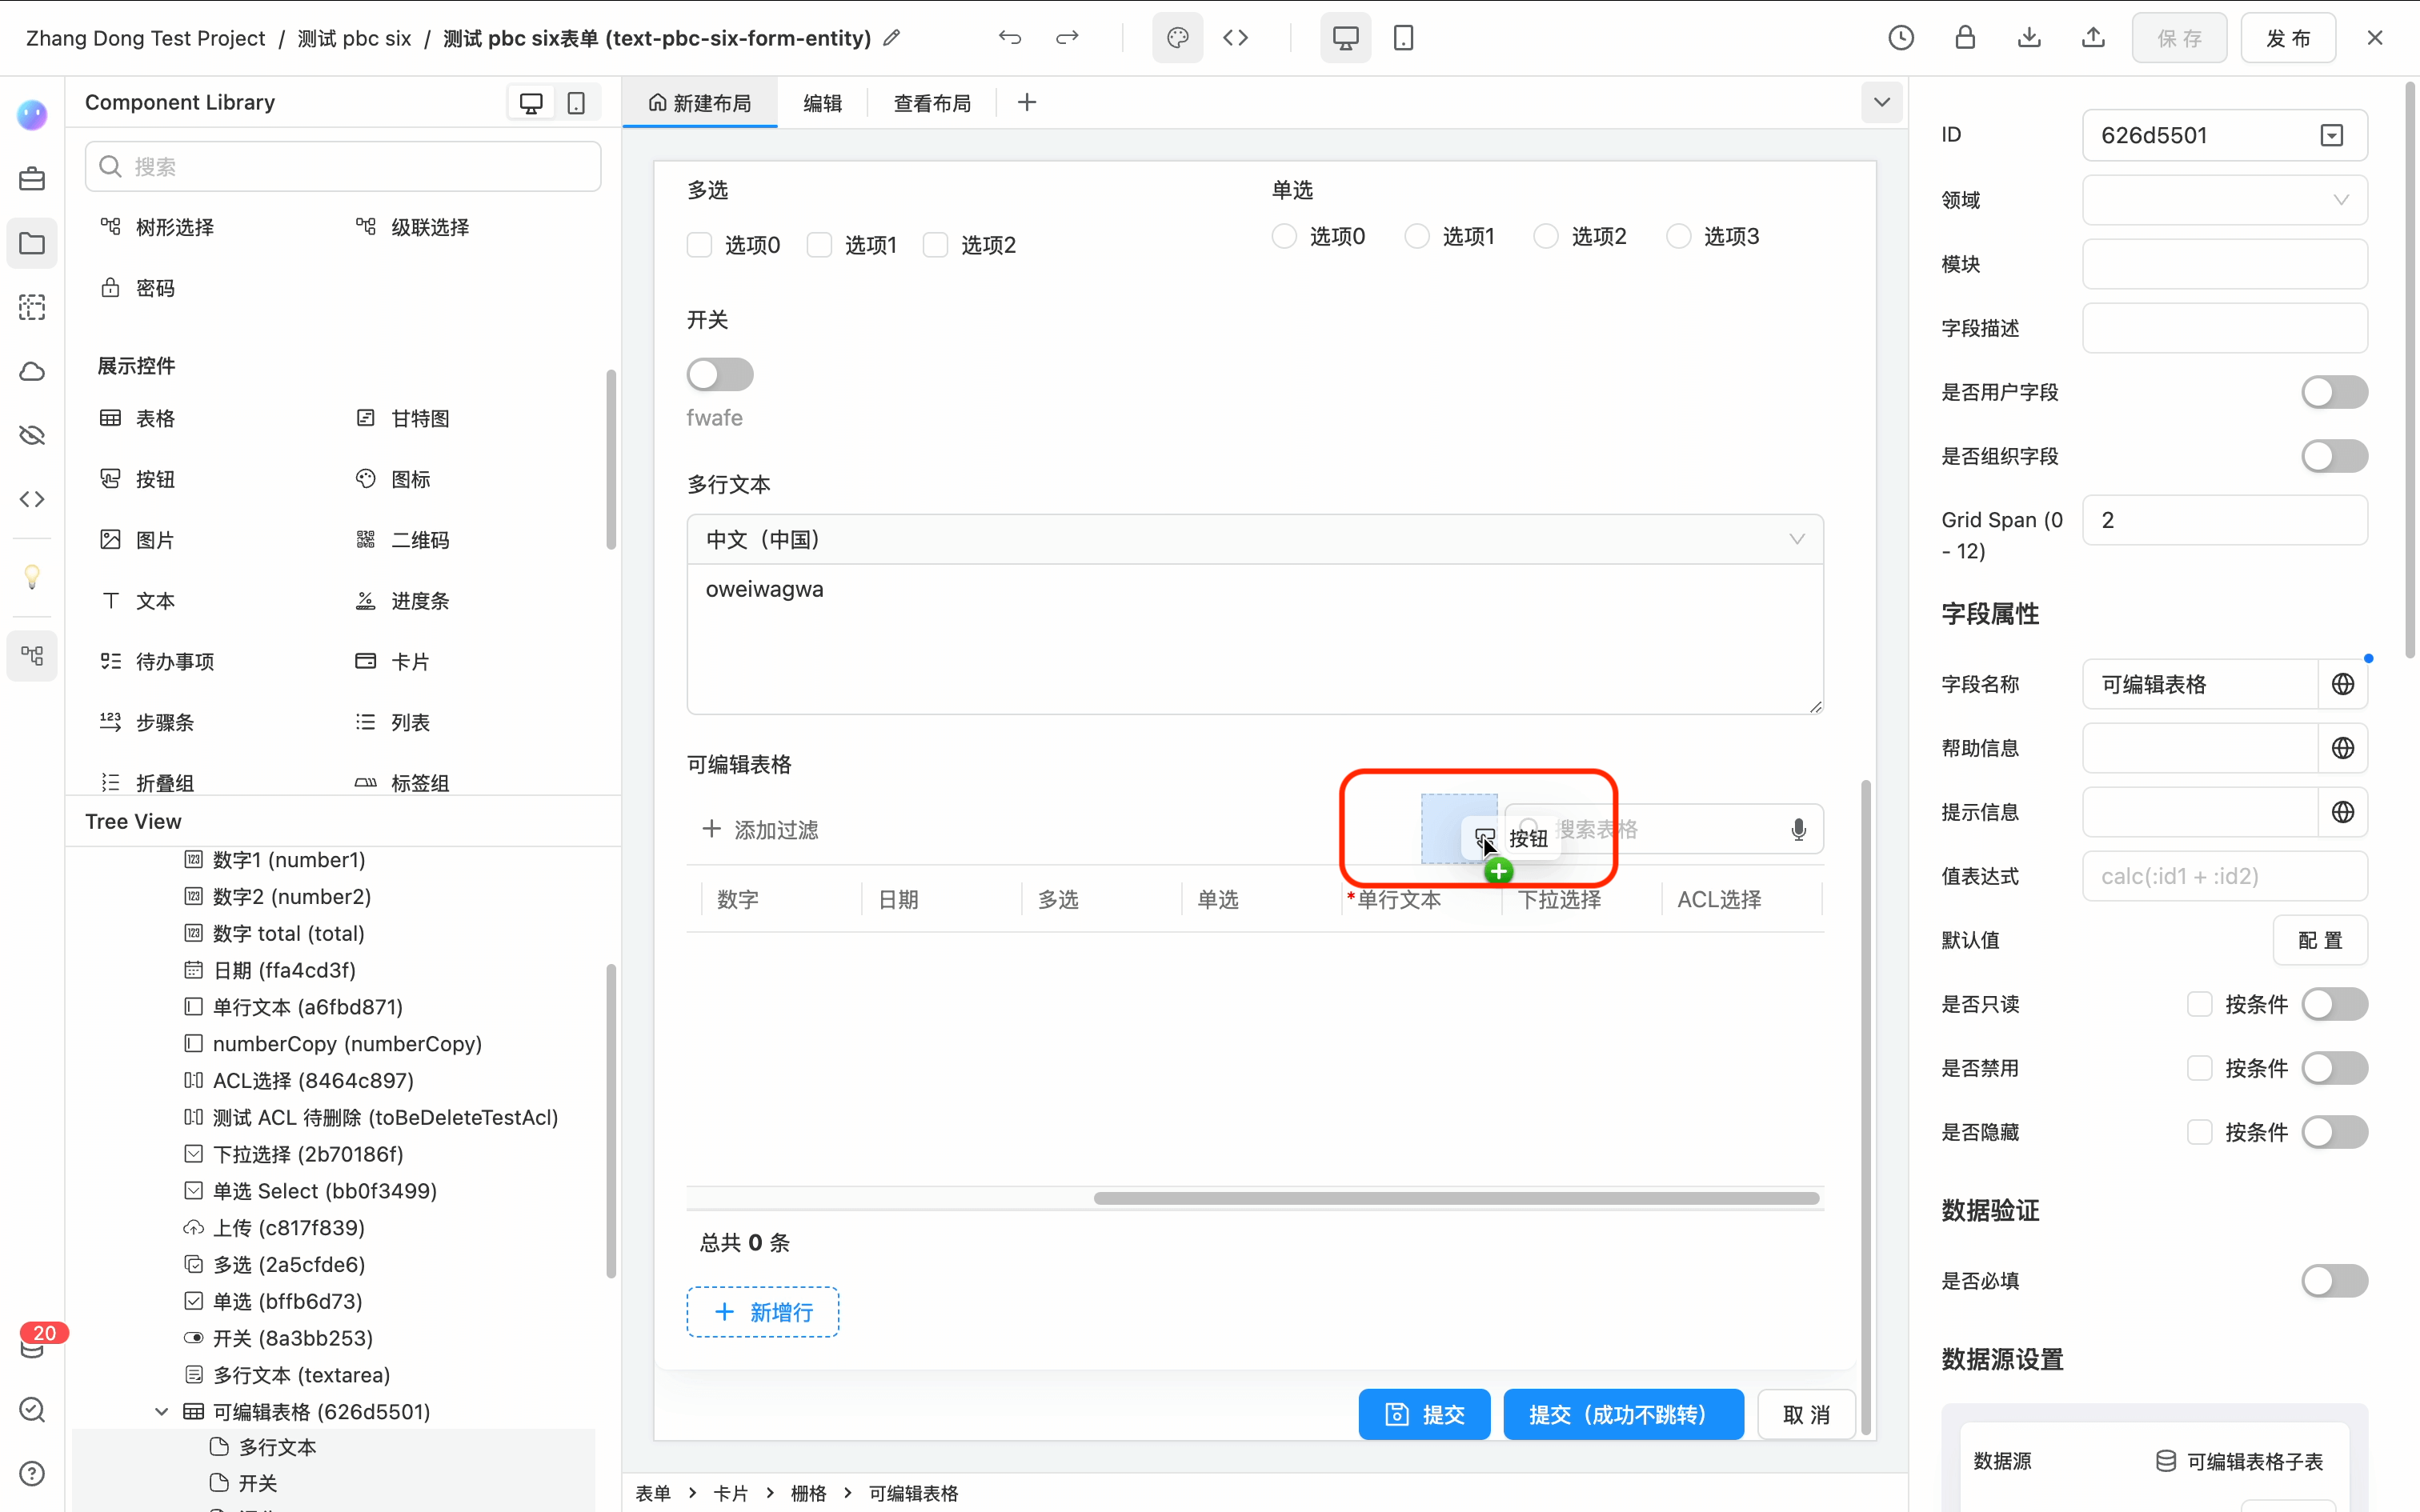
- Perform the usual settings for the button to "open a dialog."
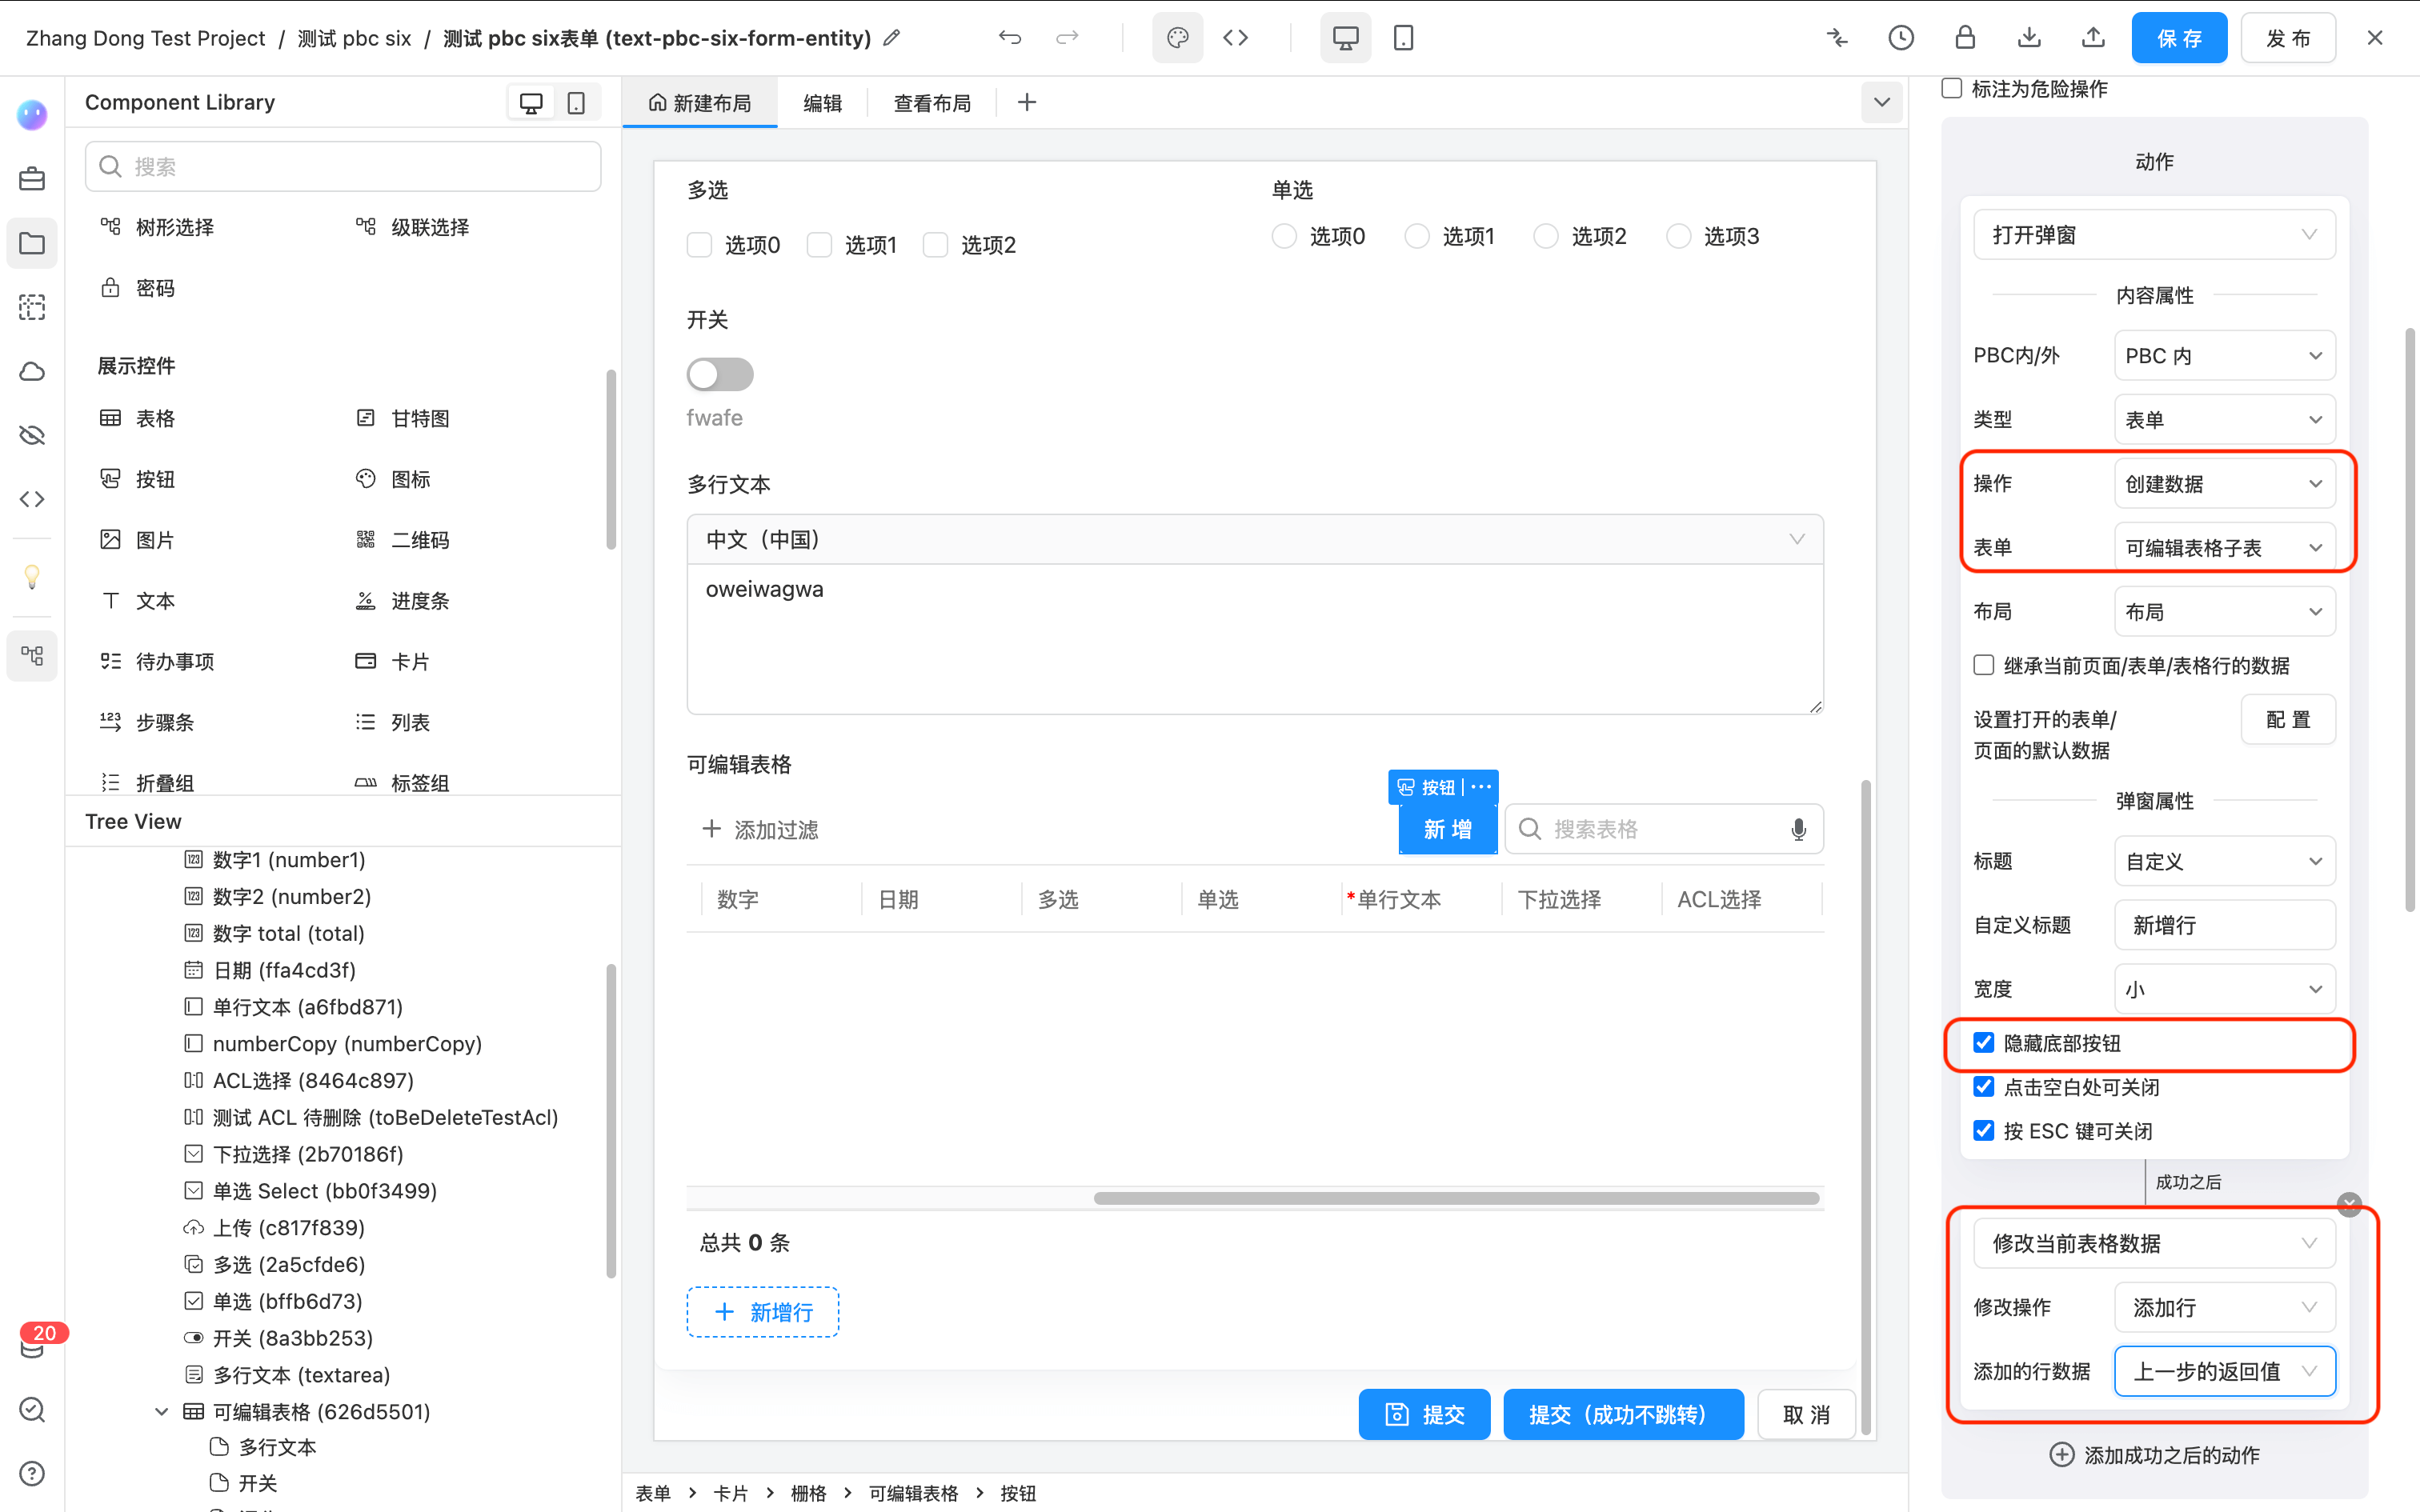
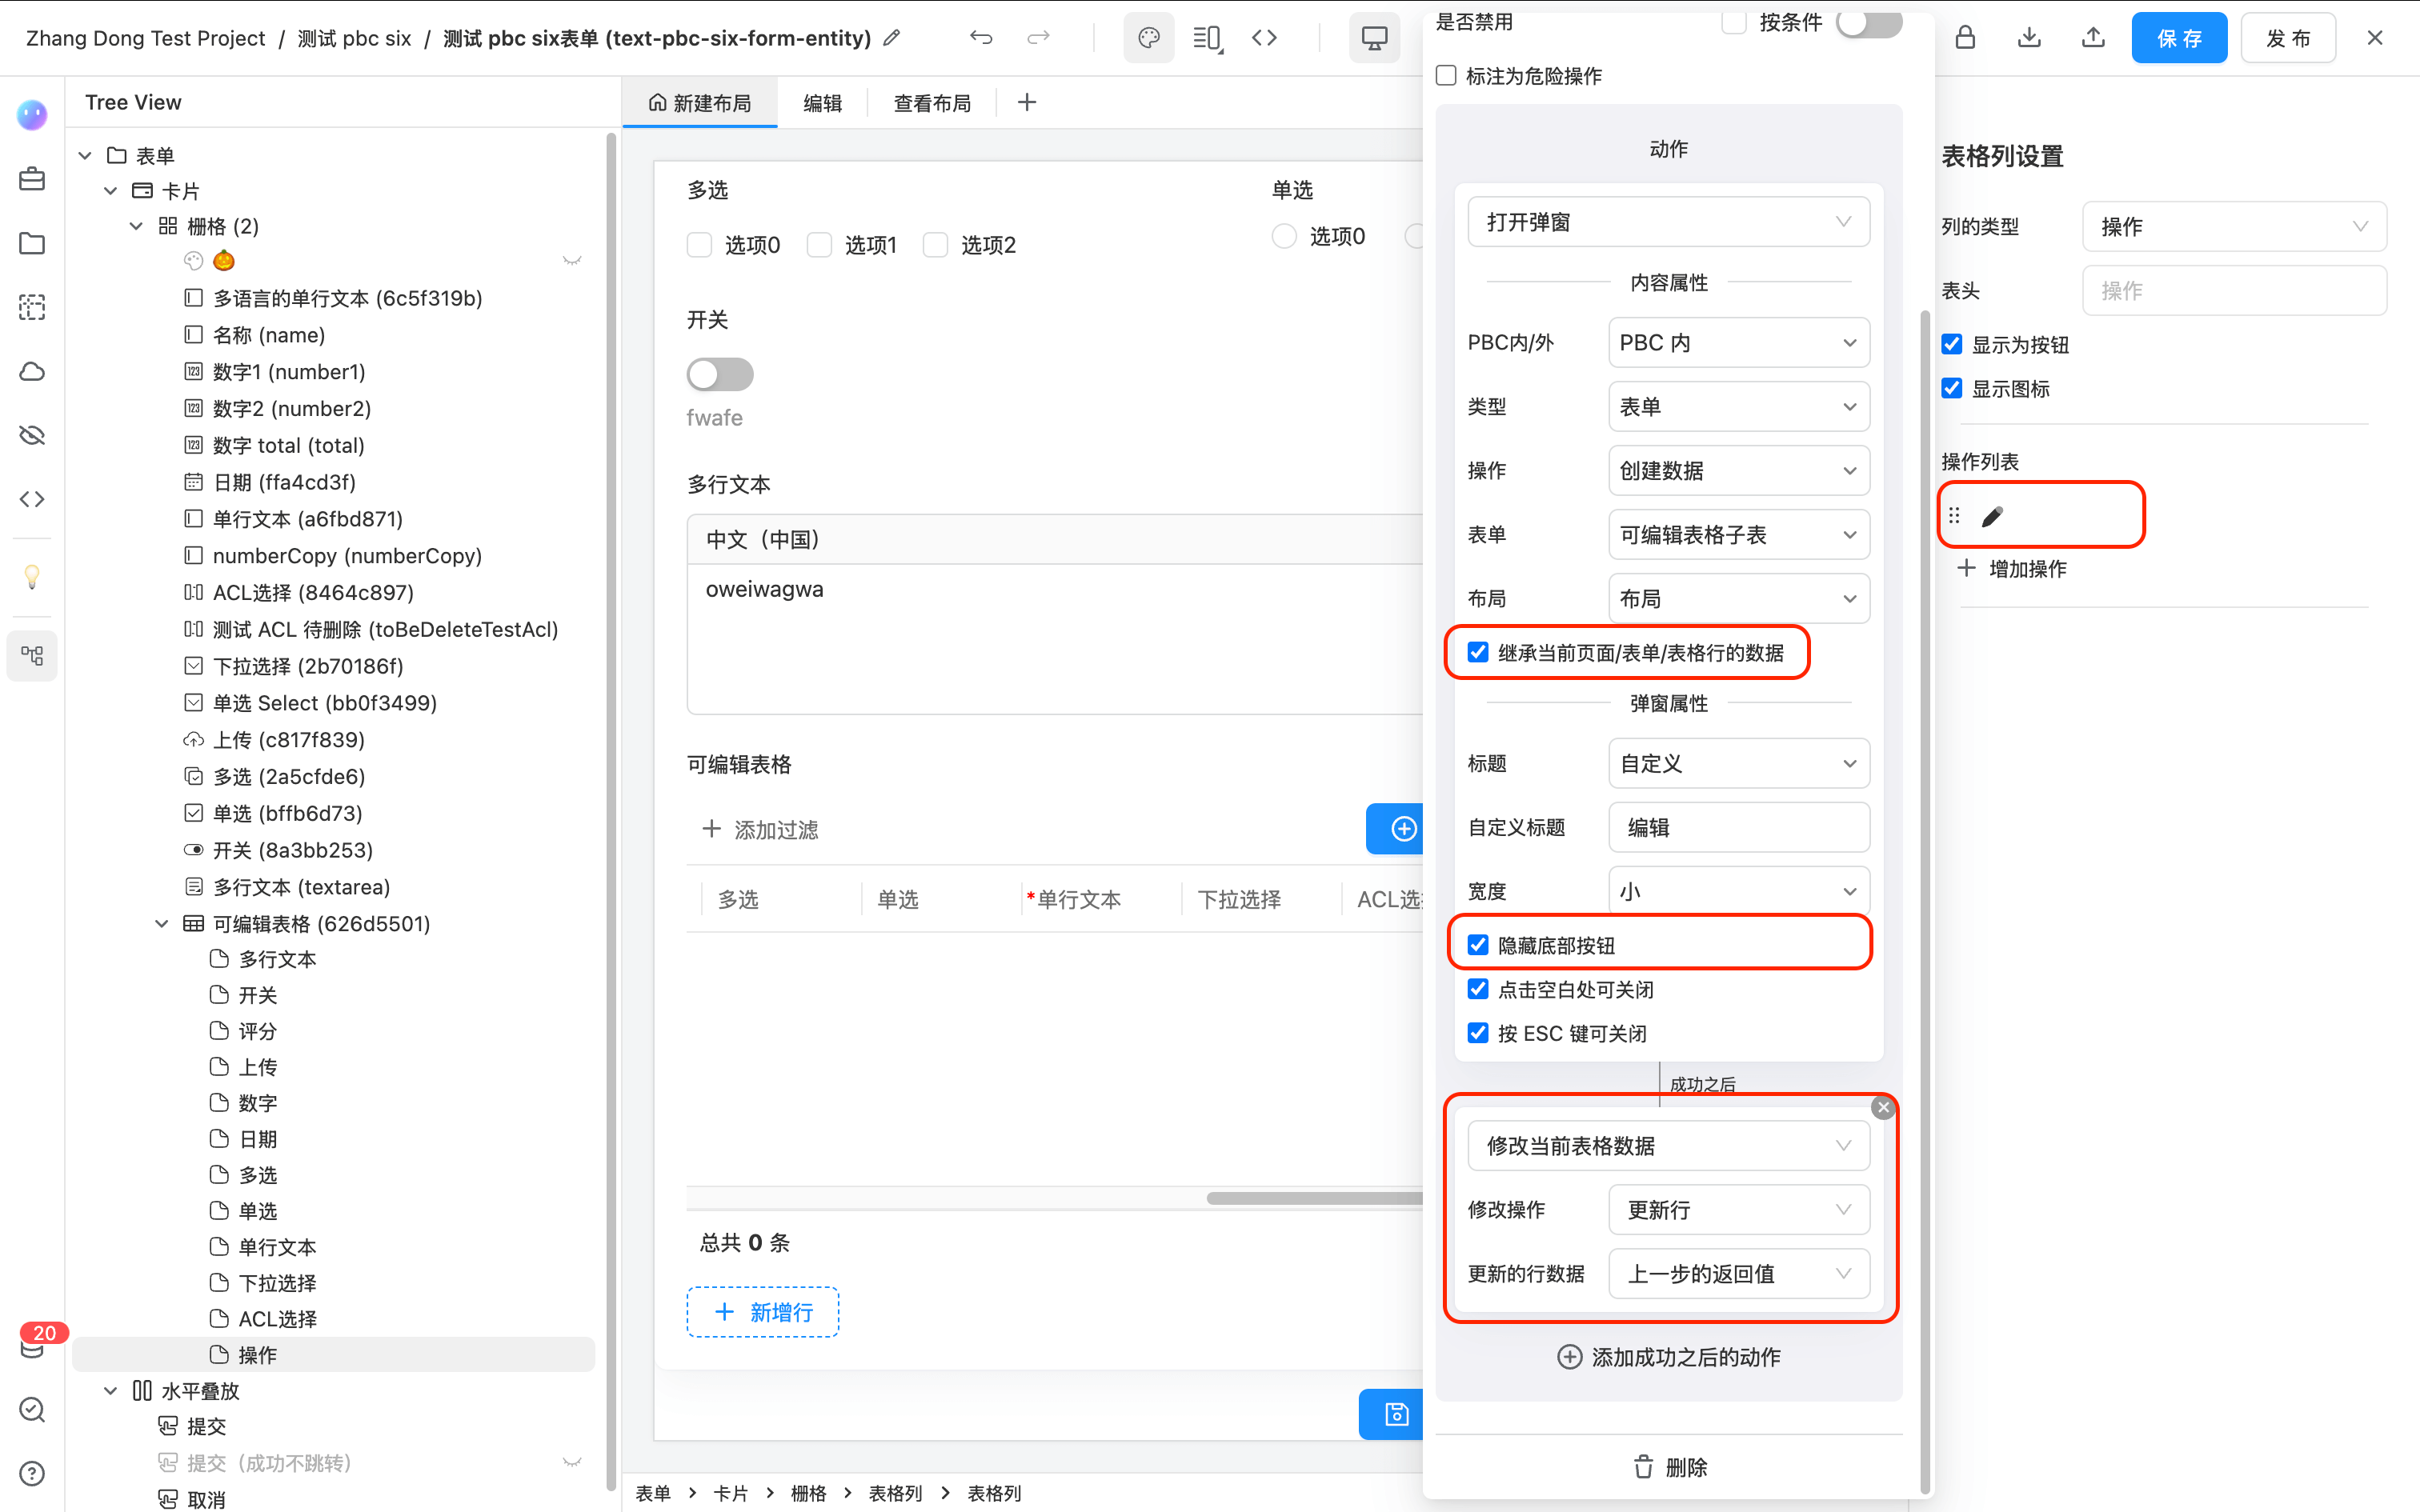
- In the form data source of the editable table, add two buttons in the layout selected by the "open dialog" button. Configure the save button as follows.
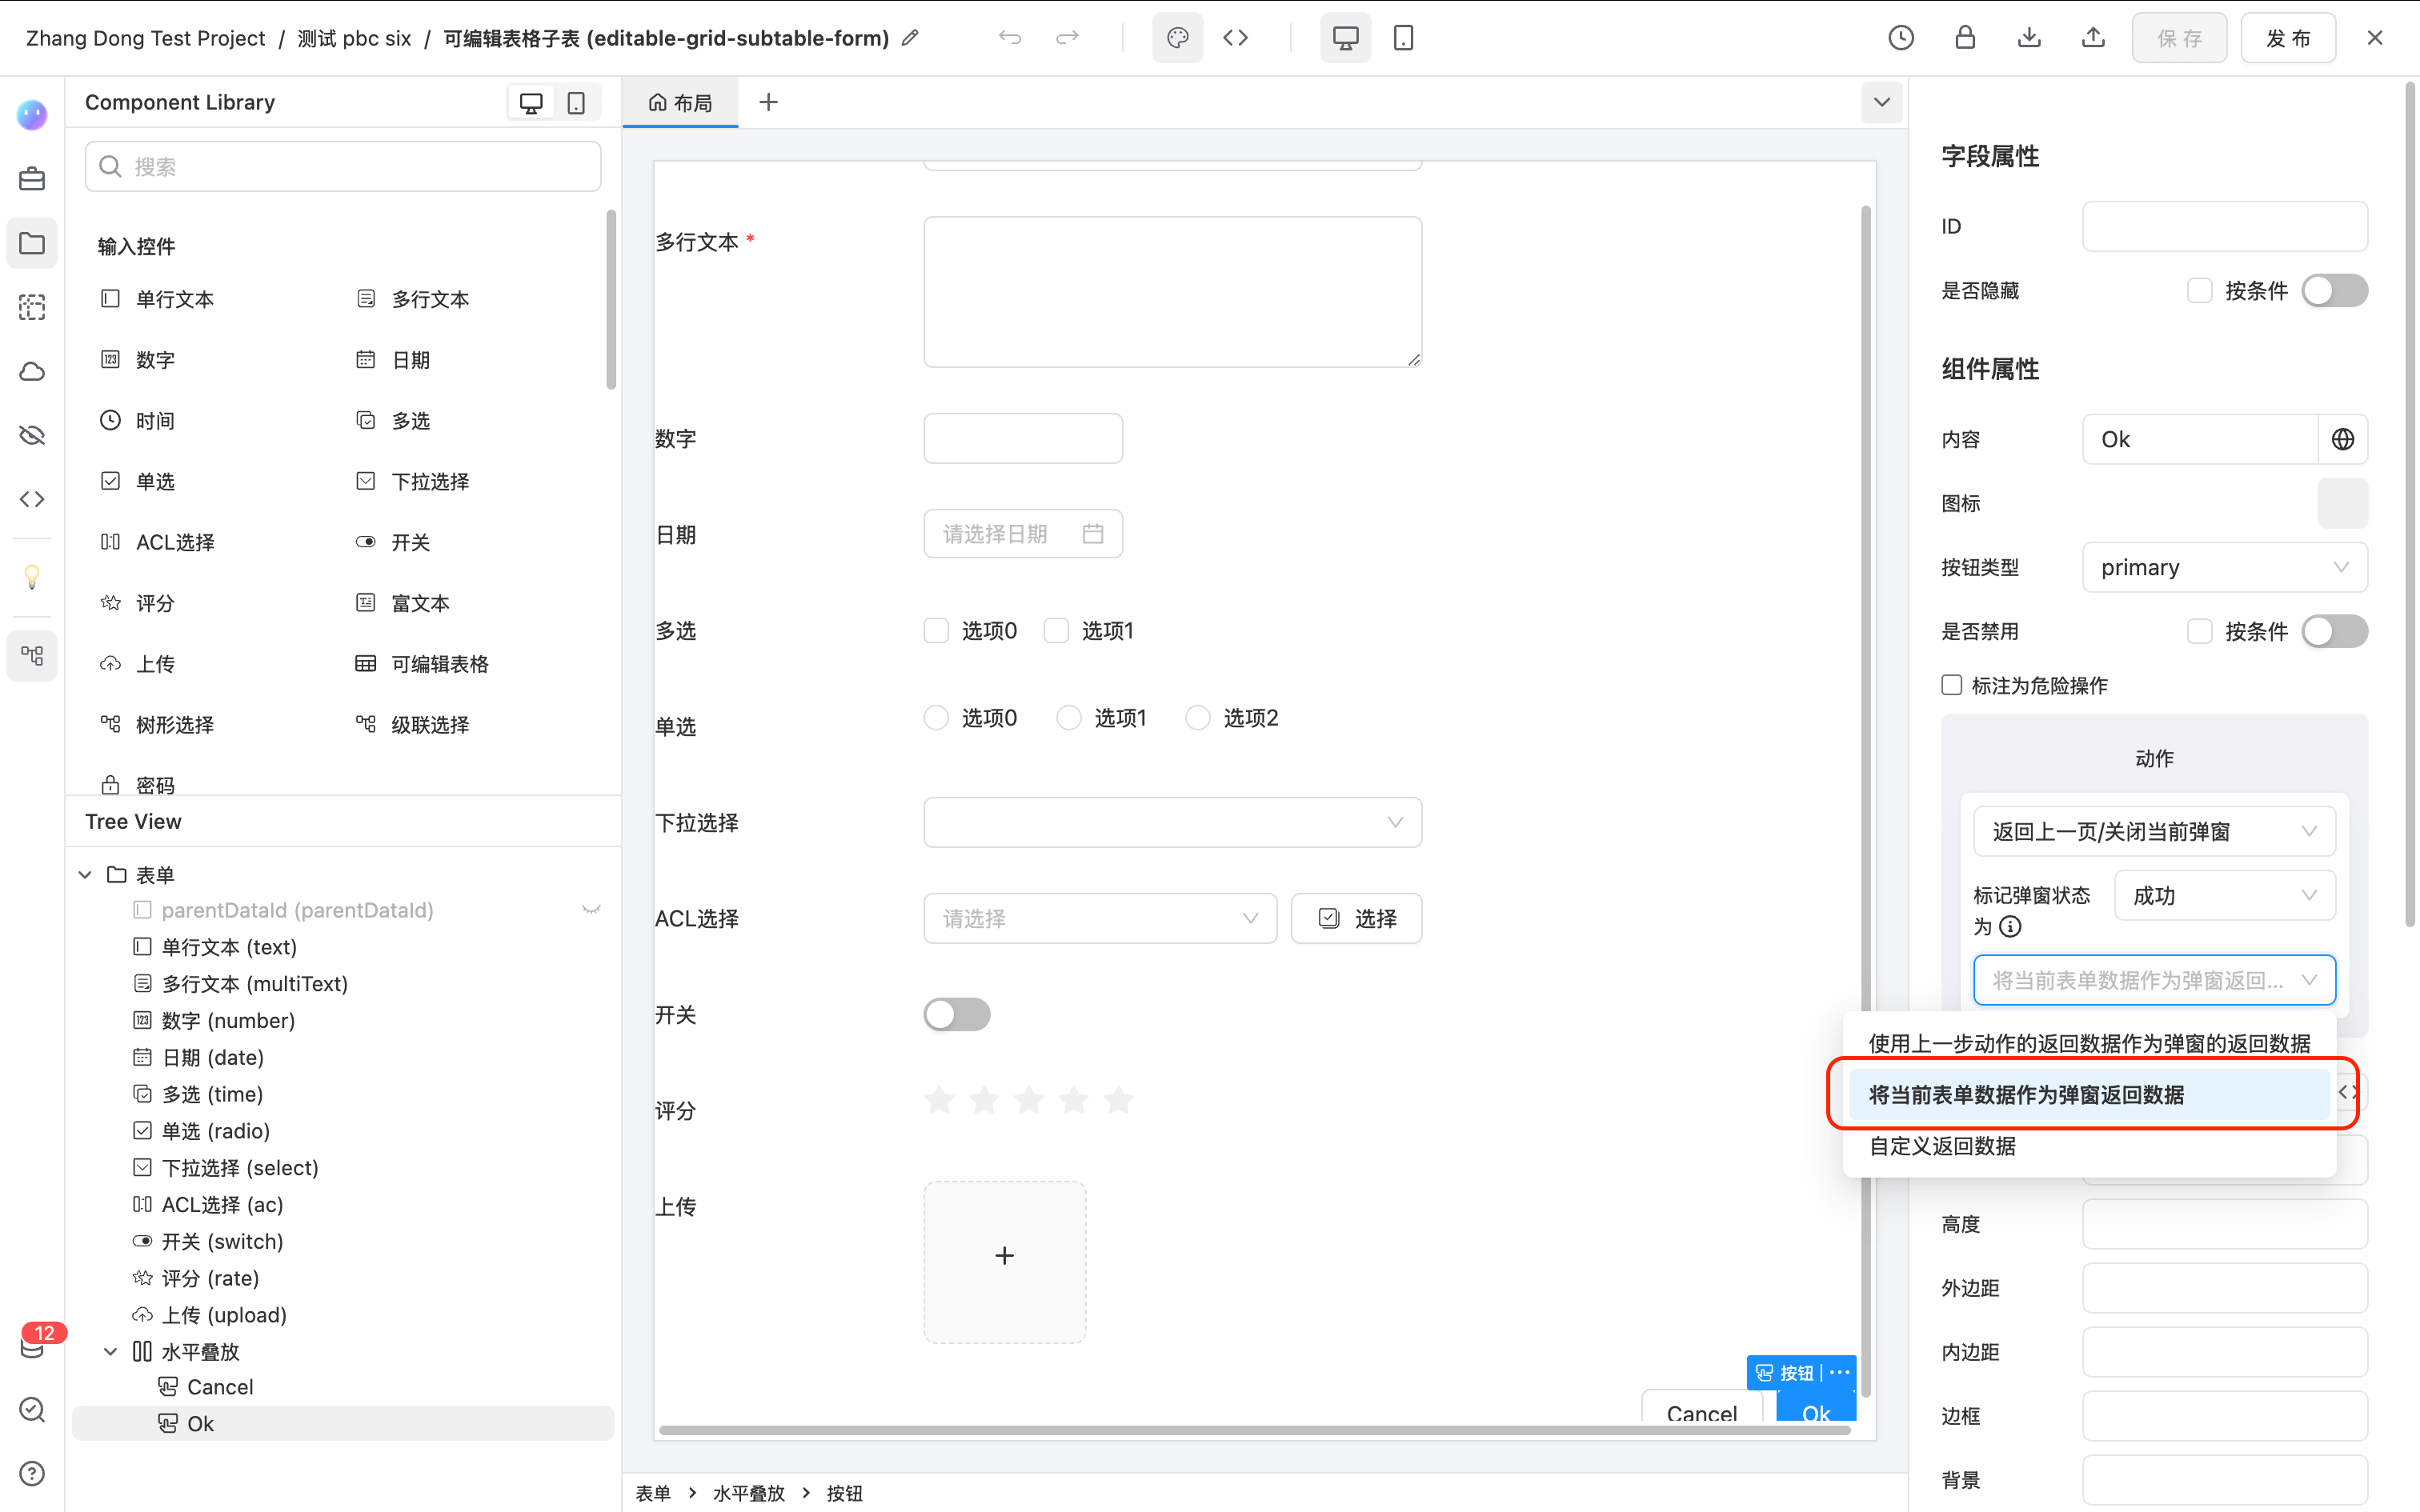
-
Now, go to the form preview page, and you can add a new row through the toolbar button via the dialog.
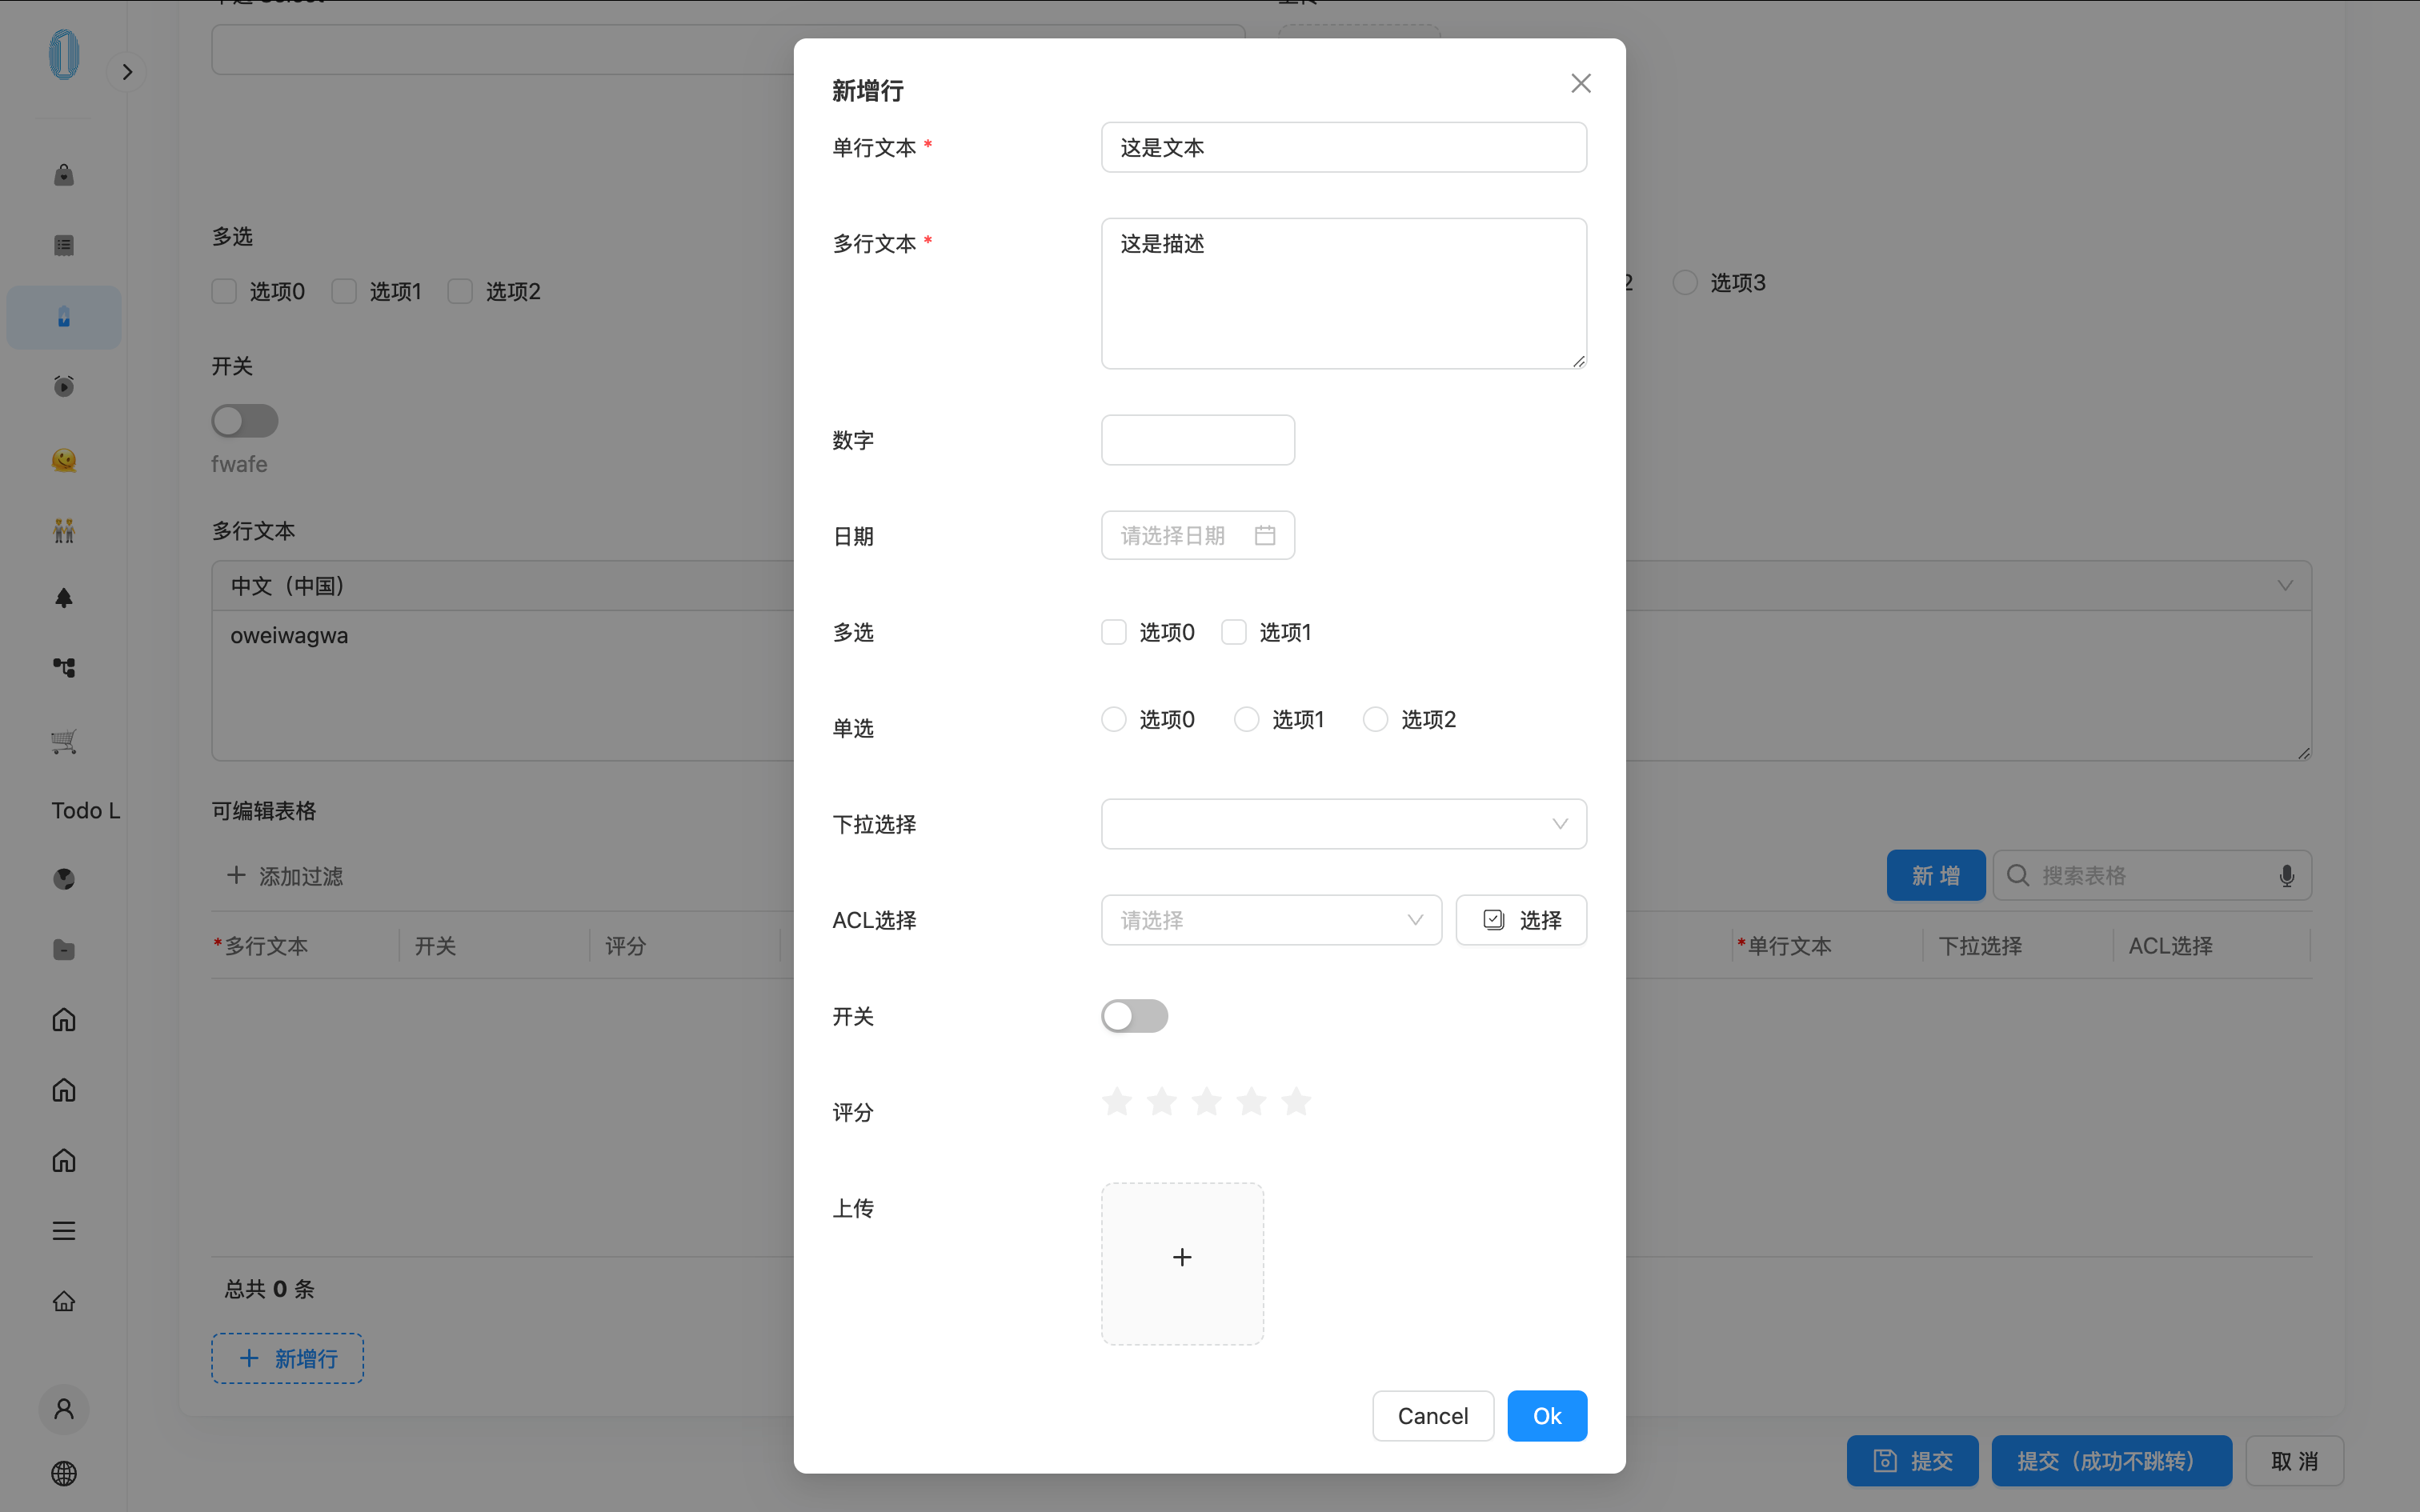
-
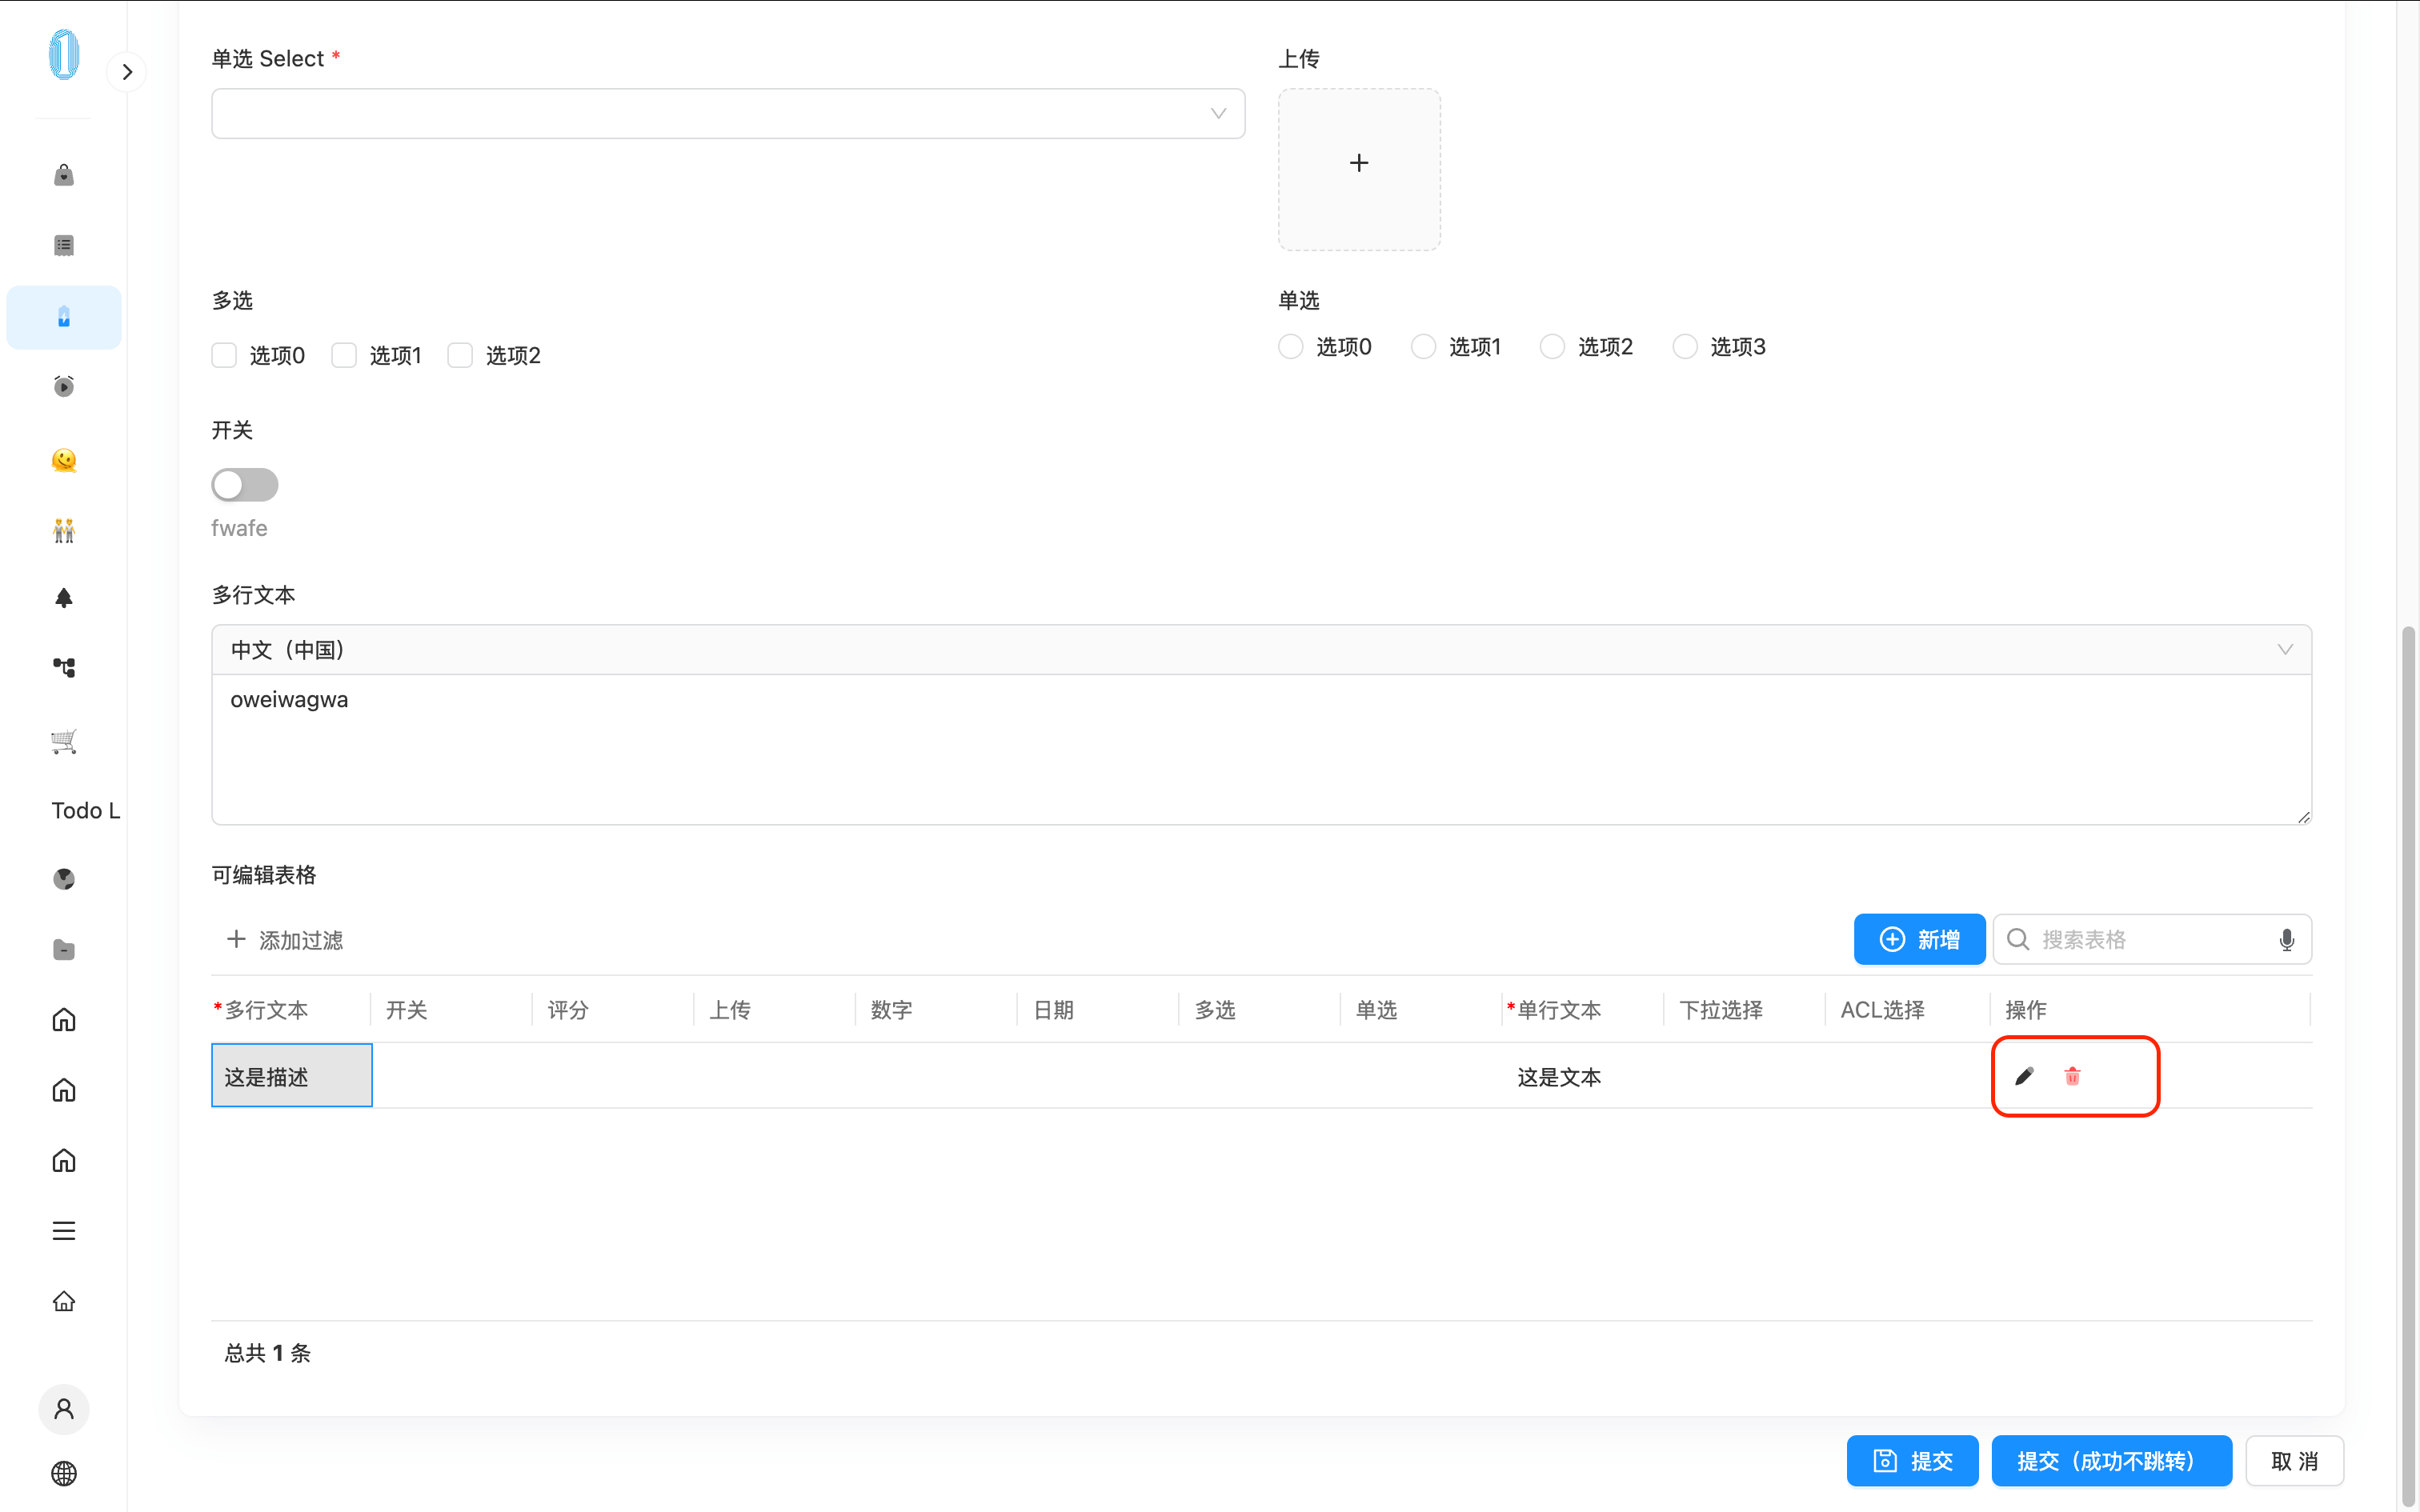
Return to the form designer, right-click on the last column of the editable table, and select "Add a column after."
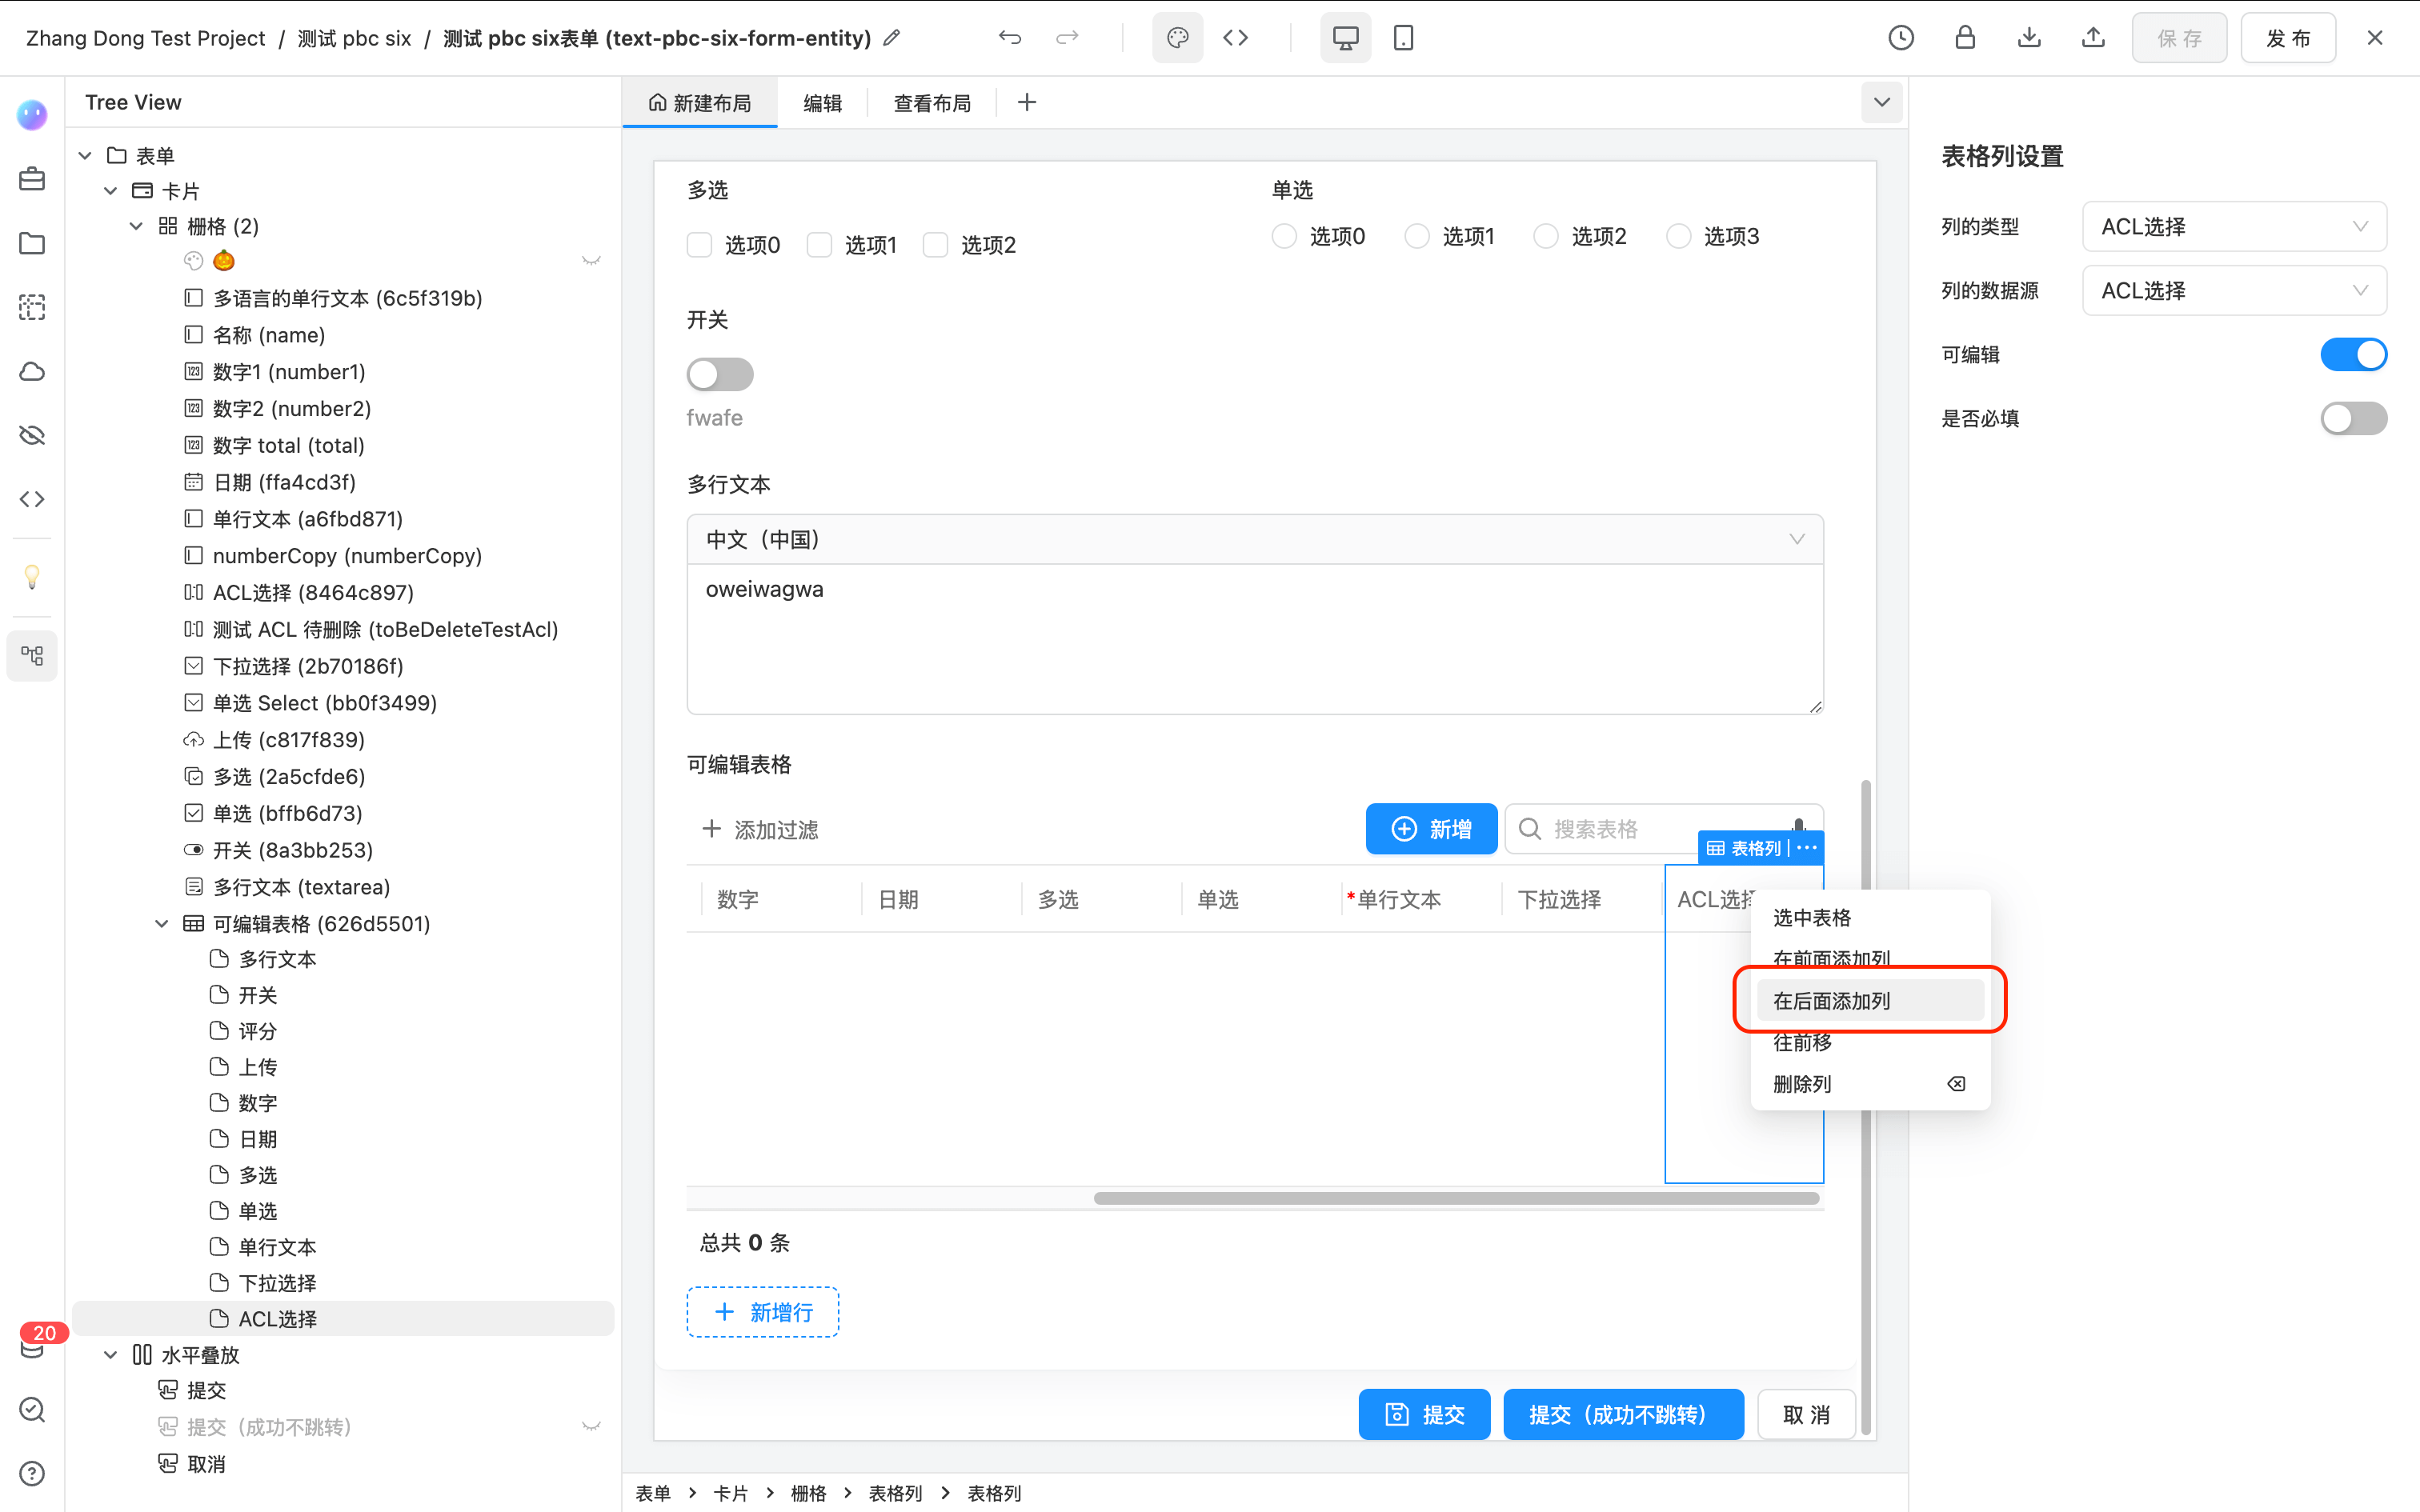
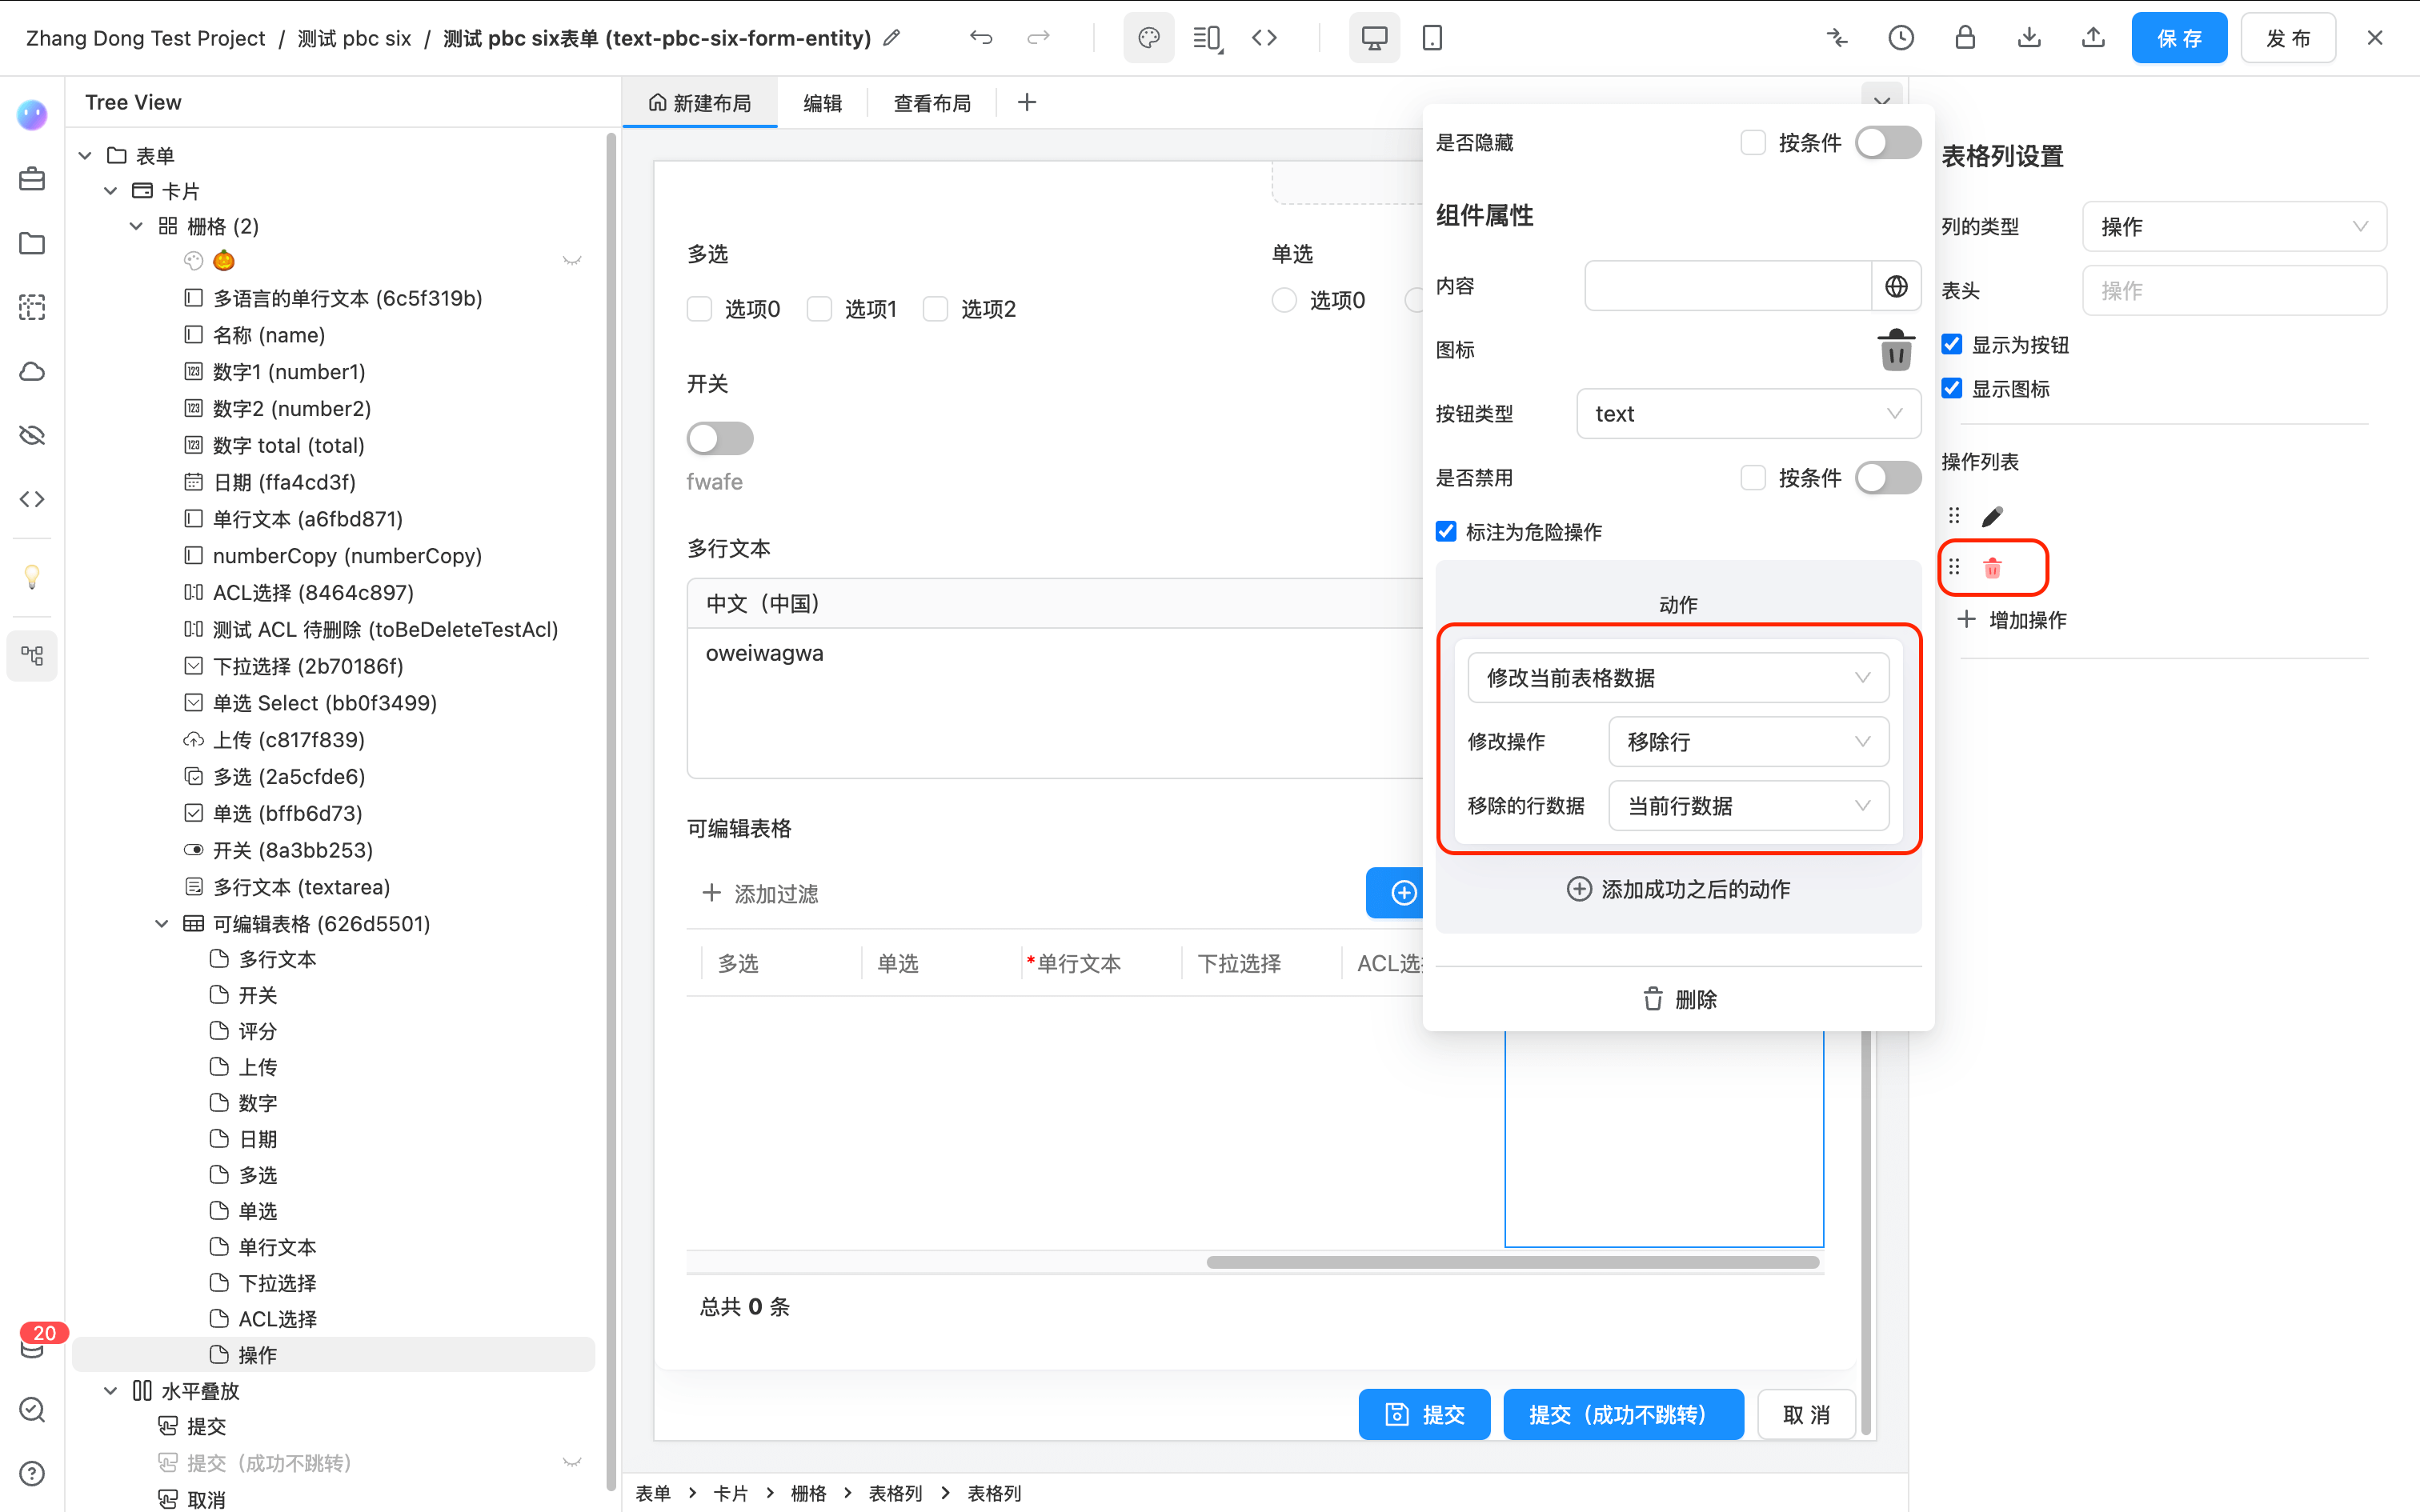
- Add two custom buttons, one for "Edit" and one for "Delete."
- Meanwhile, select the editable table and uncheck "Show Add Button" to remove the default "Add Row" button displayed at the bottom of the table.
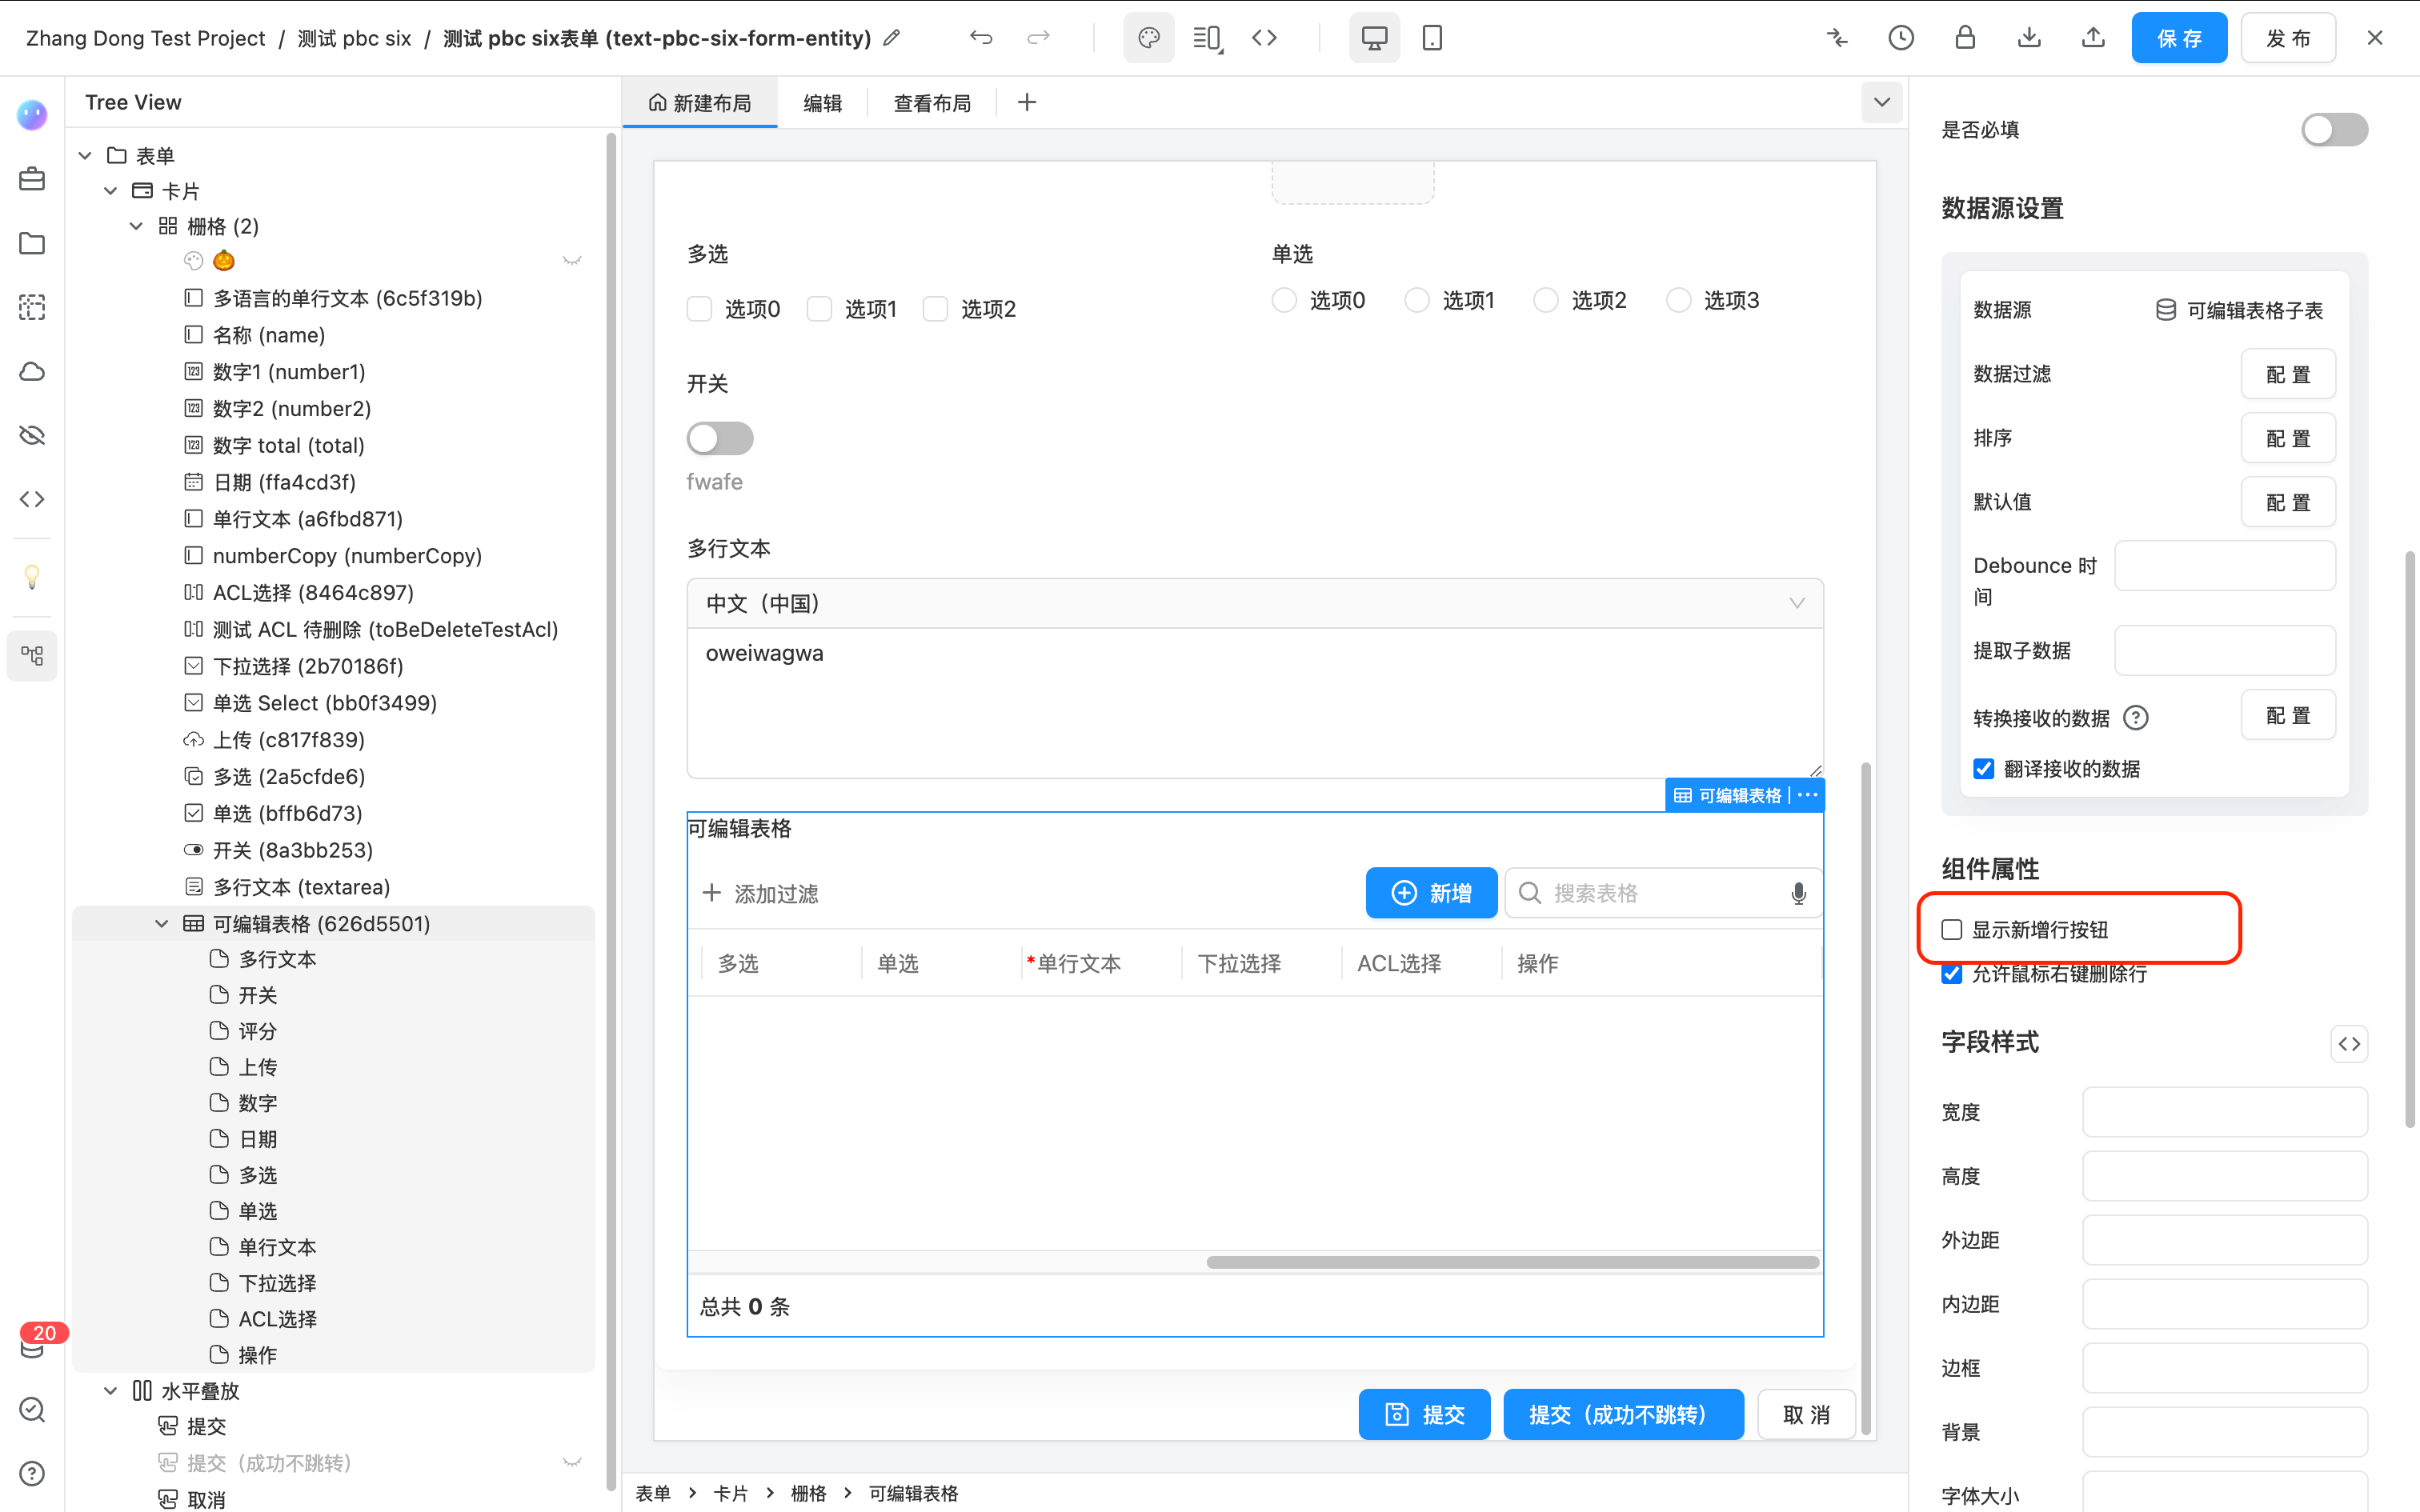
- Now, go to the form preview page, refresh the page, and add a new row in the editable table. You can edit and delete rows through the two buttons in the "Operation" column.
Dynamically Modifying Table Columns
Refer to the section "Dynamically Modifying Table Columns" in Use Table
Modifying Table Data with JavaScript
The data of the editable table is within the form data. Please use
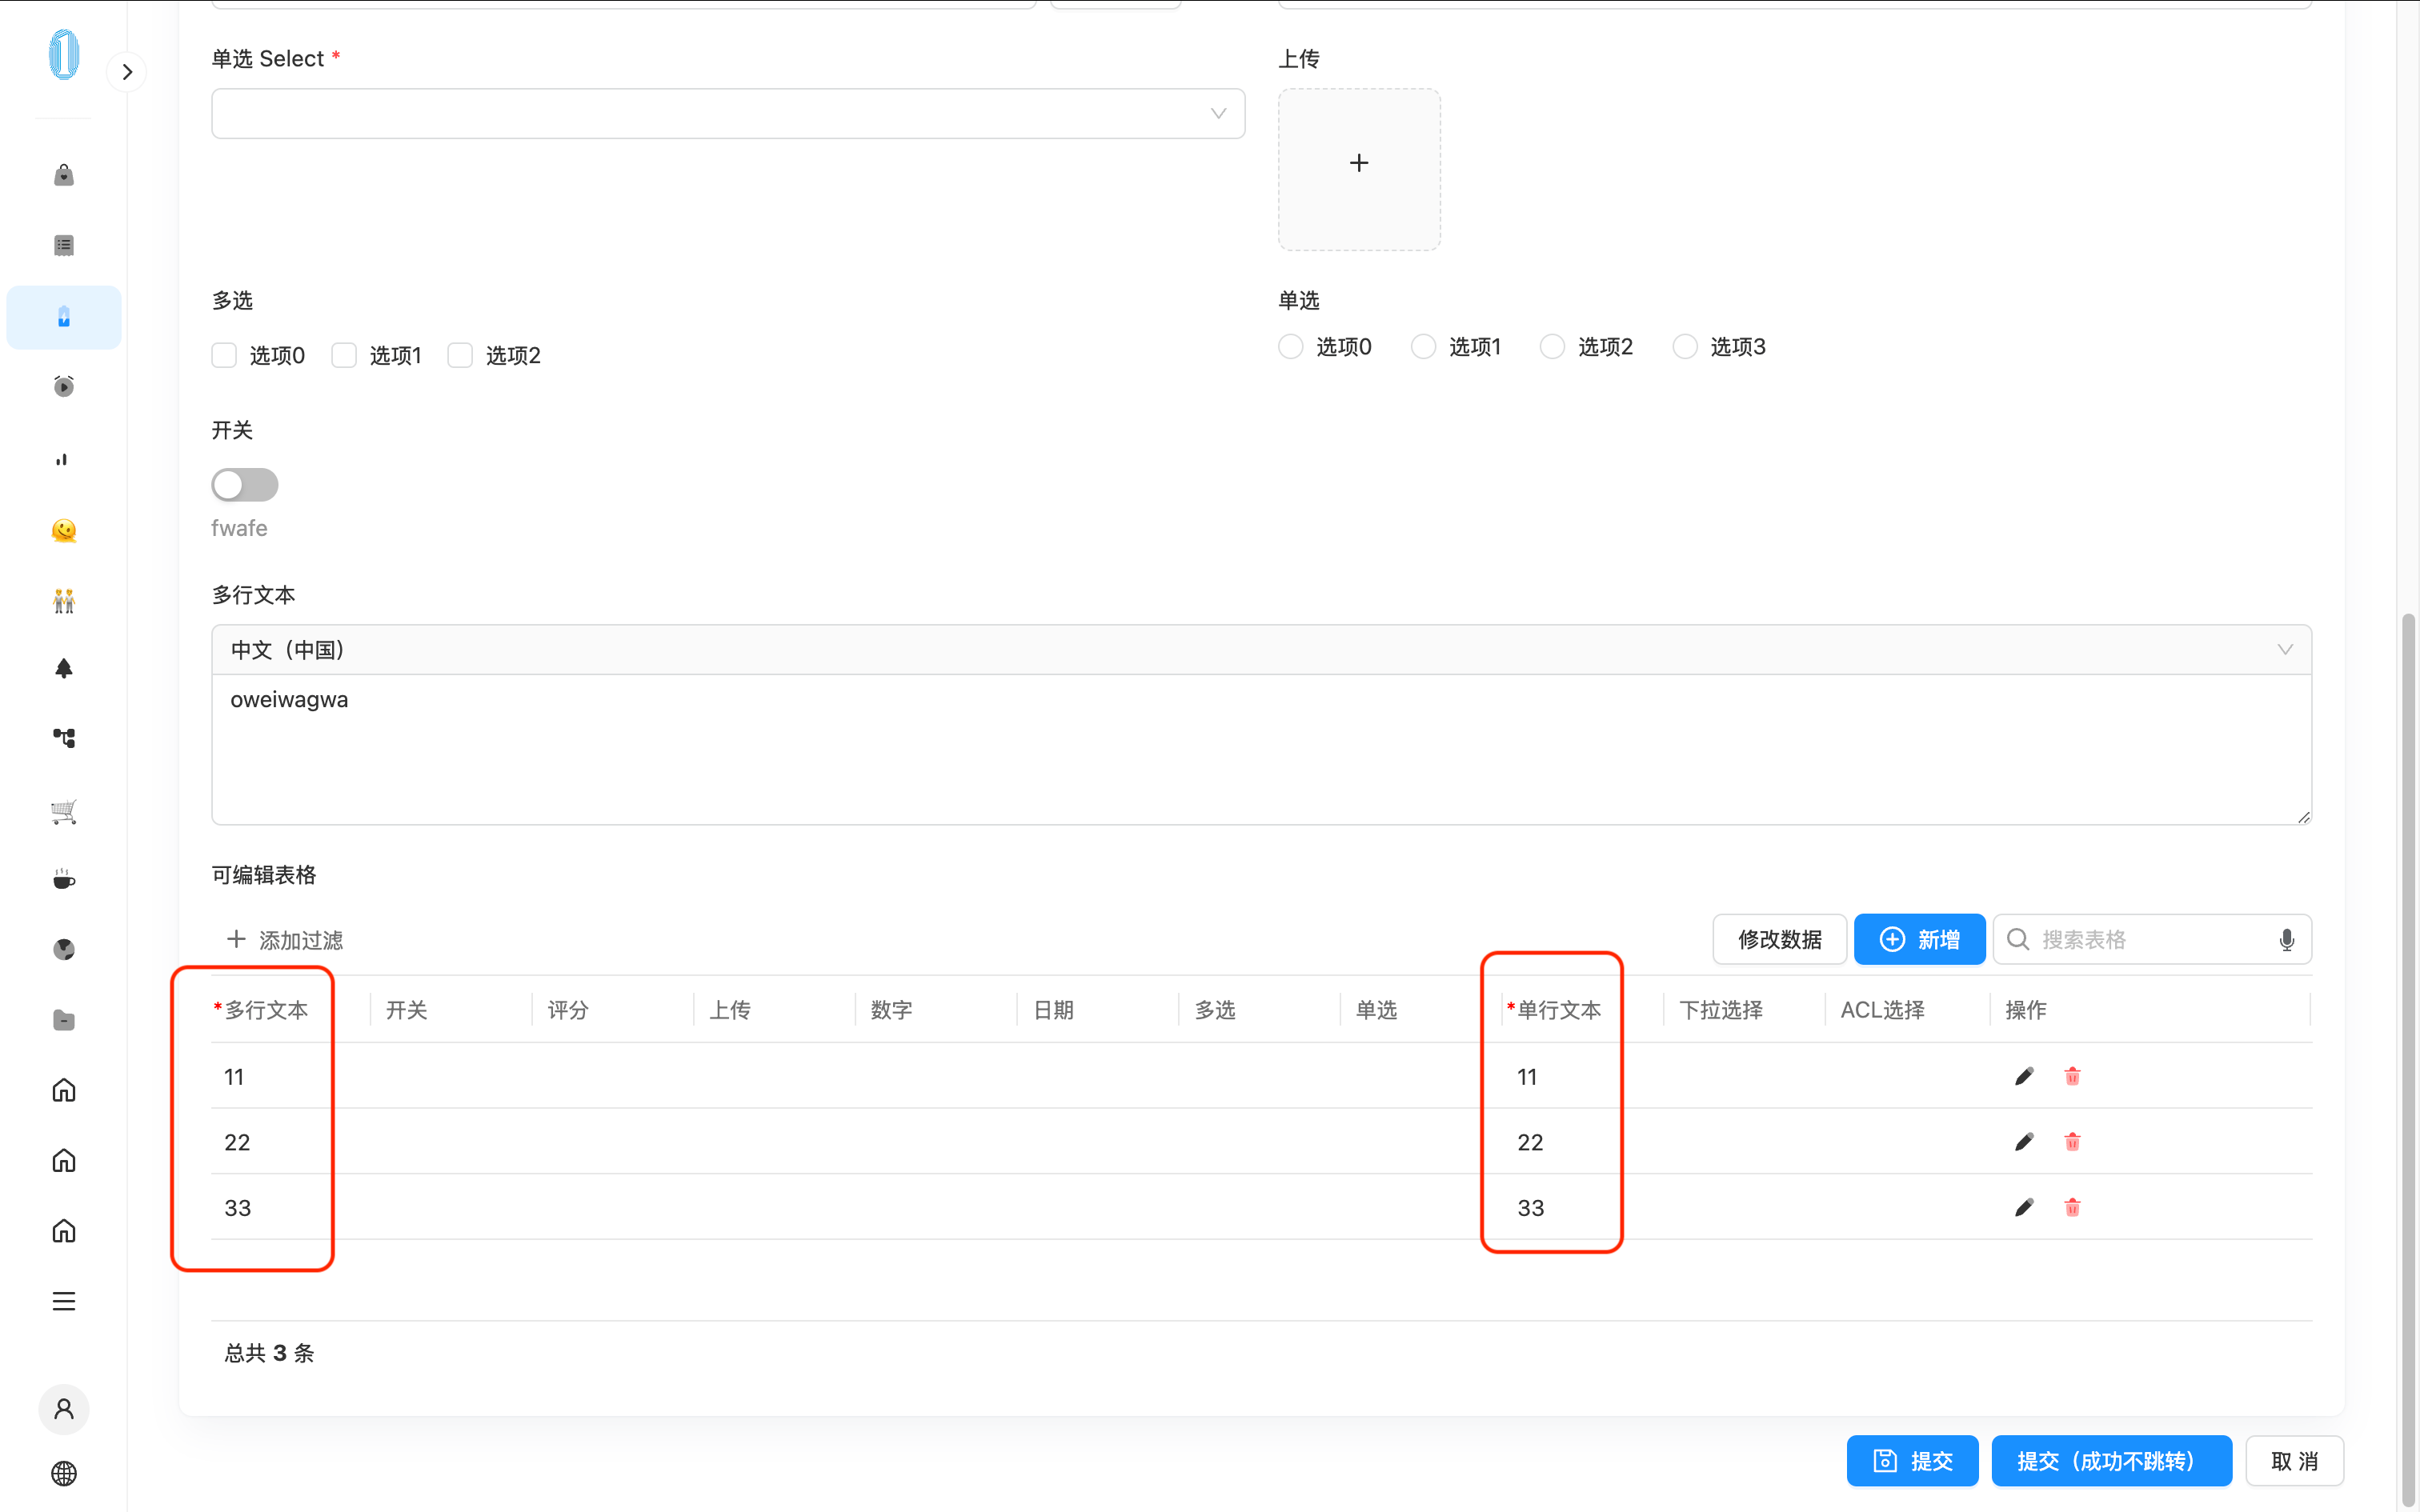
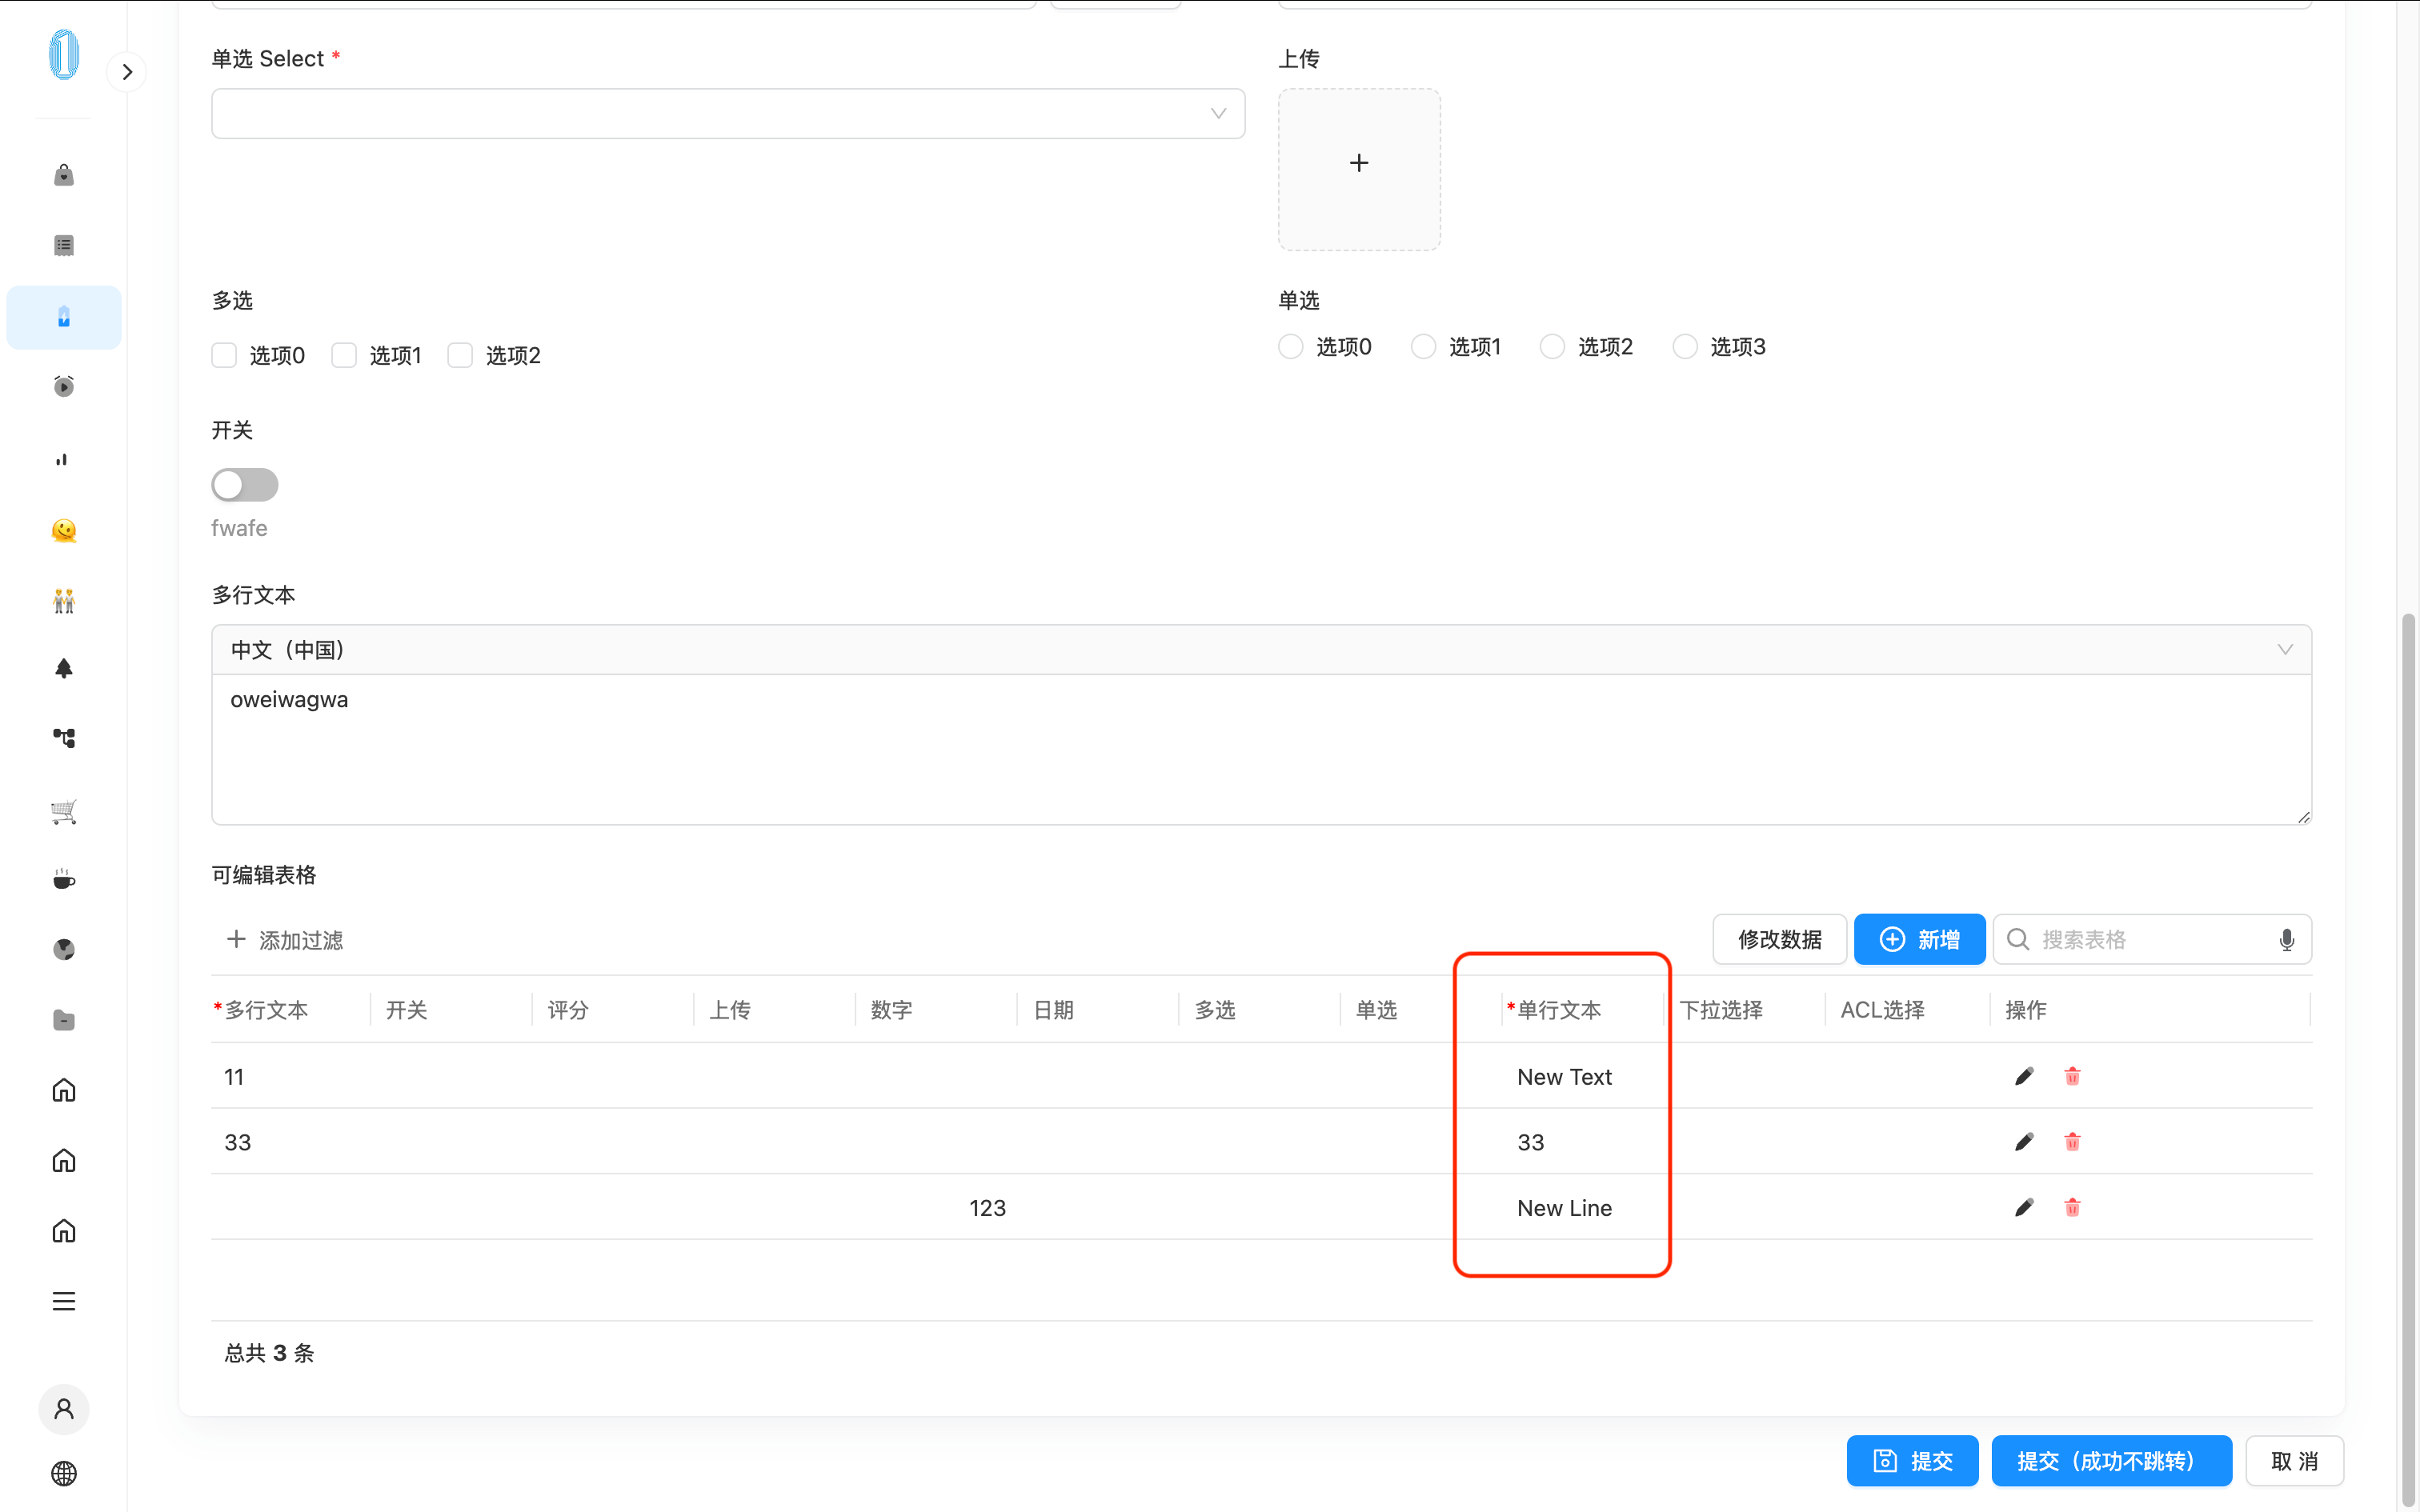
formApi.setValue to modify the data of the editable table whenever possible. Otherwise, you may encounter an error like Uncaught (in promise) TypeError: Cannot assign to read-only property 'text' of object '#<Object>'.For example, in the following example, three rows of data were added first. Then, by clicking the Modify Data button in the toolbar, one row of data was modified, one row was deleted, and a new row was added using JavaScript.
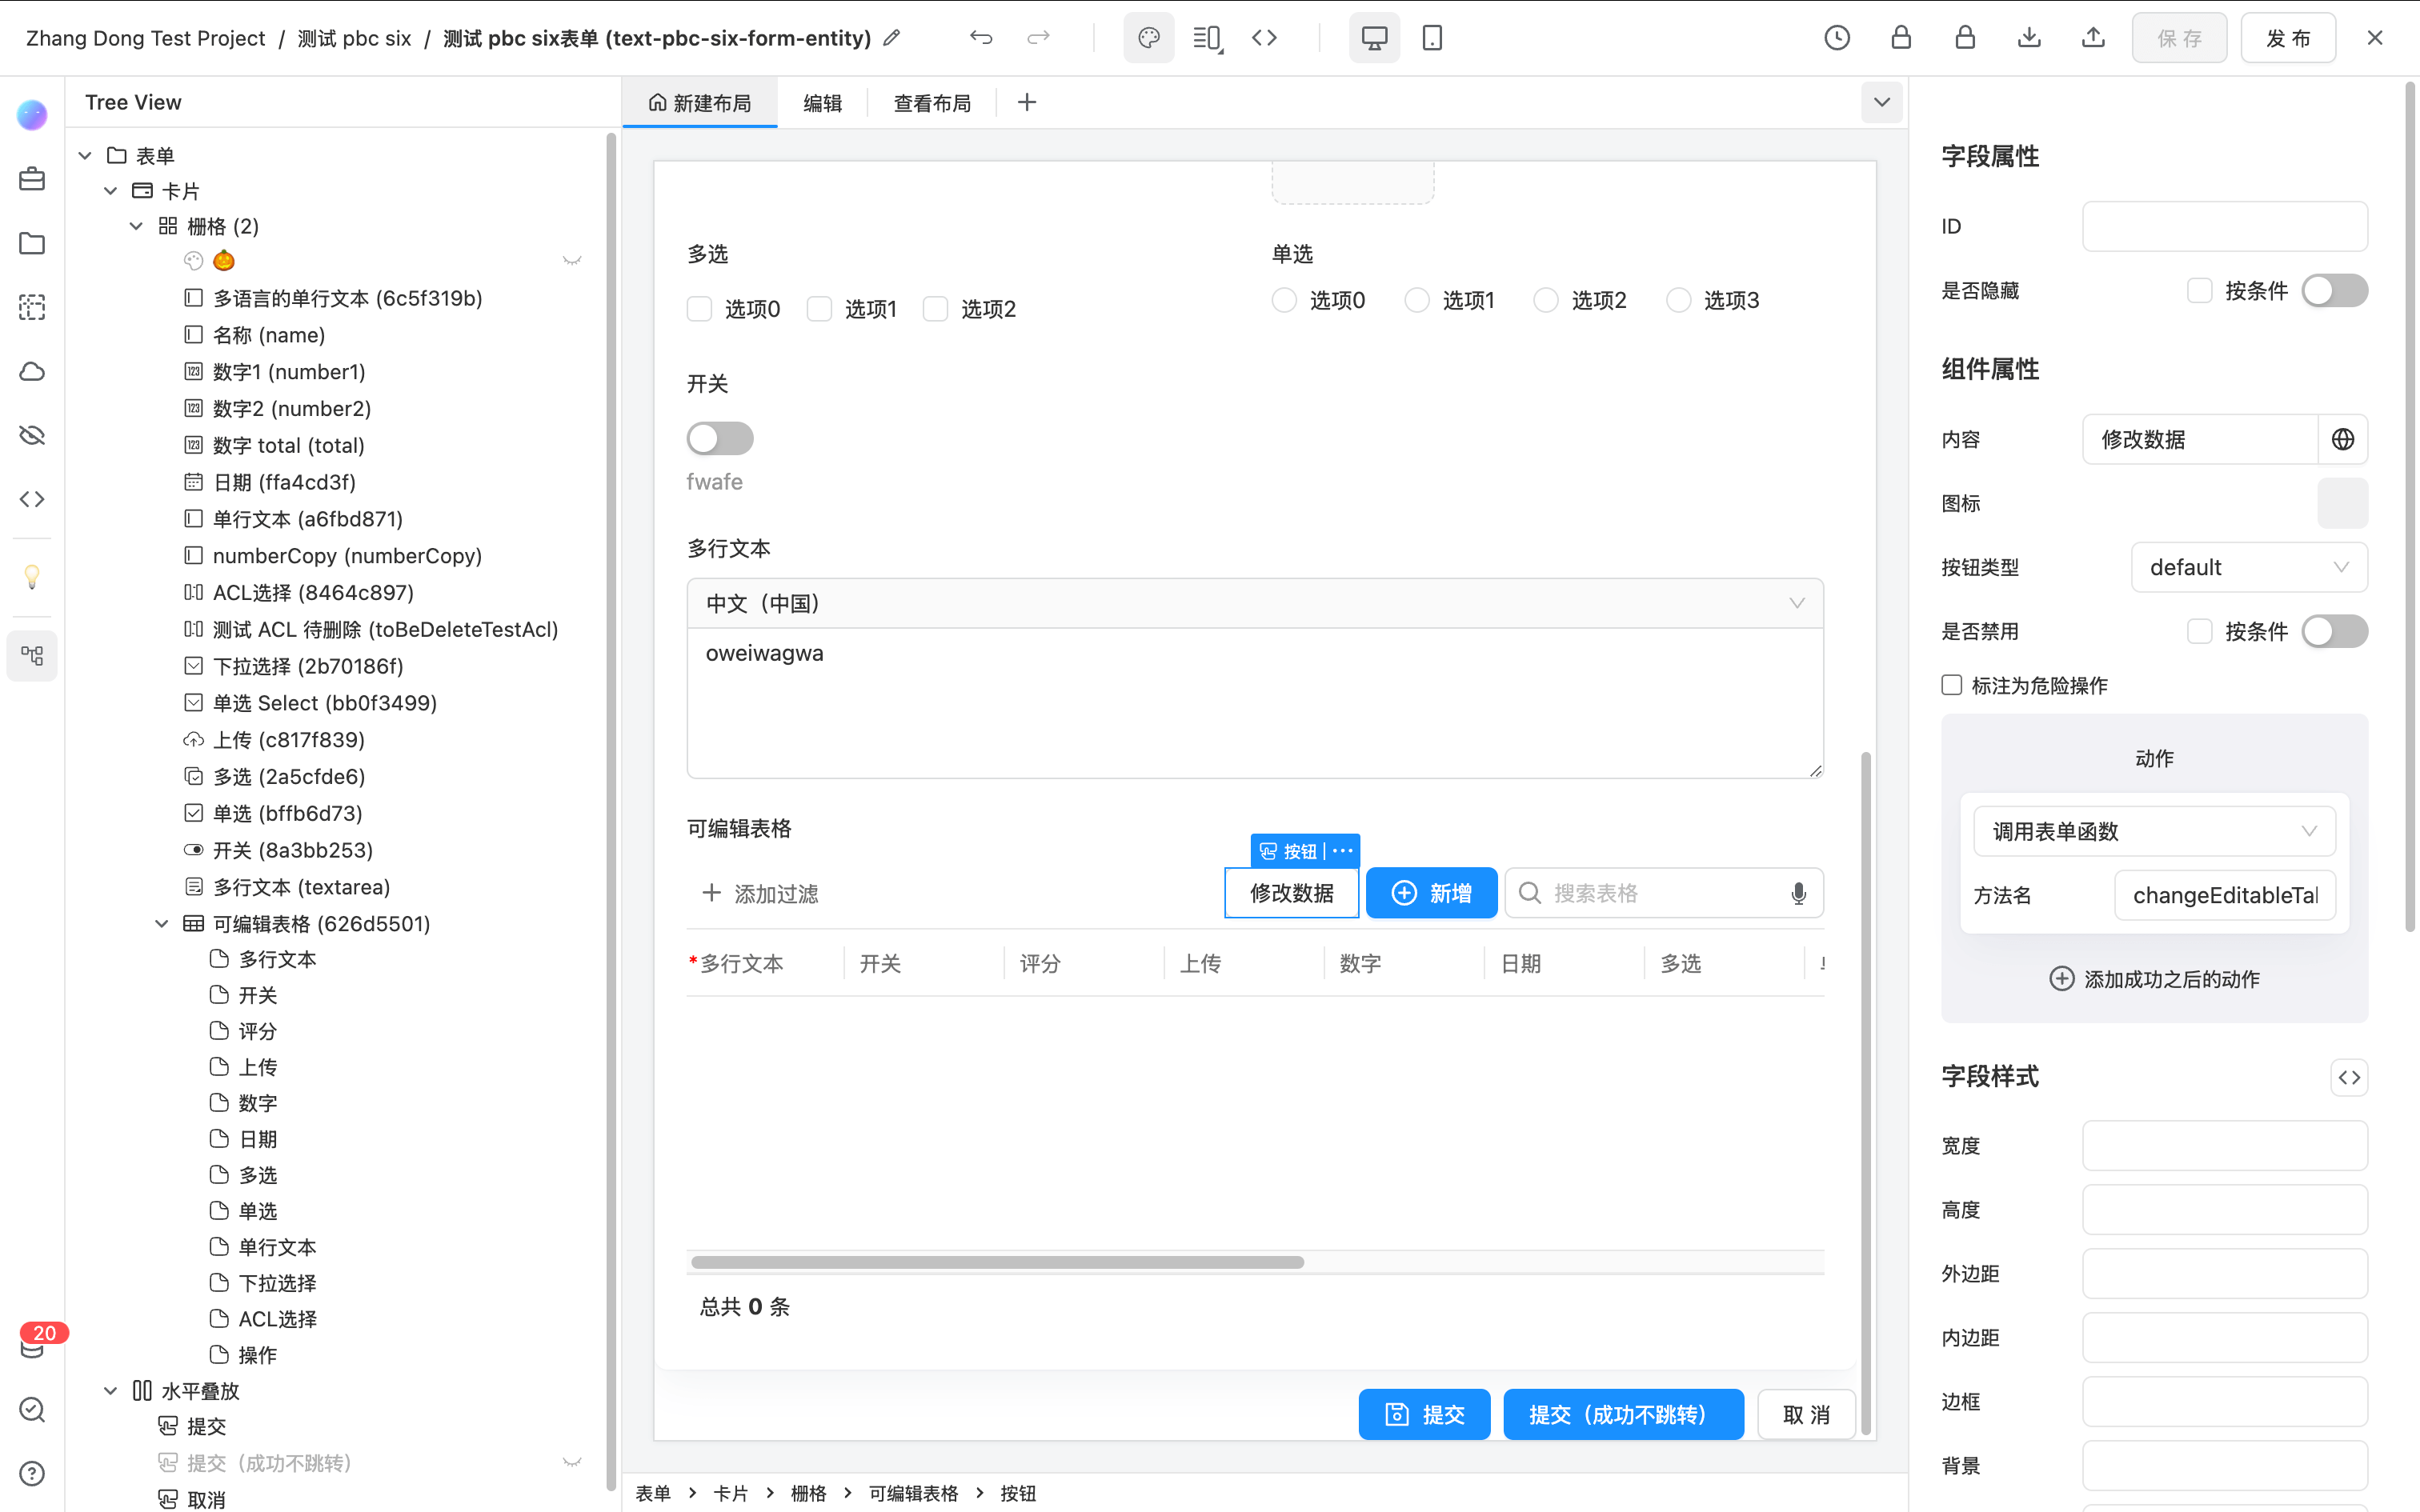
The configuration in the designer is as follows:
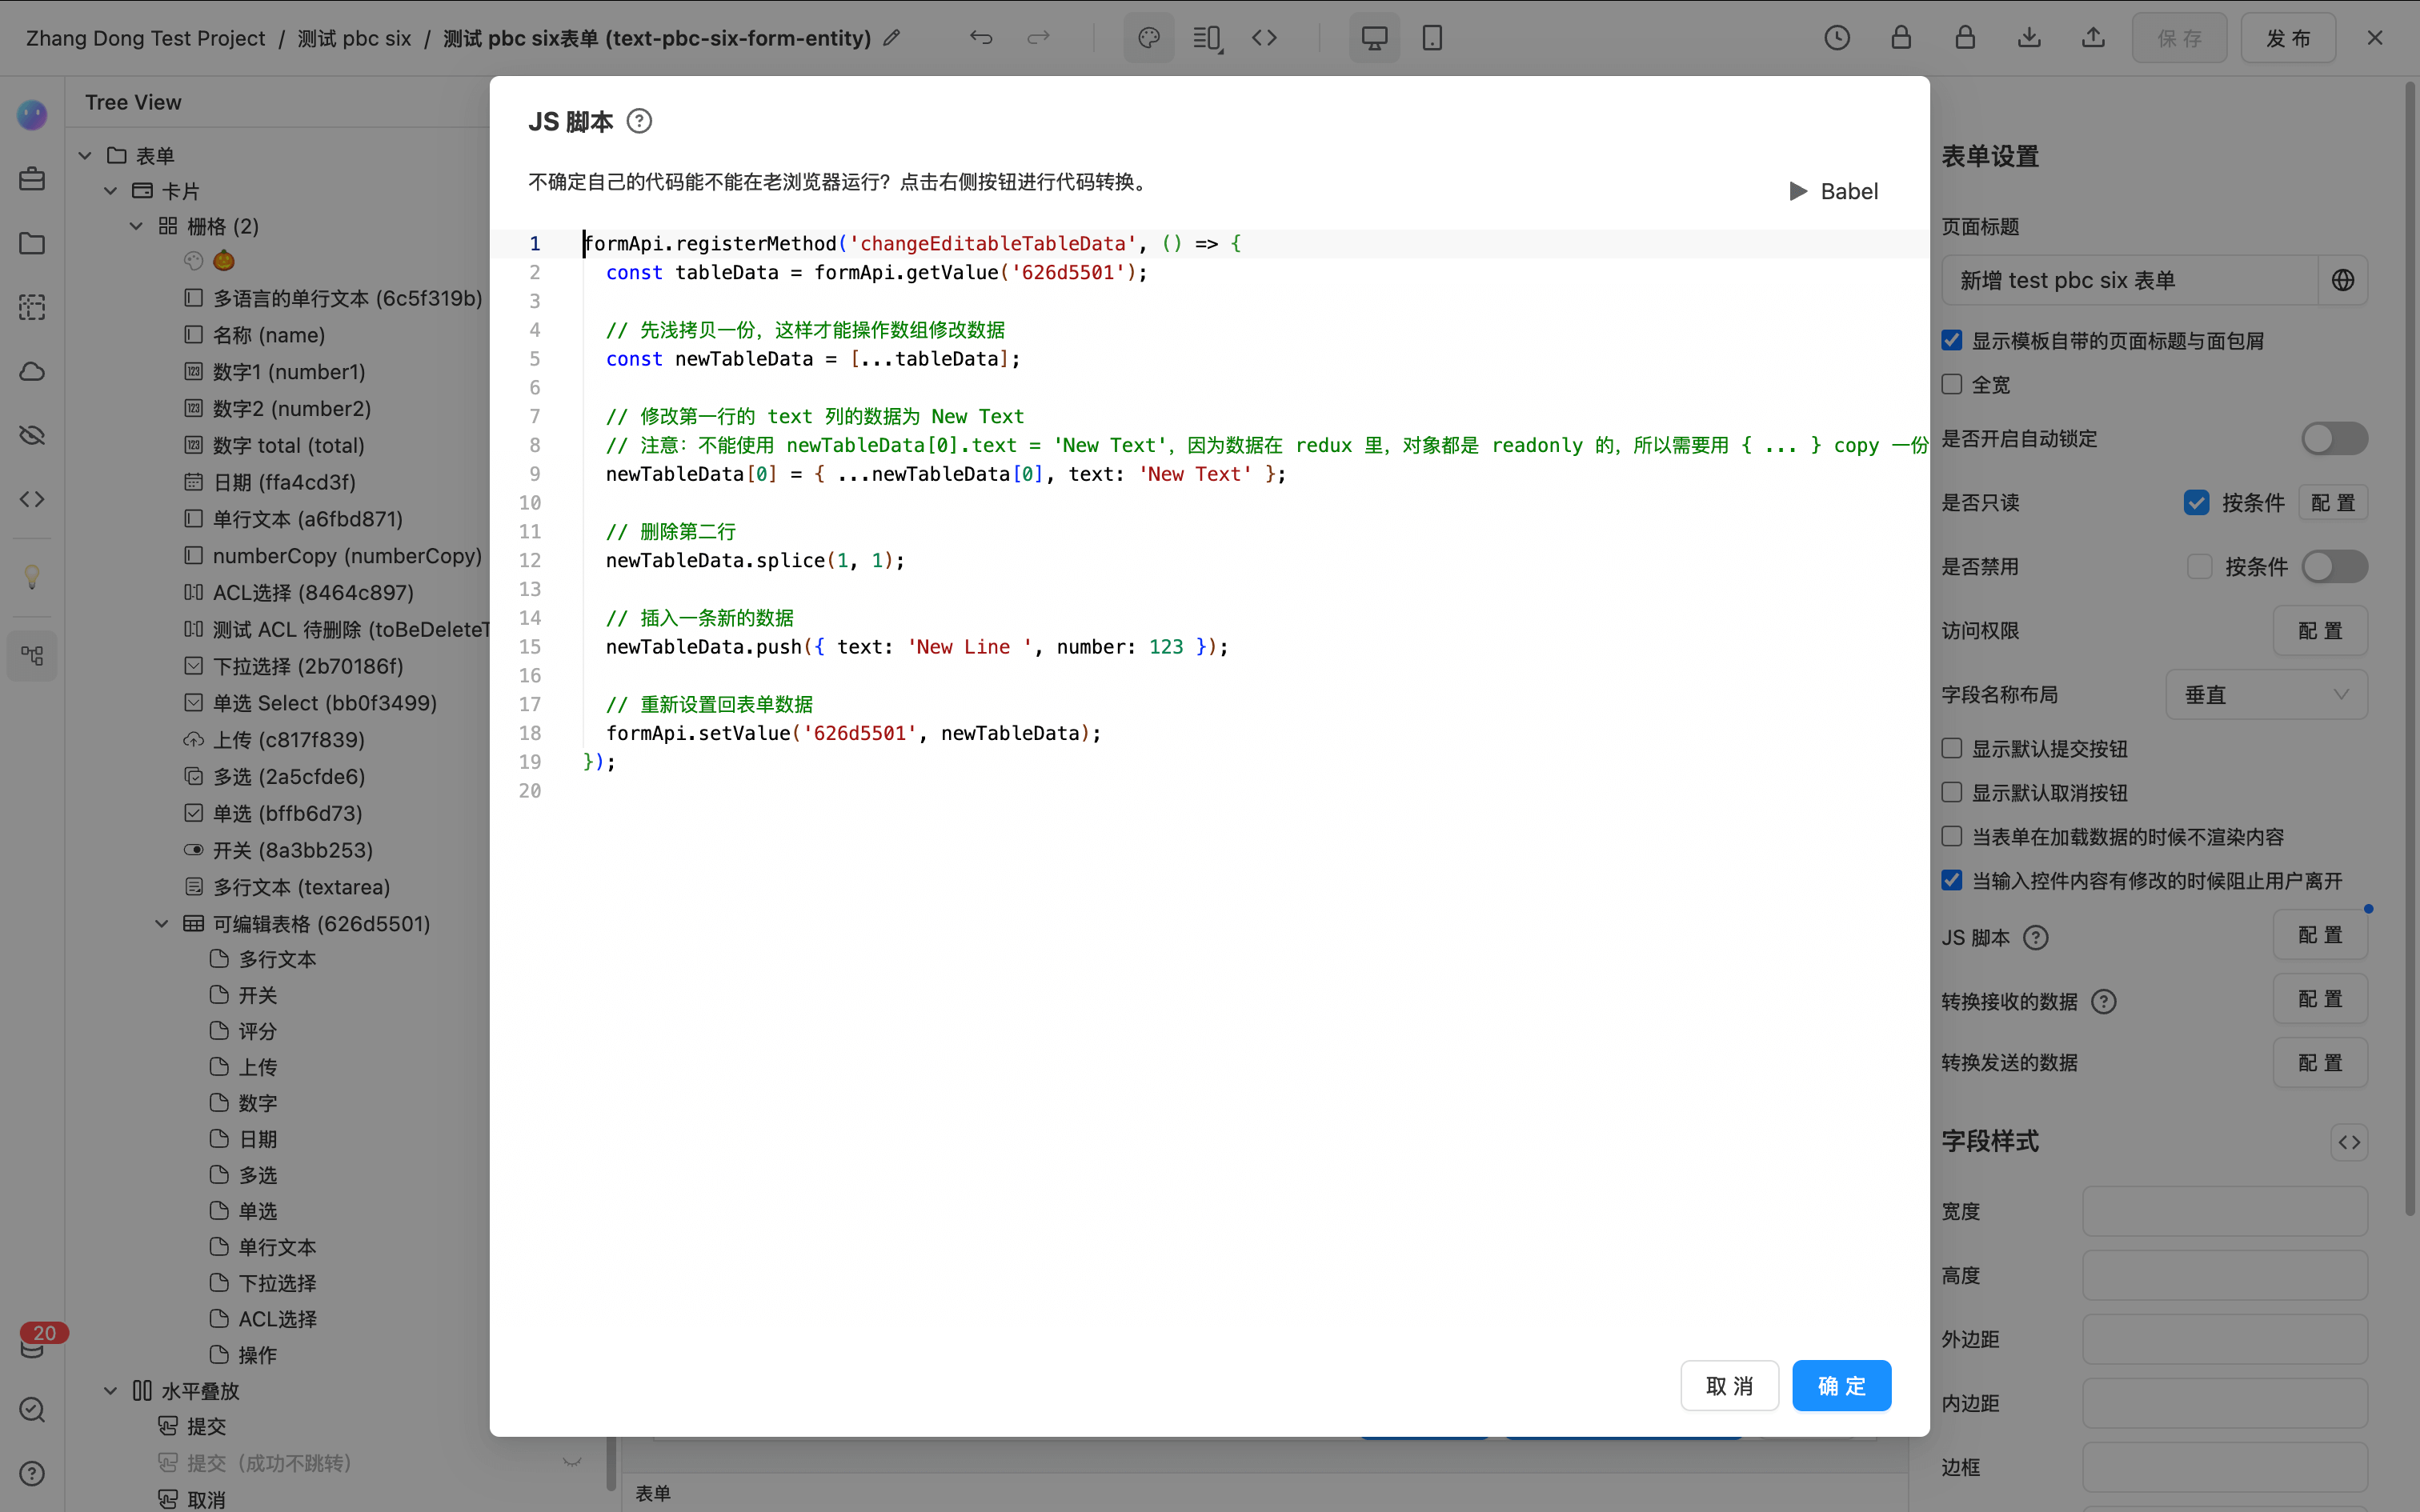
The JavaScript code for this example is as follows:
formApi.registerMethod('changeEditableTableData', () => {
  const tableData = formApi.getValue('626d5501');

  // First, shallow copy the data to be able to modify the array.
  const newTableData = [...tableData];

  // Modify the data of the first row in the 'text' column to 'New Text'.
  // Note: Do not use newTableData[0].text = 'New Text' directly, as the data in Redux is read-only. Therefore, you need to use the `{ ... }` spread syntax to modify it.
  newTableData[0] = { ...newTableData[0], text: 'New Text' };

  // Delete the second row.
  newTableData.splice(1, 1);

  // Insert a new row of data.
  newTableData.push({ text: 'New Line', number: 123 });

  // Set the modified data back to the form.
  formApi.setValue('626d5501', newTableData);
});
API
For the complete EditableTable API reference, please refer to EditableTable