Using Extension Components
Creating Extension Components using the Platform's Online Features
Image Documentation
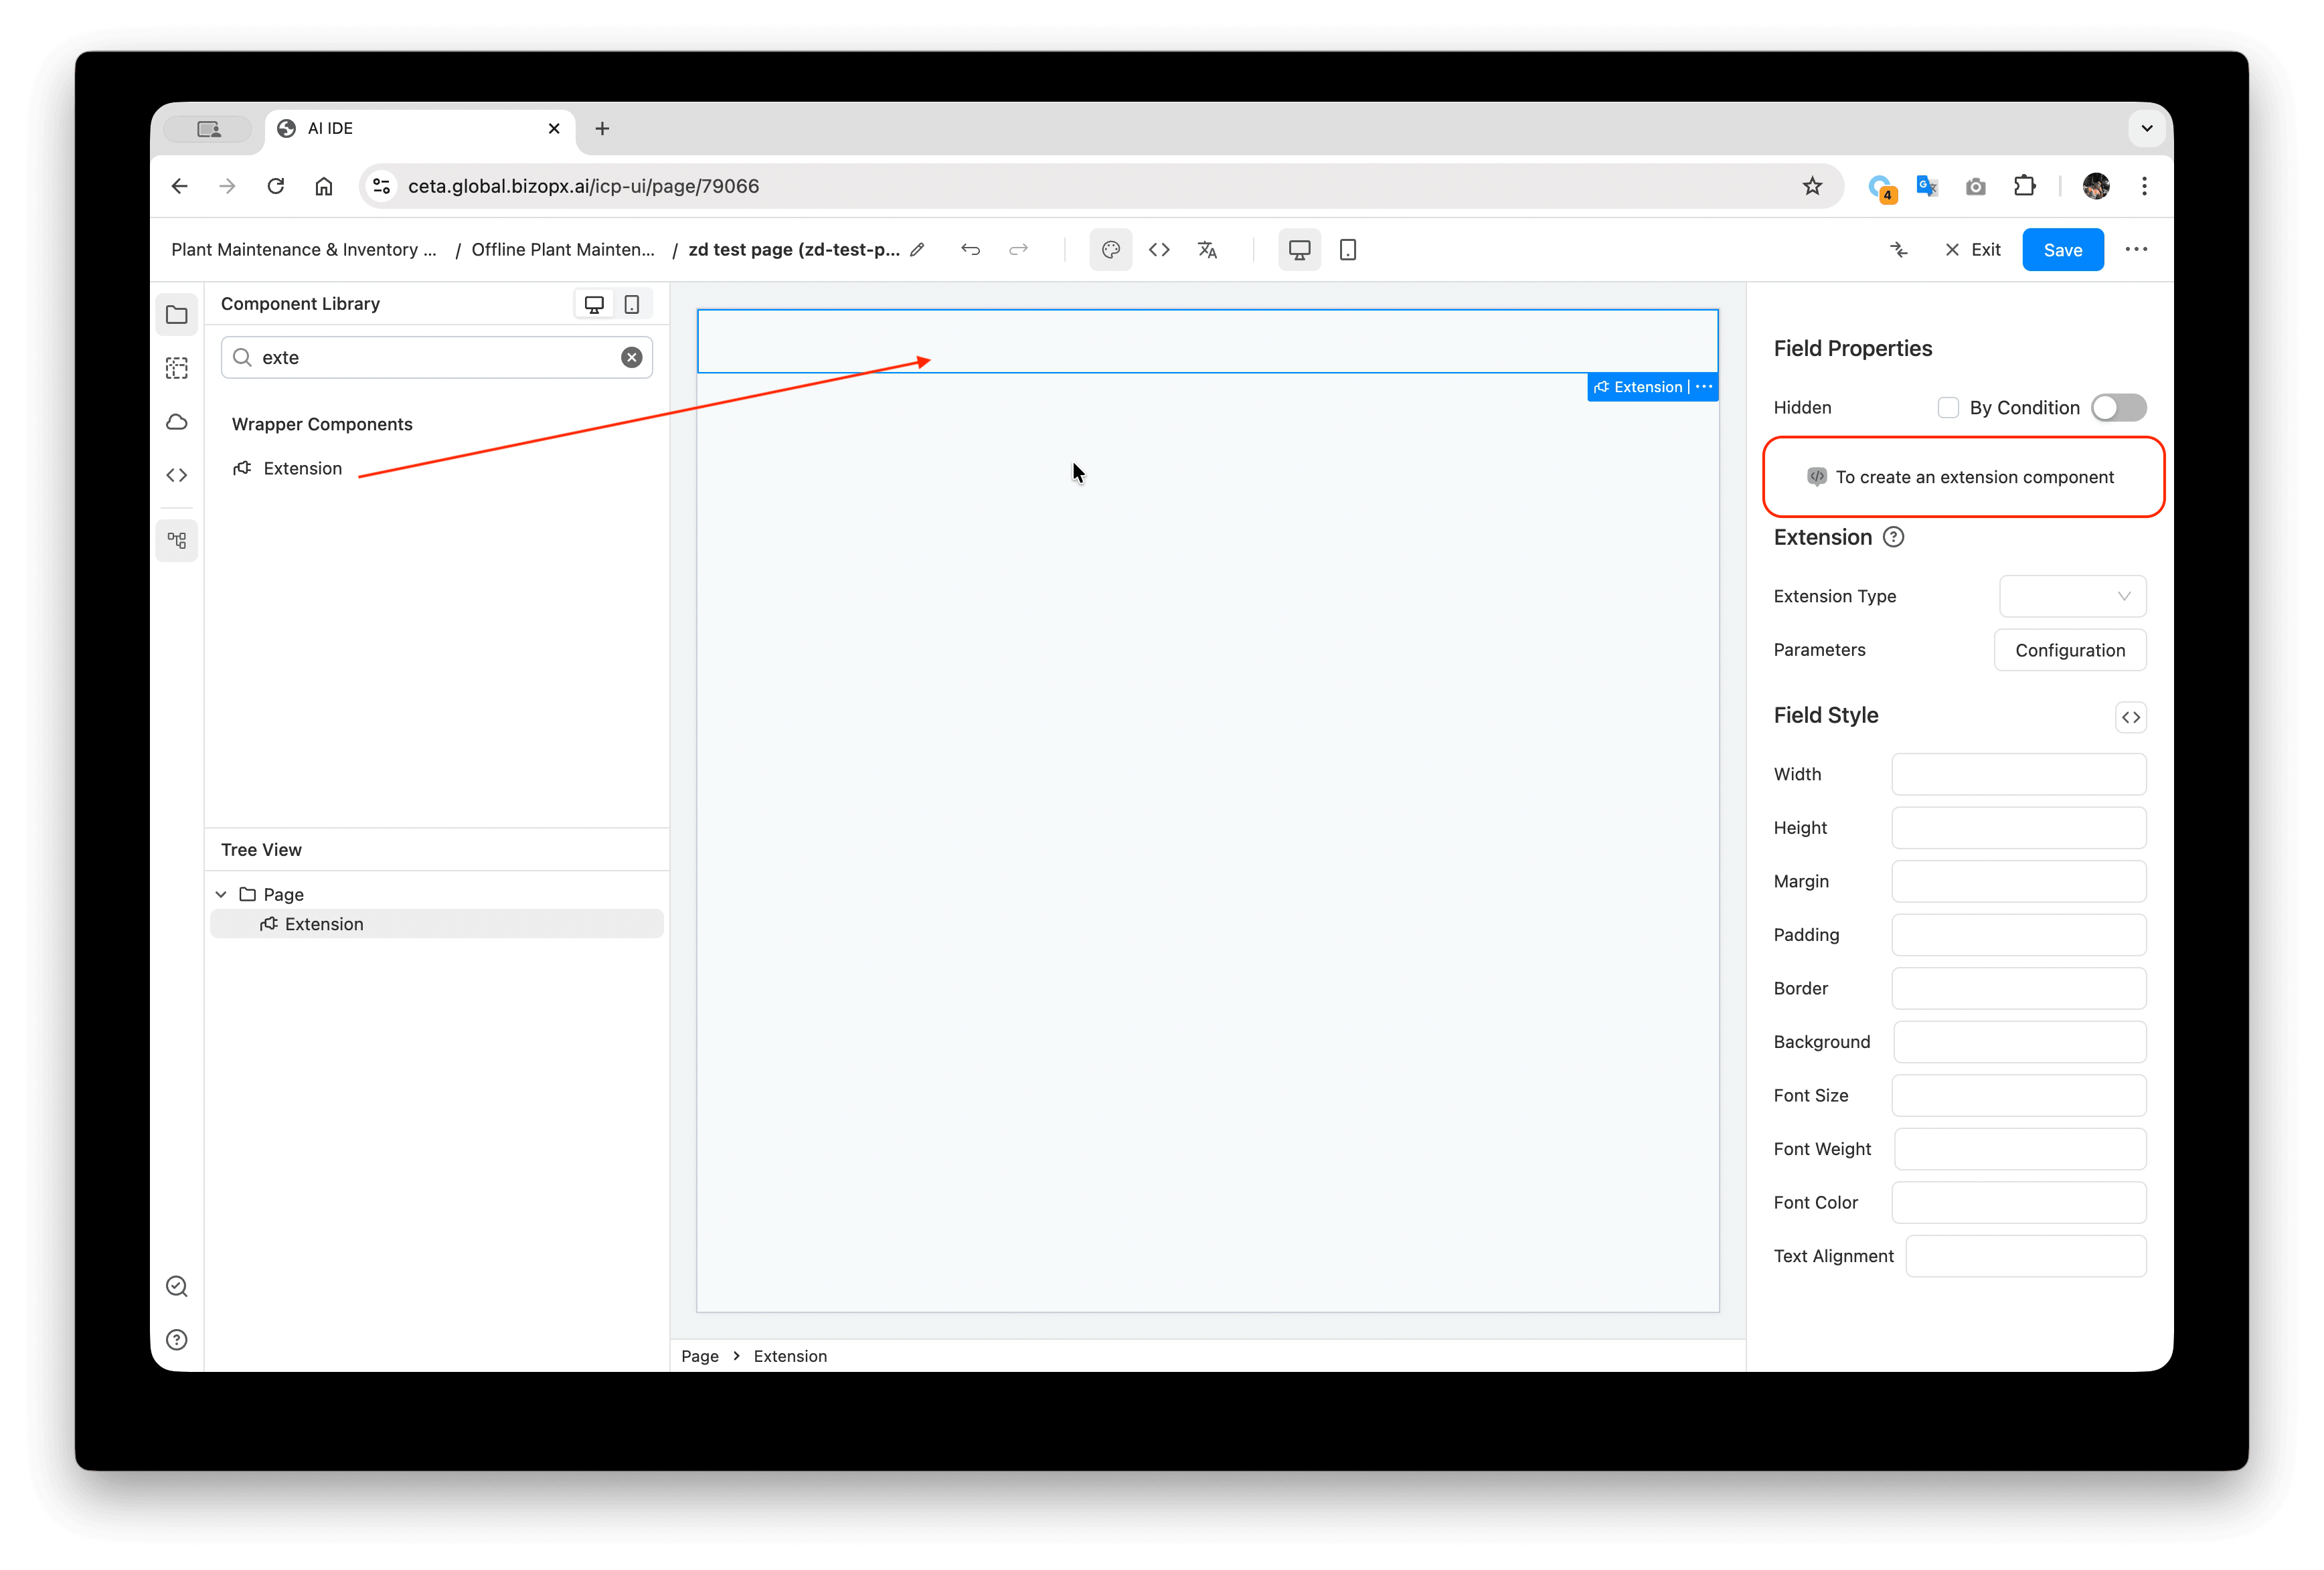
- Drag and drop an Extension component. Edit "To create an extension component" on the right.
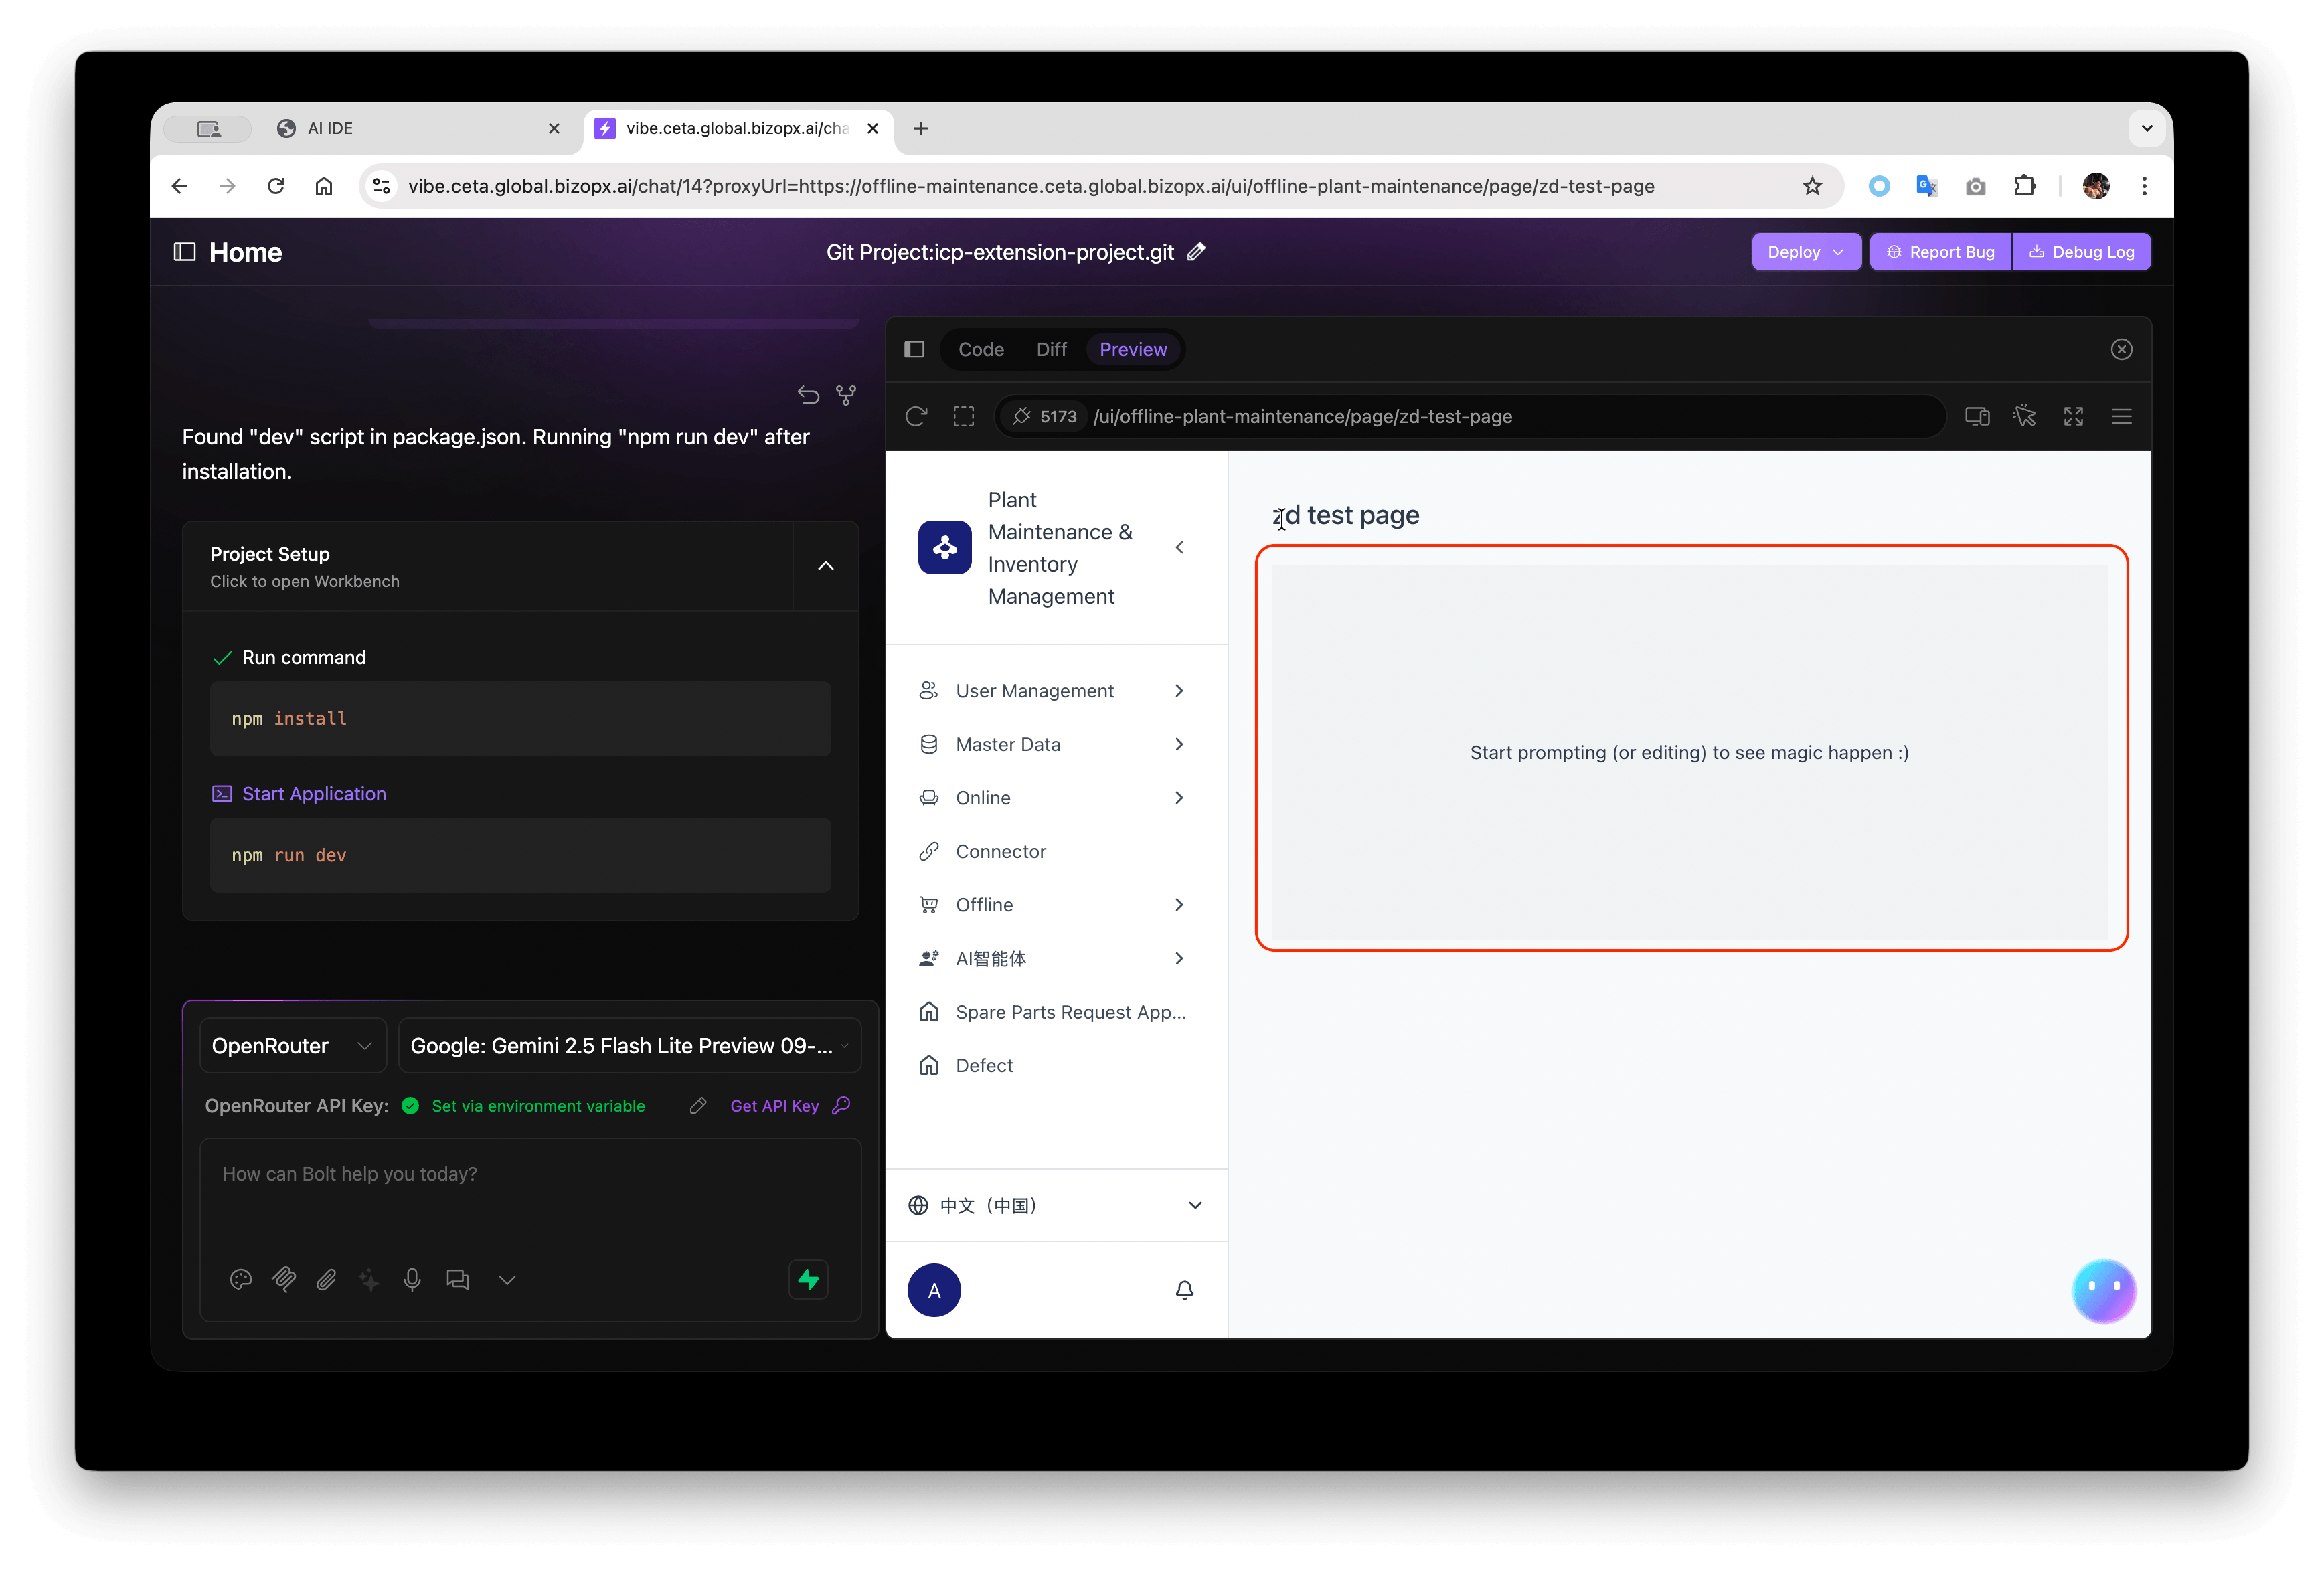
- In the automatically opened browser tab, wait for resources to load, and for
npm installandnpm run devto complete automatically. No intervention is needed until the application's trial run interface appears. If it's your first time, you'll need to log in. The username and password are the same as those used for the application's trial run.
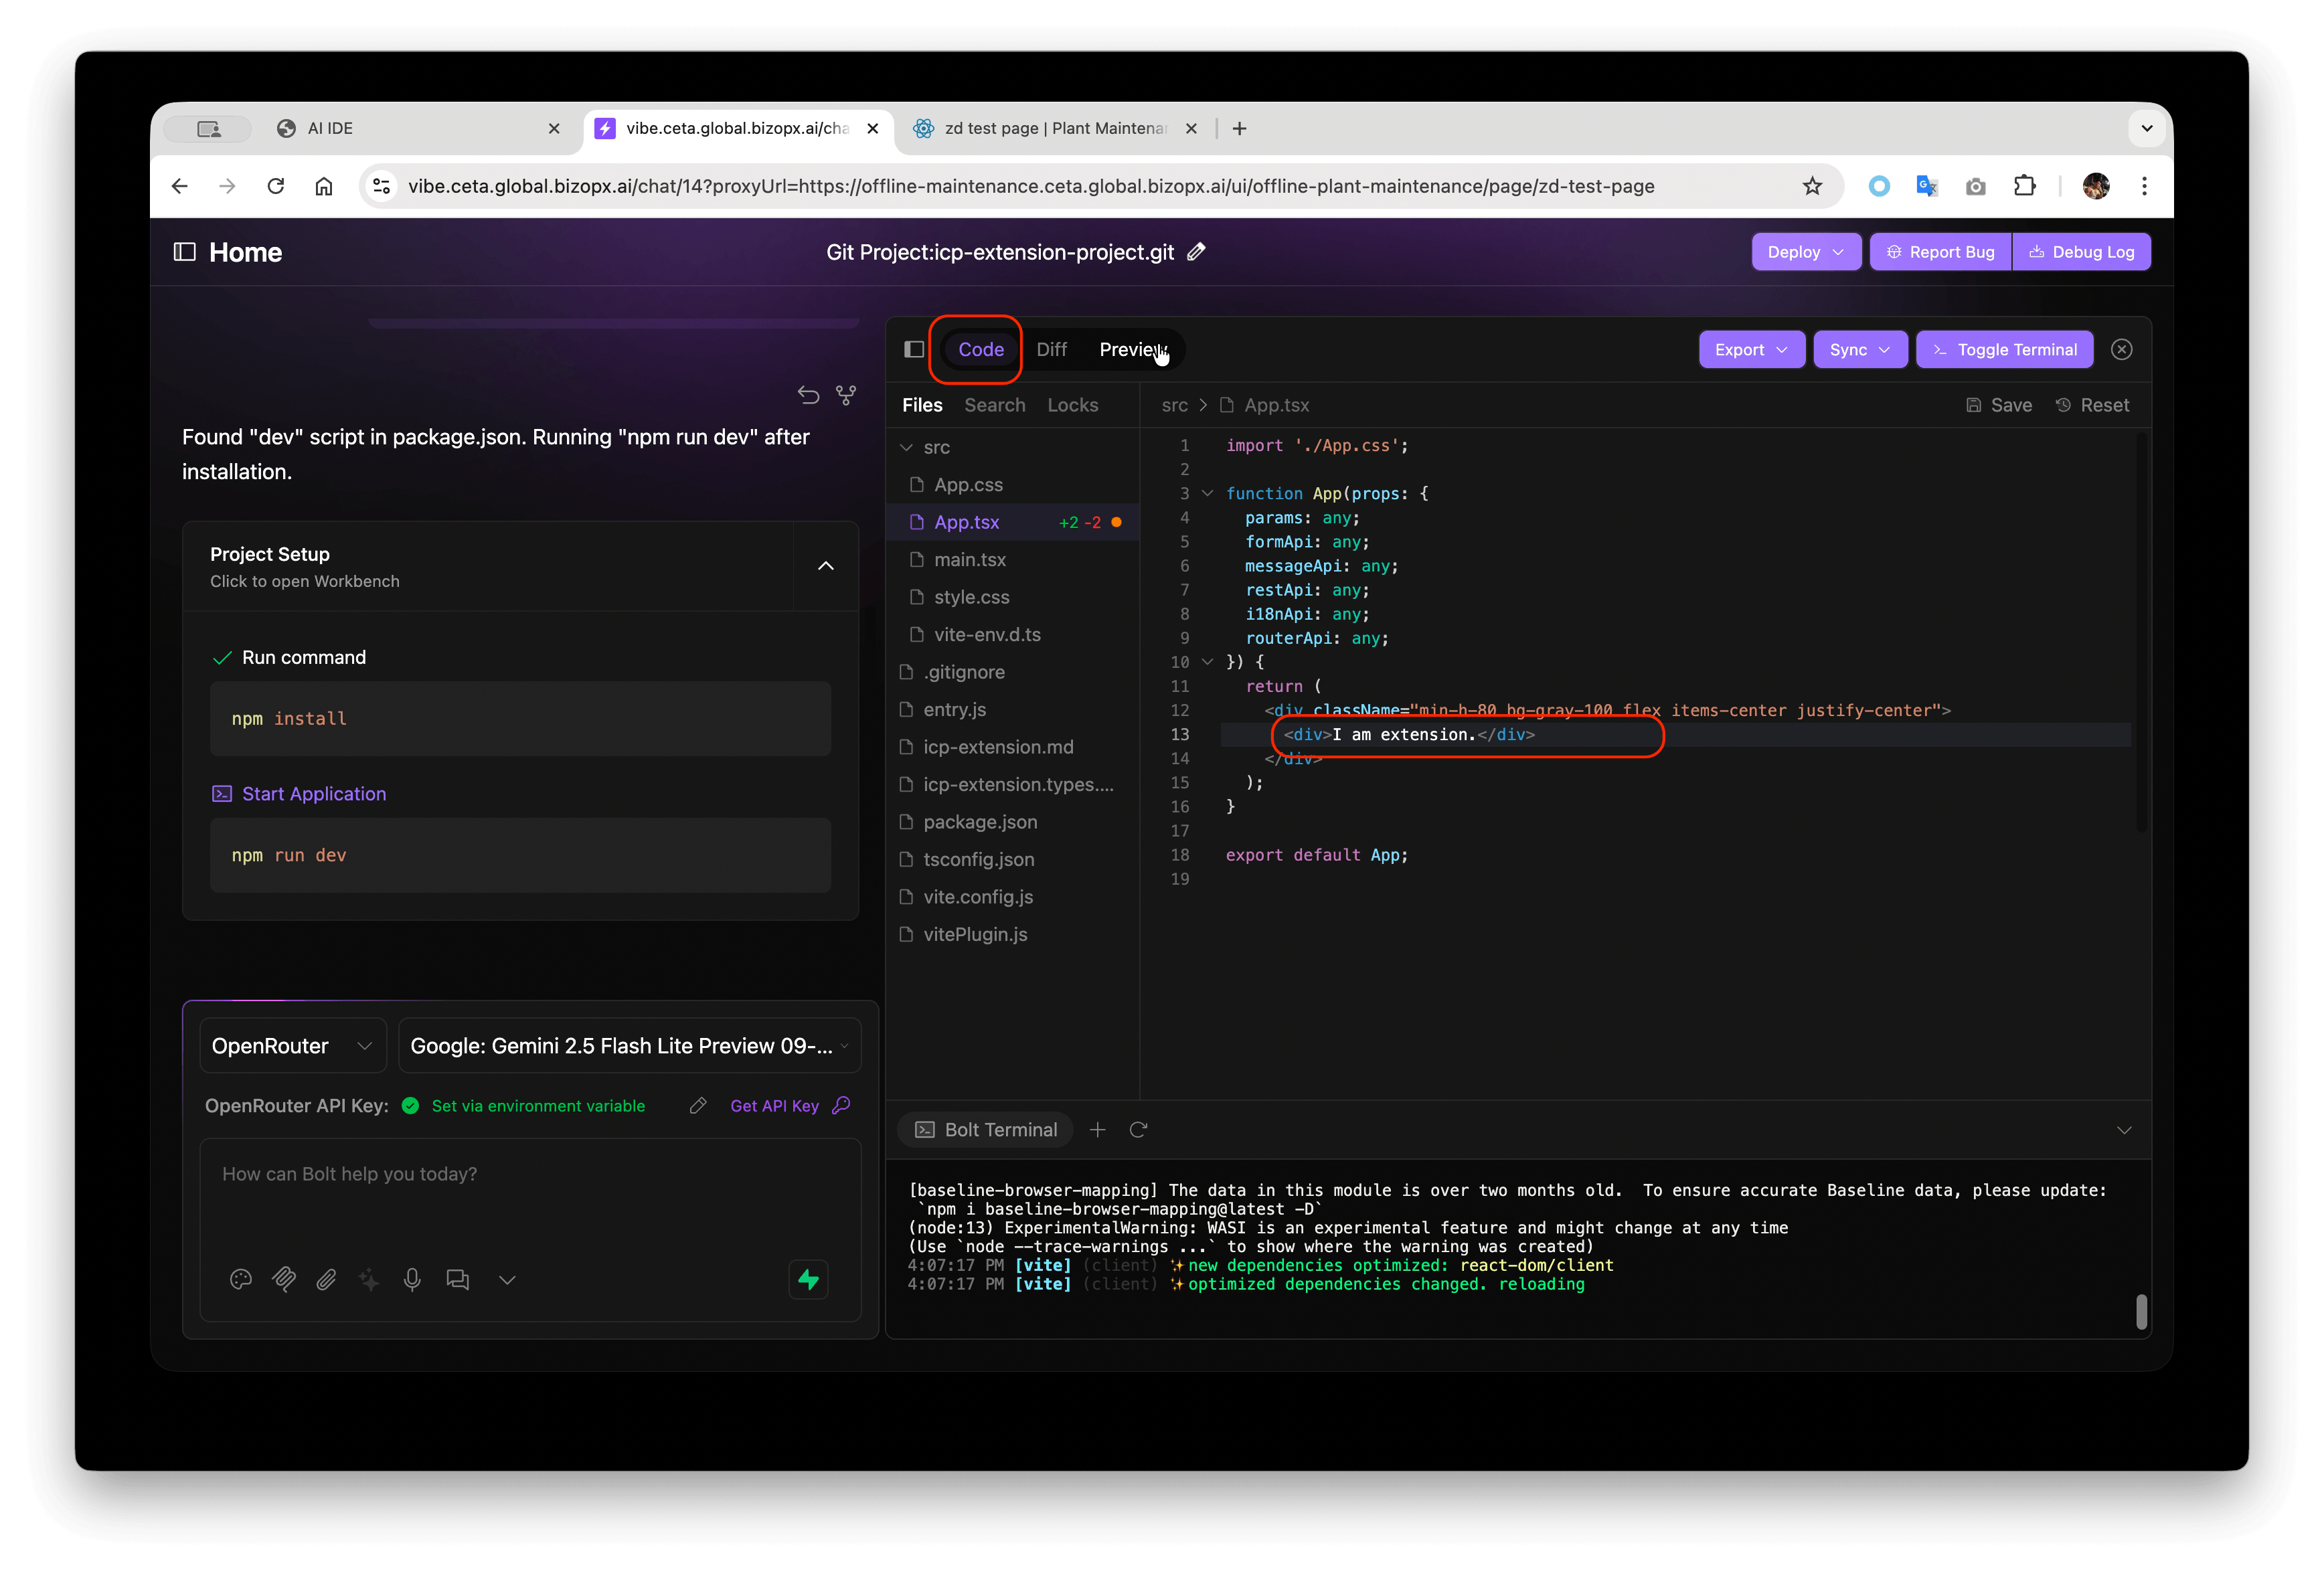
- Switch to the
Codetab, or use the AI tool on the left to modify the code. Click the "Save" button in the upper right corner, or presscmd + s(mac) /ctrl + s(windows) to save.
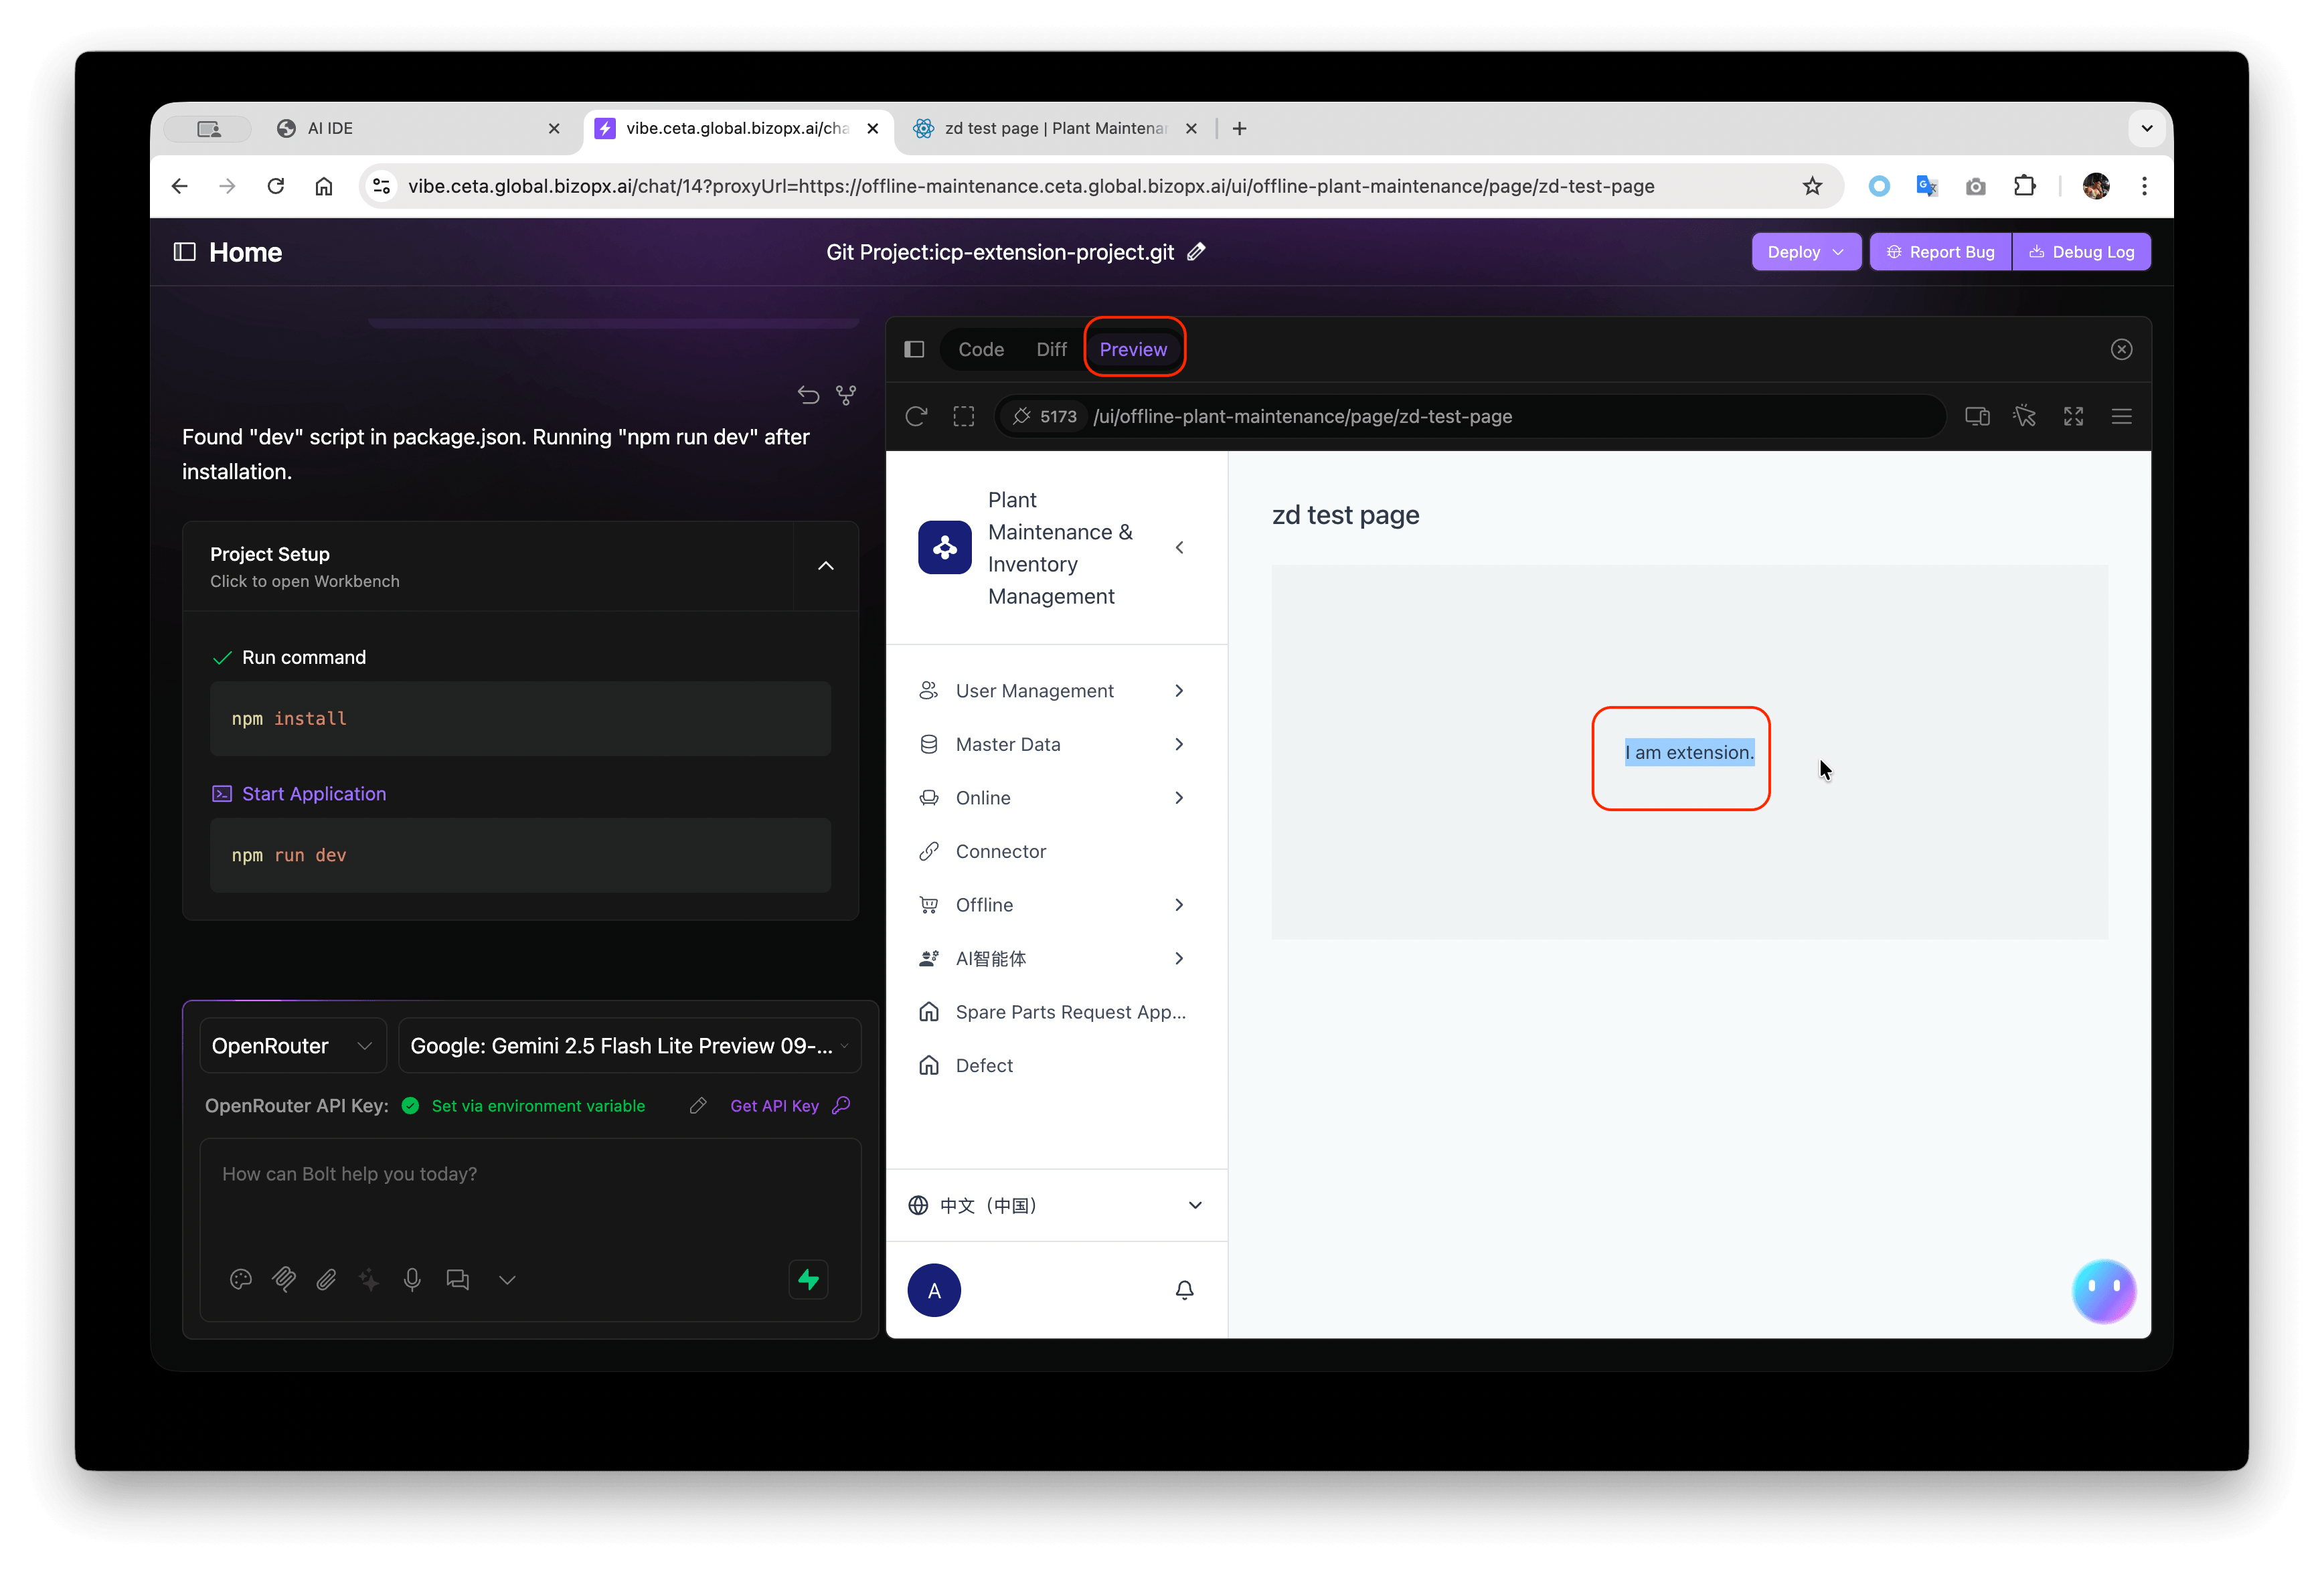
- Wait a few seconds for automatic build, then switch to the
Previewtab to check if the code changes have taken effect.
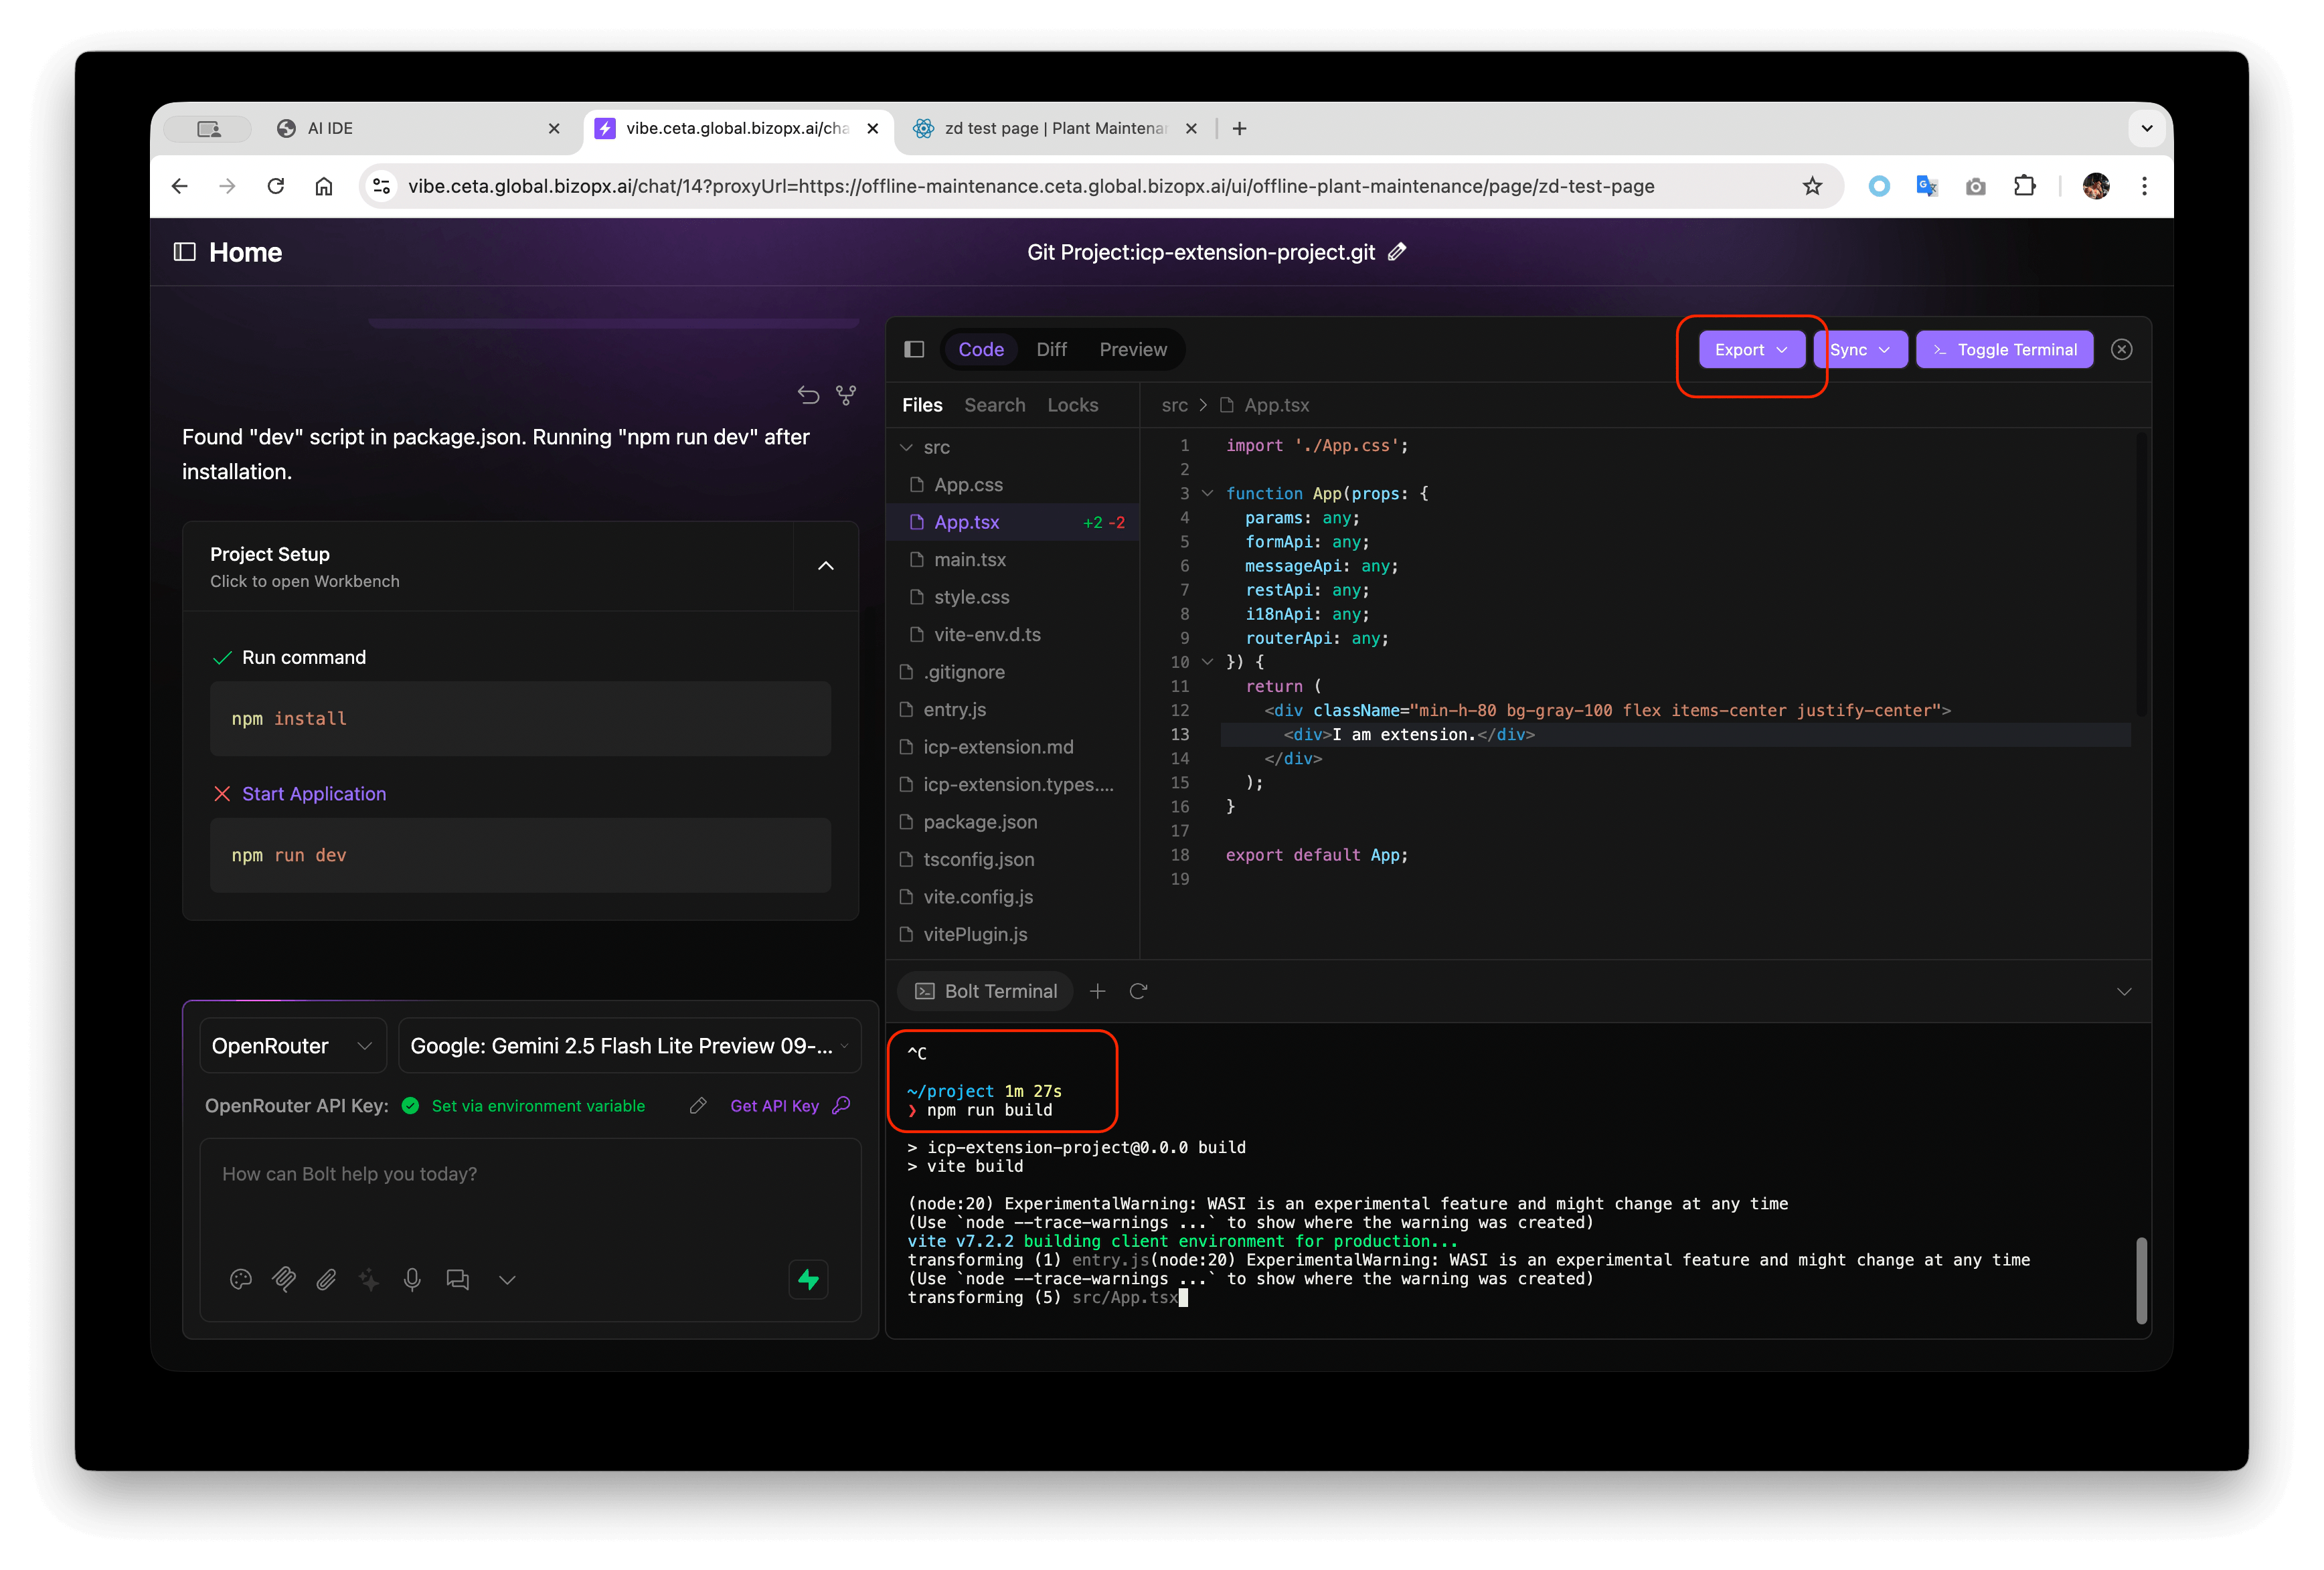
- After modifying the code, press
ctrl + cin the console to stop development mode. Then runnpm run buildto compile the production mode code. After successful execution, click "Export" in the upper right corner to export the generated artifacts locally.
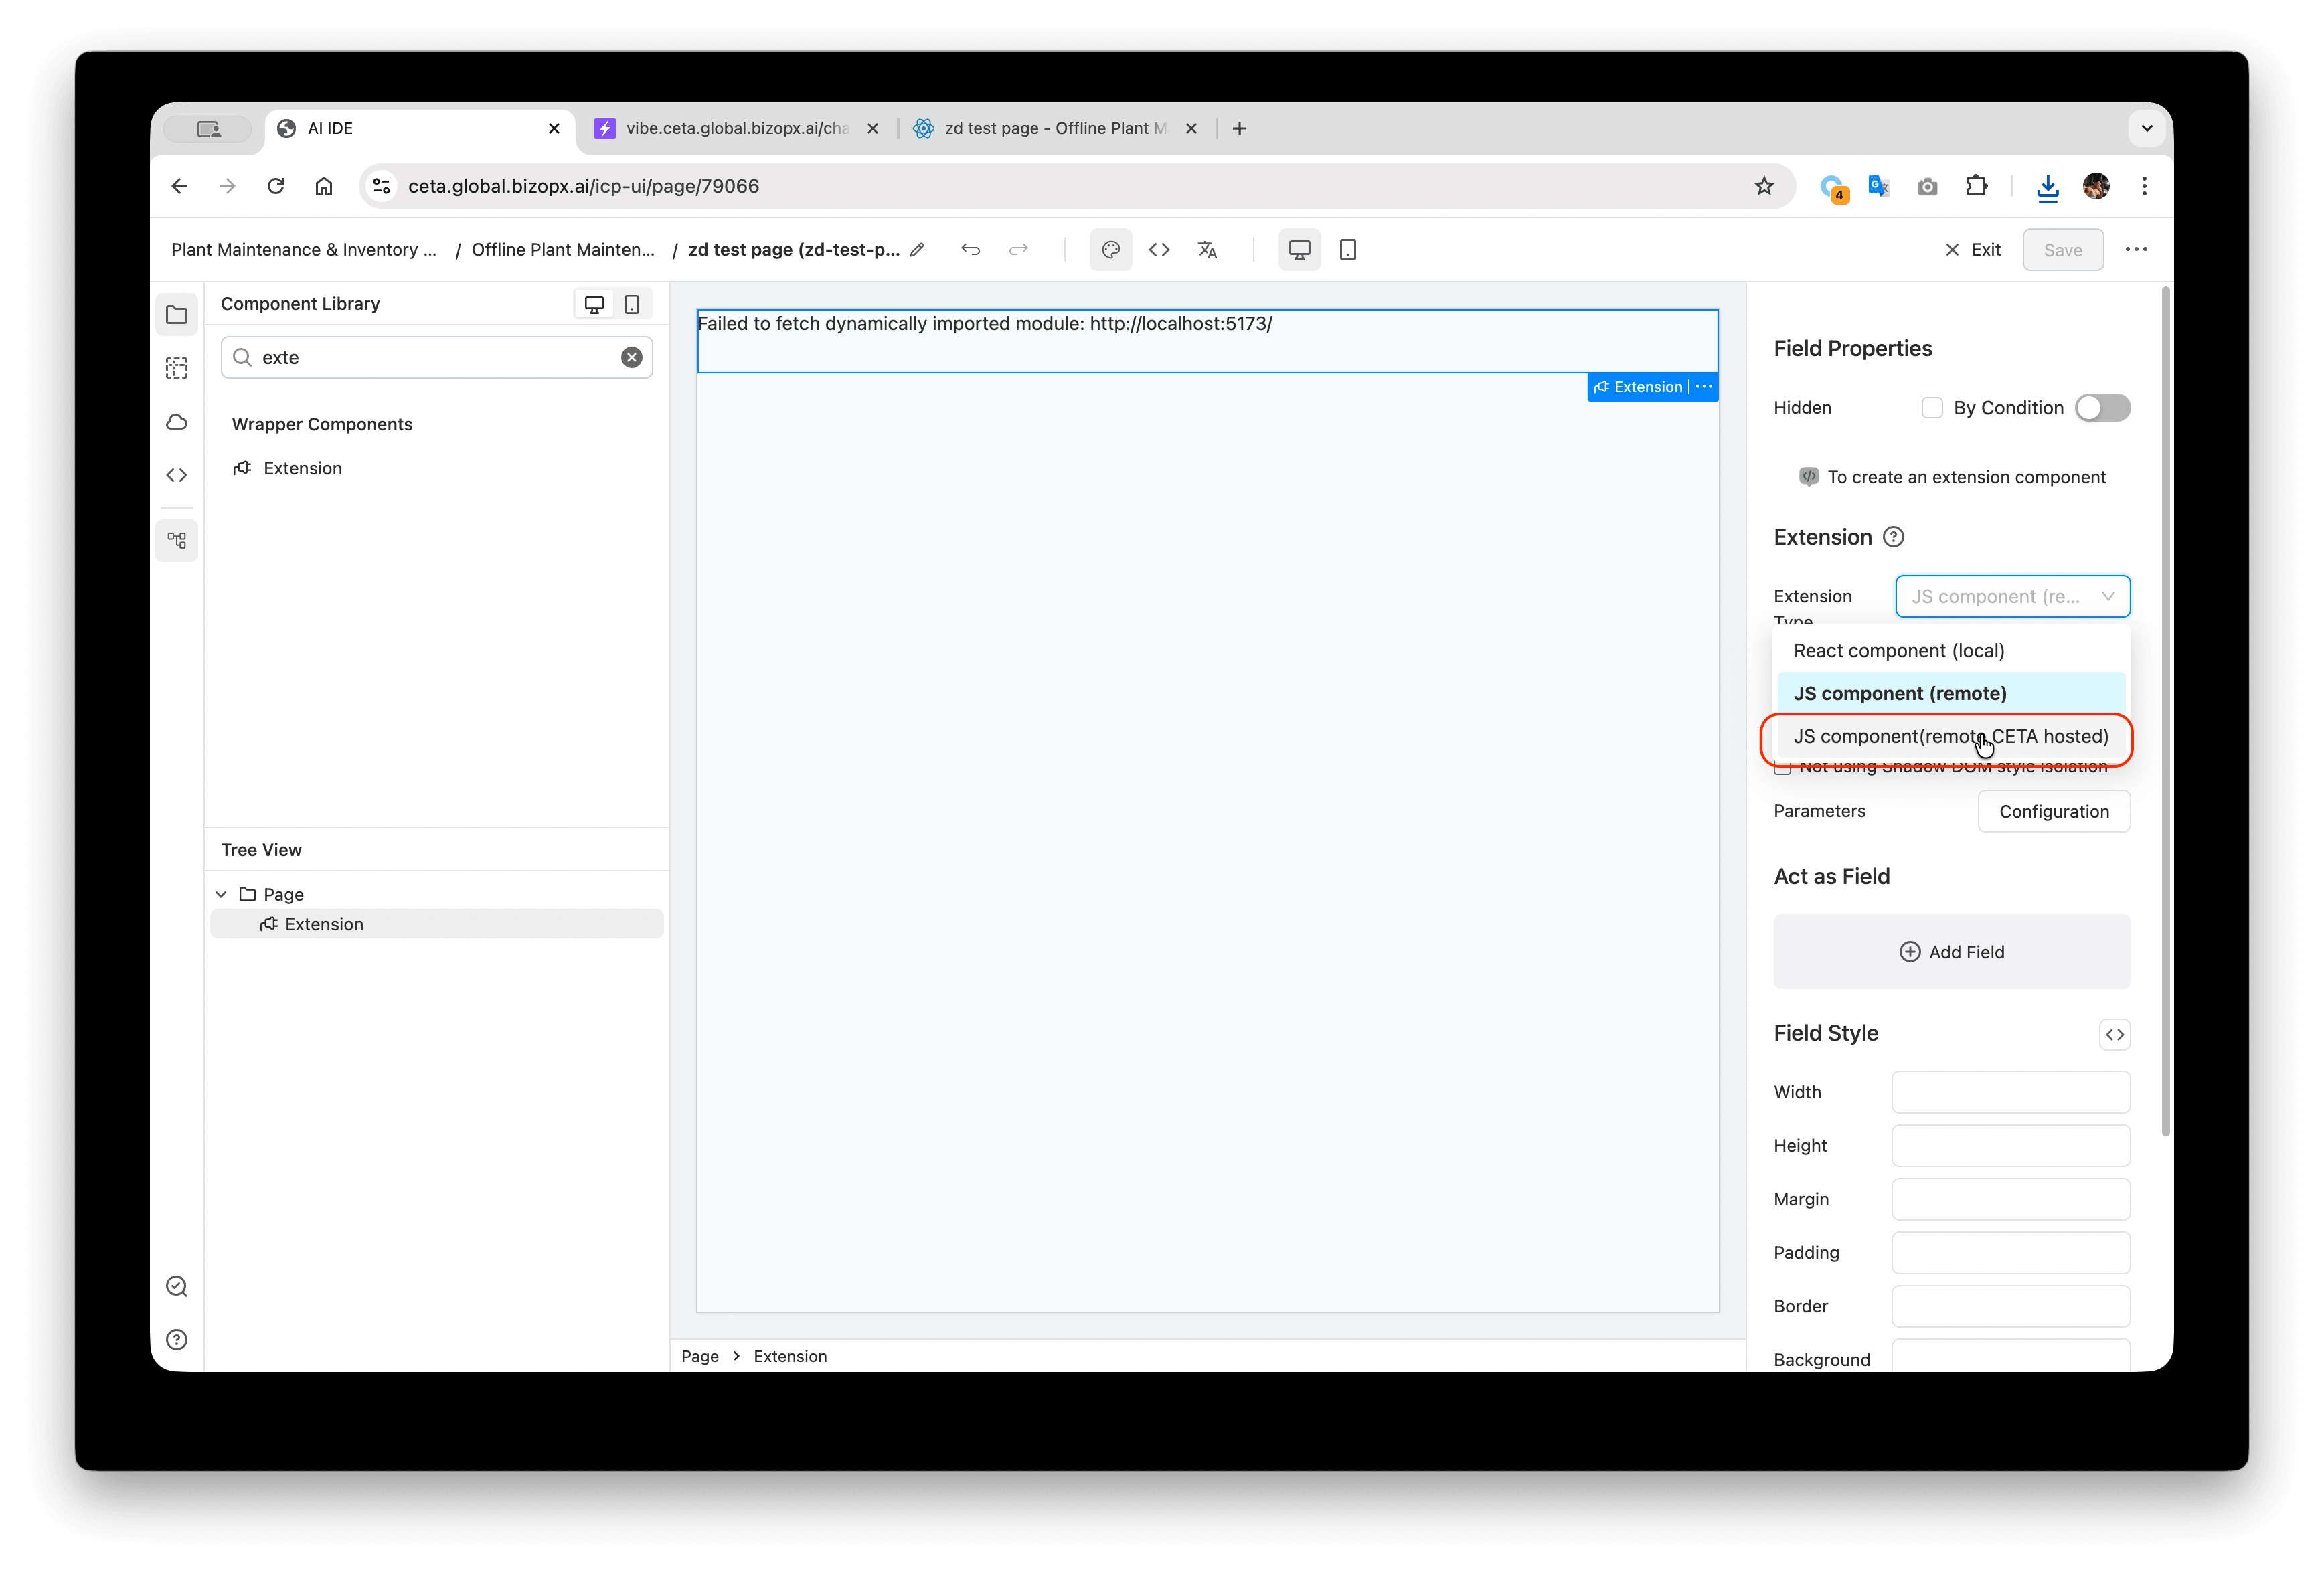
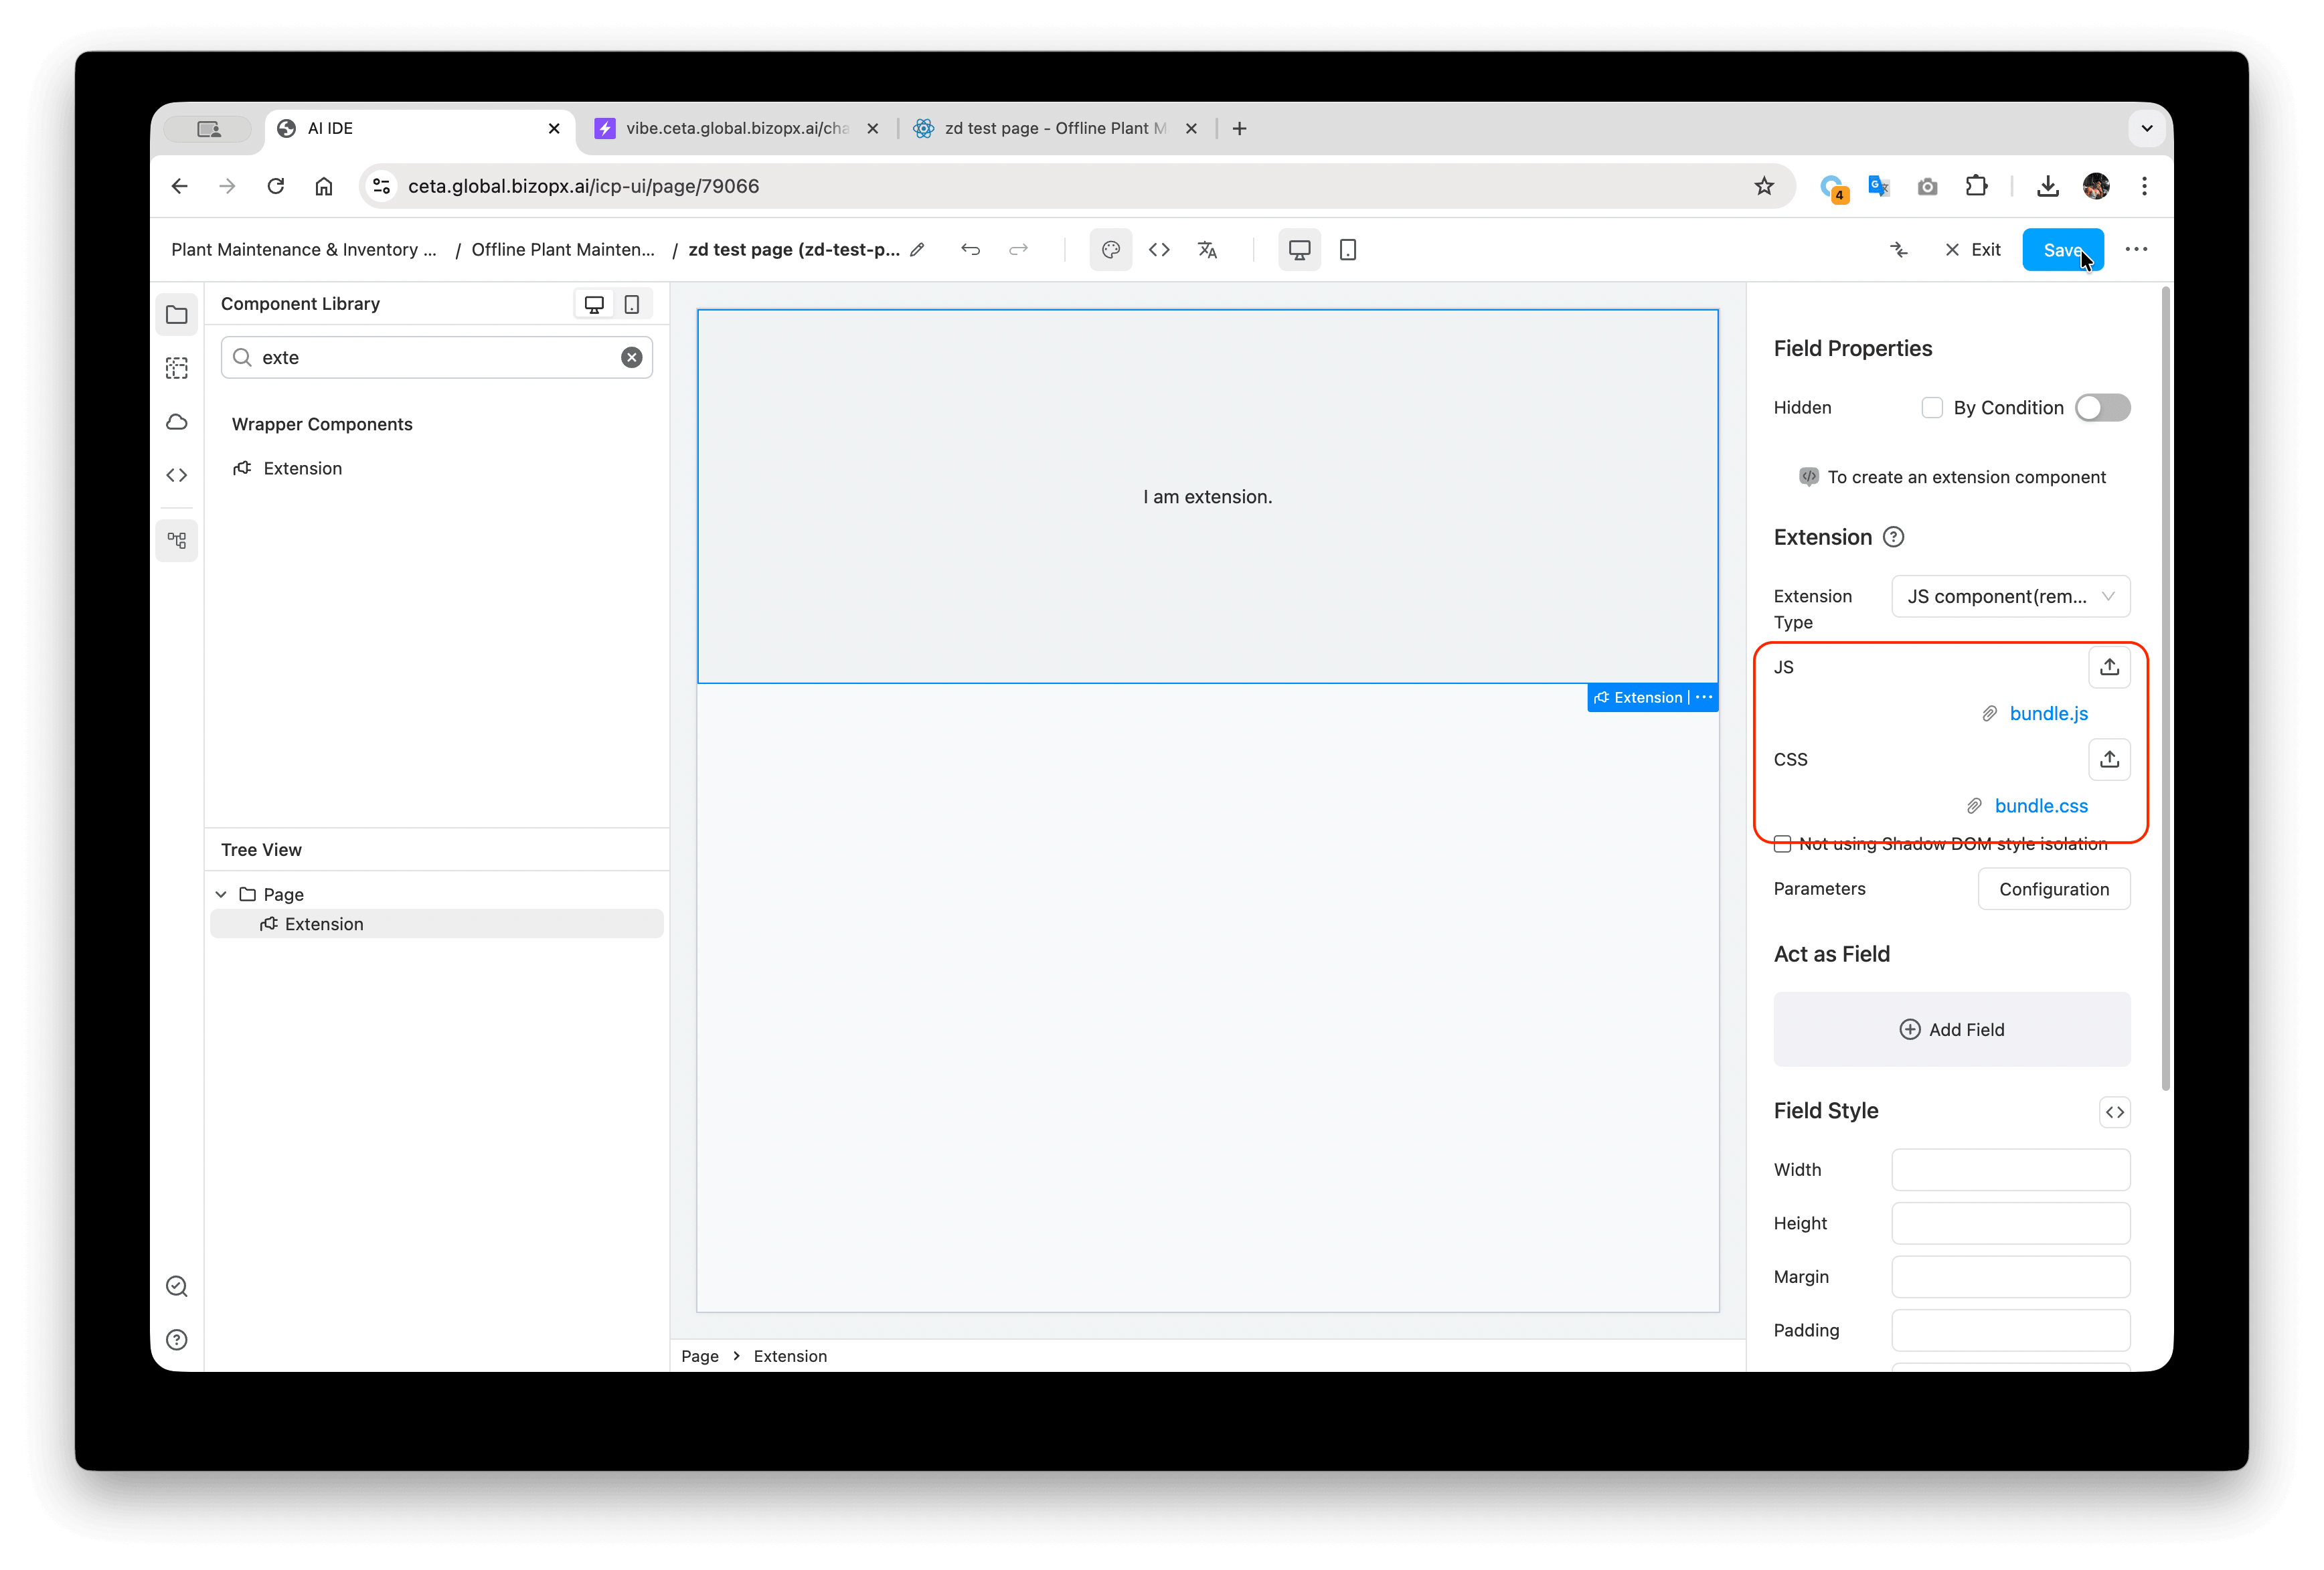
- Finally, go back to the form editor, change the Extension Type of the Extension component to JS component (remote CETA hosted), upload the exported Extension code (unzip the file, find
bundle.jsandbundle.cssin thedistdirectory), and save. At this point, the project's trial run address can be used.
Video Documentation
The video below demonstrates the entire process from creating a new Extension component from scratch to building it in production mode and uploading it to the application.